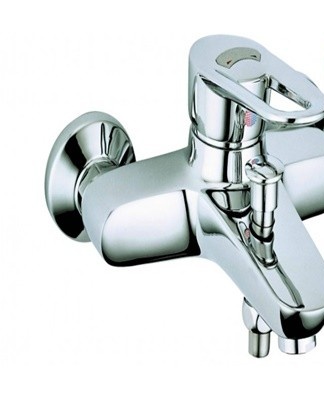
How to disassemble a single-lever mixer of various types with your own hands
Some people buy quality faucets and think they'll never have to fix them. Over time, however, even the best mixers break down and therefore have to be dismantled. Before that, it is recommended to familiarize yourself with how to disassemble a single-lever mixer yourself.
Device and varieties
Before dismantling and repairing a kitchen faucet, you should familiarize yourself with the types of mixer taps. A distinction is made between the following types of parts:
- Ball. These are common products that are often installed in kitchens. A strong steel ball is installed inside the structure, in which there are three holes. Through one of them water is poured into the drain cavity, and through the other two it is fed into the mixer. Hole size can be adjusted. The bigger they are, the better the water will flow.
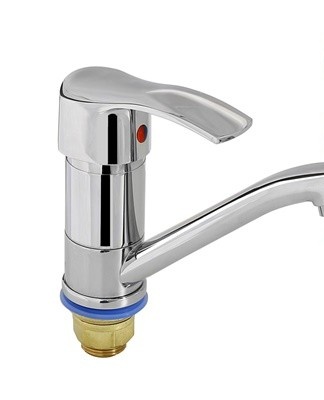
- Cartridge. A distinctive feature of such devices is that in this case all the water is mixed inside a special cartridge.Steel discs are installed inside the structure, which are responsible for regulating the water pressure and heating the liquid.
Tools required
Before disassembling a single-lever mixer, you need to prepare the tools. It is recommended to determine in advance what will be needed for repair work.
small screwdriver
You will need a small screwdriver to disassemble the mixer. It is a versatile tool used for loosening or screwing in fasteners. There are many different types of screwdrivers, which differ from each other in their tips. However, to repair the mixer, you will need the usual straight and Phillips tools. The tip should not be more than five millimeters wide.
pliers
Pliers may be needed to loosen fasteners. It's a common tool that every home should have. When working with a faucet in a kitchen or bathroom, you will need the usual high-grade steel electrician's pliers.
You can also use the adjustable clamp type, which differs from other types of electroplating.
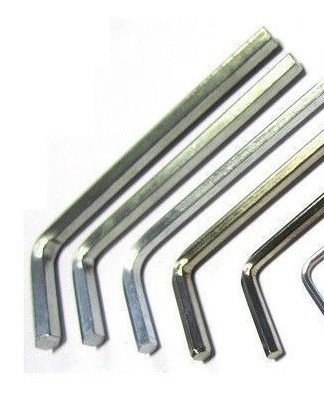
Hex key
Sometimes you have to use special keys with hexagonal tips. They are used if the mixer has fasteners made in the form of a hexagonal slot. Experts advise using large hex keys, as they have a good torque. This makes it easier to loosen the fasteners.
Lubricants
If the mixer is several years old and it is difficult to unscrew it, you will need to use special lubricants, including:
- Compressor oil. Most often used for treating automotive air conditioners. These blends include synthetic and petroleum oils.
- Hydraulic oil.These fluids are petroleum-based and used in actuators. The main advantage of the oil is considered its affordability.
adjustable wrench
An adjustable wrench is a multifunctional tool used in the repair of household and automotive equipment. Its main advantage is considered to be the ability to replace a whole set of conventional flat keys. Experts advise using adjustable wrenches, which belong to the KP 30 group. Such tools allow you to unscrew nuts with a diameter of about 20-30 millimeters.
Disassembly procedure
There are different types of mixers that can be disassembled in different ways.
With cartridge
Some types of mixers are equipped with a special ceramic cartridge. To disassemble a part, proceed as follows:
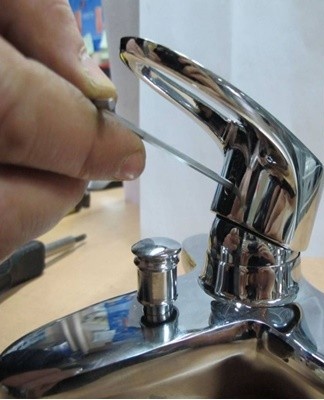
- Unscrew the cap, on the surface of which appears a red mark. You can unscrew it with an ordinary knife or a flat screwdriver.
- Screw removal. This fastener secures the linkage. You can unscrew it with a hex screwdriver.
- Hose removal. You have to get rid of it to access the mixing cartridge.
- Removing the cartridge. Once the pipe is removed, you can unscrew the cartridge.
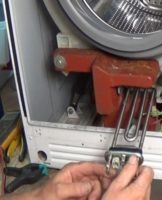
Ball
You can disassemble the Single Control Ball Rotary Mixer by following these steps:
- Disassembly of the ring. First, the top ring is removed.
- Removal of the dome. After getting rid of the ring, carefully remove the body from the structure with pliers.
- Removal of the seal. There is a gasket inside, which needs to be removed and cleaned.
- Balloon dismantling. After cleaning the seal, remove the ball inside.
repair
There are several ways to repair a broken mixer that you should familiarize yourself with.
Clear the blockage
Often the mixer stops flowing normally due to a blockage inside. In this case, you will have to take care of cleaning it. To do this, you have to disassemble the part, remove its case and fill everything with gel to remove stains. You can also use other cleaning products suitable for steel, copper or brass items. The cleaned part is put in place and the water circulation rate is controlled.
Replacement of rubber bands
Sometimes fluid begins to drip from under the valve. This problem indicates that the rubber bands are worn out and should be replaced with new ones. To do this, the mixer is disassembled and the rubber seal is removed from it. If there are scuff marks on it, you will need to change it. Before installation, a new joint is treated with a sealant to make the fastening more reliable.
Switch Troubleshooting
The design of the mixer has special switches that can jam over time. To return the work of the part, you will have to turn the handle of the structure and move the crank to a different position. After that, the switch should work.
Replacing the spool sealing rubber
On the coil, special rubber bands are installed, which gradually wear out. To check the integrity of these joints, it is necessary to disconnect the flexible hose and remove the sealing rubber through the hole. If it is damaged, you will need to install a new gasket instead. This must be done carefully so as not to accidentally damage the part.

How to replace the switch spring
It is very easy to replace the switch spring yourself. To do this, remove the decorative cap from the mixer, located at the top, and remove the stem from below.Then a new one is installed in place of the worn spring. If necessary, replace the rubber sealing elements that are installed near the spring.
Features of dismantling the ceramic cartridge
To dismantle a ceramic cartridge, you must:
- using an adjustable wrench, unscrew the nuts responsible for fixing the crane;
- remove the installed plugs with a screwdriver;
- discard the mounting screws and remove the lever;
- remove the protective cover and remove the cartridge.
Preventive measures
There are several preventative measures that can help you maintain your one-handed mixer and extend its life:
- if there are a lot of mechanical impurities in the water, special filters are installed in the mixing structure;
- the mixer should be cleaned regularly;
- when cleaning, use polyphosphate powder.
Conclusion
People who have not disassembled kitchen or bathroom faucets for a long time often encounter a faucet failure. Before starting to repair such a broken part, you need to familiarize yourself with the main causes of breakdowns, how to disassemble the structure and what preventive measures will help extend its service life.