How to get, remove and replace the heating element on different models of washing machines
A washing machine is available in every household and greatly facilitates the life of housewives. Unfortunately, however, washing machines, like any other technique, are prone to breakdowns. The most common is the breakdown of the heating element - this is when the machine stops heating the water for washing. Why this happens and how to replace a damaged heating element in a washing machine with your own hands, we will find out below.
Device and signs of breakage
Determining the exact cause of a washing machine breakdown for an untrained person is not an easy task. If this is not done properly, you will not only fail to fix the broken device, but you will damage it even more. Fortunately for owners of washing machines, the breakdown of the heating element is quite easy to determine, and it is not difficult to replace it.
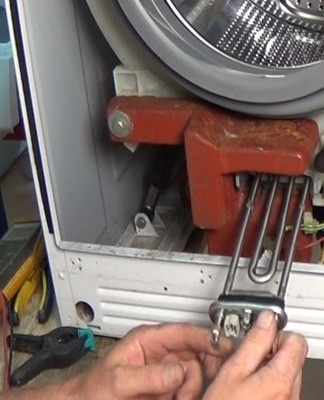
The heating element itself is a thin tube with a spiral inside.Under the influence of an electric current, the heating element heats up and raises the temperature of the water to the required values. Due to constant temperature changes and poor water quality, the heating element breaks down quickly. This is indicated by the following signs:
- the water in the washing machine has stopped heating;
- a thick layer of scale has formed on the heating element.
thick plate
Plaque is caused by poor quality water used during washing. It contains many impurities that settle on the surface of the heating element in the form of scale. This does not allow it to fully perform the necessary functions, which leads to an early breakdown. You can visually determine plaque formation by disassembling the washing machine.
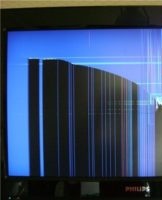
The water is not heated
In the event that it is impossible to disassemble the washing machine for inspection of the heating element, pay attention to the water temperature during washing. It needs:
- start washing;
- wait 10-15 minutes;
- put your hand to the glass;
- if it is cold, the heating element has stopped working and needs to be replaced.
To note! To increase the life of the heating element, try to clean it at least once every 6 months.
What is needed to change the heating element
Before you change the heating element yourself at home, you need to prepare yourself properly. For the repair you will need:
- new water heater;
- Screwdriver set;
- a set of keys;
- rubber hammer;
- adhesive putty.
New heating element
Before starting repair work, it is important to choose the right heating element, because the first one found in the store may not be suitable for your equipment. For that:
- Carefully study the instructions for the washing machine and remember the basic heating parameters.
- If there are no washing machine instructions or the data you are looking for cannot be found, go to the manufacturer's website. They often have all the information they need about the equipment they produce and their components.
- As a last resort, write down the brand of your washing machine and consult your nearest service technician. Maybe for a small monetary reward they will agree to help by sharing the information that interests you.
screwdriver set
Without a set of screwdrivers, you simply cannot access the failing part and diagnose or replace it. A simple Phillips screwdriver is enough to disassemble the washing machine. In some cases you may need different sized tools, but more often than not you can get away with the standard options.
Set of keys and tubular keys
A set of keys is required to remove the old radiator from its location and replace it with a new one. Any cheap set with 5-6 wrenches for different diameters will do.
Do not be stingy to buy it, because such tools will come in handy for you more than once in the future.
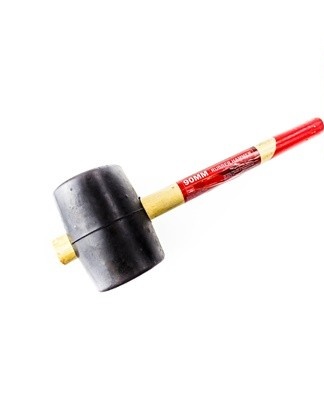
rubber hammer
You will need to carefully knock out the bobby pin that secures the central part of the heating element to the base of the washing machine. If there is no rubber hammer, it is allowed to use an ordinary one, only there must be a piece of wood between the hammer and the hairpin. It will soften shocks and prevent parts from warping. The blows must be precise. Do not hit the part with a hammer with all your might.
Adhesive putty
Sealing glue is needed to process the lower part of the body of the water heater.If this is not done, water may leak during washing, which will lead to repeated damage to the washing machine or a short circuit. The glue is applied to a degreased surface from which all moisture and debris have been removed.

How to replace
To replace a non-working heating element with a new one, you will need:
- Disassemble the washing machine, taking into account the peculiarities of its design.
- Disconnect the wiring and check its condition with a tester.
- Dismantle.
- Install a new usable heating element.
- Restore the washing machine to its original state and check its operation.
Design features and disassembly of various models
Depending on the manufacturer of the washing machine used in your home, dismantling may have some nuances that need to be taken into account. Among the common models, often bought in stores, we find brands:
- Samsung;
- Ariston;
- LG;
- DISPLAYS;
- Indesit.
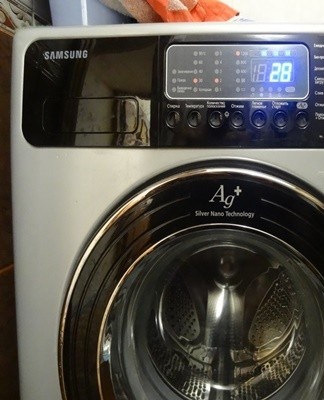
Samsung
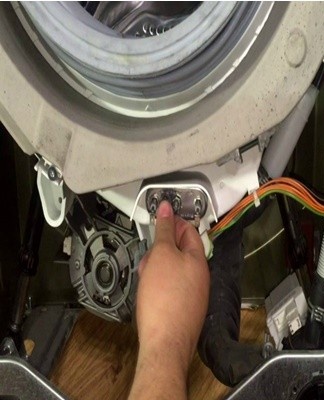
Samsung washing machines are among the easiest to disassemble. To work with them, you need to know the following things:
- The heating element that needs to be replaced is located under the front cover, at the bottom of the water tank. Access is not closed by anything, and accessing it presents no problem.
- The laundry loading compartment is fixed to the structure by 2 self-tapping screws and, if necessary, can be easily dismantled.
Indesite
Equipment manufactured by Indesit is also easy to dismantle. Necessary:
- minimal set of tools;
- carefully disconnect the board with the wires when dismantling the heating element;
- the radiator itself is very practical; to dismantle it, simply unscrew the rear cover of the machine.
Ariston
Replacing the radiator in Ariston does not present any problems for owners.It is located very conveniently and conveniently. Problems arise when the bearings inside the tank fail.
If they or the oil seals go bad, you will have to buy a whole new unit.
LG
LG home appliances are not designed in the most practical way and you will have to tinker with it when disassembling. Algorithm of actions:
- First, the nuts are unscrewed, with which the hatch cover is fixed.
- As soon as the nuts are dismantled, remove the front panel.
- The next step is to unscrew the screw with which the clamps holding the cuffs are held.
- Teng is located under the reservoir.
- To remove the tank, you must first twist the weight.
To note! If you are unsure of your own abilities, take the machine to service. There she will undergo a comprehensive diagnosis under the supervision of experienced specialists.
Bosch
BOSH is easy to disassemble. To disassemble components that failed during operation, no special tools or skills are required. According to the assurances of experts, for a complete disassembly of the washing machine, it is enough to have in stock:
- Phillips screwdriver
- key.
Disconnect wiring and check with tester
Before disconnecting the heating element from the machine, be sure to do the following:
- Unplug the device and turn off the water.
- Before disconnecting the wires leading to the radiator, their location should be memorized or photographed.
- A control test is carried out to determine the condition of the heater. If the tester displays several ohms, the device is working properly. When the tester determines high values, from 10 and above, the part can be safely discarded.
Dismantling
The disassembly algorithm may differ slightly, depending on the manufacturer of the unit, but, in general, it looks like this:
- It is necessary to remove the nut with which the heating element is attached to the body.
- Using a rubber mallet, gently remove the pin.
- We carefully remove the damaged item.
- We check its performance.
Installing a new item
To install a new item, follow these steps:
- install the radiator and tighten the nut on the main screw;
- we connect the electrical wires to the places where they were before dismantling.
Reassembly and inspection
To complete the reverse assembly, we install the twisted parts of the machine in the reverse order. Once assembly is complete, do the following:
- We start a washing test and carefully observe if there are any leaks anywhere.
- Check how the water is heating.
- If everything is in order, put the machine back in place.
Rules of operation and preventive measures
The operating rules of the equipment are described in the instructions attached to the purchase. Read them carefully and try not to violate them.
As preventive measures are used:
- Descaling every 6 months.
- To protect the equipment from sudden power surges, it is connected to the network using a stabilizer.
- If there are extraneous noises and strong vibrations, take the washing machine to a service.