How to properly hang a rack for a towel dryer with your own hands
Despite the apparent complexity, the installation of towel warmers does not cause problems even for people who do not have the appropriate experience. However, the installation of this tool requires compliance with certain rules. It is also important to adhere to several criteria for choosing racks for towel warmers, since the strength of the structure depends on these parts.
Content
- 1 Main varieties
- 2 Key Selection Criteria
- 3 Connection methods in the bathroom
- 4 Conditions for correct installation
- 5 Recommended installation diagrams
- 6 Prohibited connection schemes
- 7 Step by step instructions
- 8 Particularities of the electrical installation
- 9 Common Mistakes
- 10 Additional tips and tricks
Main varieties
According to the principle of operation and technical characteristics, heated towel rails are divided into water and electric. There are also combined types that combine the characteristics of the previous two.Water models are more popular because they are directly connected to hot water pipes and have a long service life.
Despite the fact that there are three types of heated towel rails, similar products are mounted on any of the brackets on the market. In this case, the installation order changes depending on the selected design type.
The water
Water models are connected directly to the heating system or hot water pipes. Compared to other devices, such structures are more difficult to install. However, after installing this type of product, the payment for utilities does not increase.
Electric
Models of this type can be installed in any part of the interior, in places where the power supply is located. These coils are selected according to the operating conditions. If an electric towel warmer is installed in the country, low-power models are suitable. And when the coils are installed for heating a bathroom or other room, the models should be taken at the rate of 100 watts of power per square meter of internal area.
Combined
These models combine the characteristics of the two previous ones. Combination coils are less popular due to their overpriced price.
Key Selection Criteria
In addition to these characteristics, when choosing a suitable coil, you should pay attention to the material, dimensions and shape of the towel warmer.
Material
Coils are made from:
- Stainless steel. Such heaters are characterized by low resistance to particles in the water. For this reason, sediment forms inside the pipes over time.
- Copper, brass. Both materials are characterized by increased heat transfer and short service life. Galvanizing the pipes from the inside makes it possible to extend them. This circumstance must be specified in the passport, which is attached to the heated towel rail.
- Black steel. Coils made of this material are sensitive to changes in pressure. Therefore, it is recommended to connect towel warmers of this type to private heating systems.

When choosing coils, you should also consider how the material from which the plumbing fixture is made reacts to hard water.
Dimensions and shape
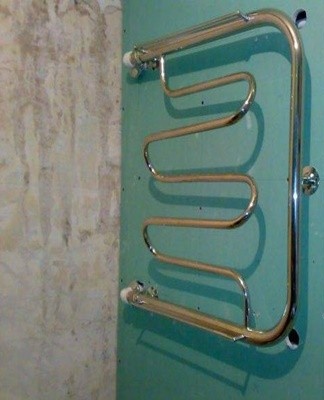
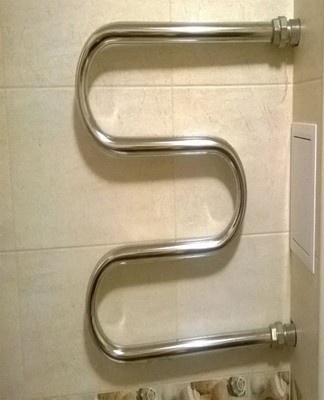
Manufacturers produce heated towel rails in the form of a rack (U-shaped) or a snake (M-shaped). There are also foxtrots, scales and modern models. The first two are classic reels, while the latter are large in size. Therefore, it is recommended to install U-shaped and M-shaped heated towel rails in compact bathrooms and the rest in large ones.
Connection methods in the bathroom
Also, before buying towel warmers, you need to decide which system the device will be connected to.
Hot water connection
Connection to a DHW pipe ensures heating of the coil throughout the year. At the same time, water consumption practically does not change.
Connection to the heating system
This connection option is used if there is no access to the centralized hot water supply. After connection to the heating system, the battery remains constantly heated.
Conditions for correct installation
When installing heaters, the following conditions must be observed:
- the diameter of the supply pipes must correspond to the dimensions of the elements of the heating device;
- a jumper (bypass) is provided between the outputs of the coil, which maintains the flow rate of the defined heat transfer fluid;
- Install the dryer at a distance of at least 120 millimeters from the floor.
In addition, the supports should provide a distance from the wall of 3.5-4 millimeters or 5-7 millimeters if the diameter of the coil pipes is less, or 25 millimeters, respectively. When installing a towel warmer, it is forbidden to install locks until the jumper is connected.
Recommended installation diagrams
Heated towel rails are recommended to be installed using a side or diagonal cutout, each allowing for the location of the top outlet and the bottom outlet. Such mounting methods are possible under the following conditions:
- The lower point of the fitting is closer to the ground than the connecting pipe, the upper point is further away.
- The horizontal connection is also used for inlets with a cross section up to 32 millimeters.
- The diameter of the pipes to which the towel warmer is connected is 0.75 inches (for steel) or 25 millimeters (for polypropylene).
- The pipes to which the coil is connected are located at a slope of no more than 2-3 centimeters per meter.
- The supply pipes must not be bent in order to avoid aerating the system.
There are other options for connecting a heated towel rail. However, in such cases, it is necessary to observe the above conditions and install a drain valve to purge the air.
Prohibited connection schemes
It is not recommended to use the following circuits when connecting a coil:
- the device is located closer to the floor than the lower outlet;
- the upper pipe bends in several places to the point of connection to the coil;
- the downpipe bends down to the point of connection with the towel rail.

In each of the above options, hot water does not enter the coil.
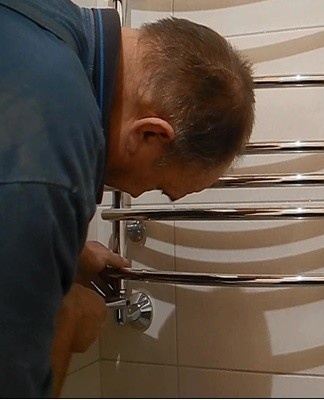
Step by step instructions
The order of installation and connection to a system providing coolant supply does not depend on the selected scheme.
Necessary tools
The type of tools is selected depending on the type of towel warmer. The coils are usually equipped with all the parts necessary for installation. Also, a soldering iron and knife may be needed if polypropylene pipes are used.
It is also recommended to purchase shut-off valves and telescopic supports, which will facilitate the alignment of the structure.
Dismantling of old equipment
Before dismantling, it is necessary to coordinate this work with the management company (if the coil is installed on the wall in an apartment building). Then you can remove the old towel rail.
In this case, there are two options for work:
- The union nuts are unscrewed, by means of which the drying is attached to the inlets.
- The coil is cut from the carriages using a "shredder". The rest of the latter should be enough to cut the threads.
In both cases, the length of the supply pipes must be sufficient for the insertion of the lintel.
How to properly install diverter and ball valves
You can hang a towel warmer without a jumper. However, most plumbers recommend installing the latter. The by-pass is mounted on pre-cut connectors in the pipes. If necessary, wires are cut on the inputs. If work is carried out on steel pipes, a branch of the same section is welded to them. Ball valves are fitted to the ends of the coil. In this case, it may also be necessary to thread the old pipes.
Fixation
As mentioned above, various fixings can be used to install heated towel rails, regardless of the type of coil.
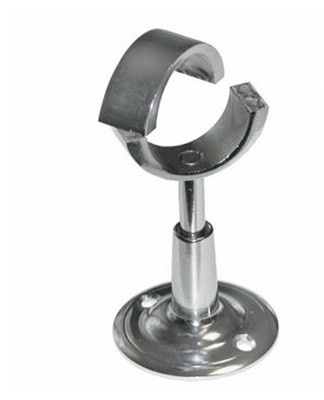
Brackets
The brackets are divided into telescopic and split brackets. In this case, the order of installation of these fasteners in both cases is the same. Installation is carried out as follows: marks are applied to the wall, along which holes are drilled. Then the support is screwed into the latter by means of anchors and screws. Telescopic models are convenient because they not only fix the towel warmer, but also allow you to adjust the gap between the pipes.
Support
Like the detachable clips, the brackets can be attached to the wall using self-tapping screws or screws that screw into the wall. Such elements are rarely used to fix the coolant pipe, since they create certain difficulties during installation.
Connection
Fittings allow the supply pipes to be fixed to the towel rail. There are several types of such fasteners, each of which is used under appropriate conditions: "American" (with a union nut), plugs (cover unused inlets), collectors (create a separate branch), etc.
Posing, clamping "American women"
"Americans" came up to the exit of the towel dryer. Before starting work, the thread is treated with a sealing paste, then the nuts are tightened. It is not recommended to use excessive force when performing this last job.

brand
To determine the points at which the holes for the installation of the fasteners will be drilled, it is necessary to fix the towel warmer to the outlet pipes, align it with the level of the building and apply the appropriate marks on the wall.
Preparing the hole
When installing the coils, it is recommended to make deep holes. To do this, you need to drill a concrete wall. Next, you need to insert dowels into the obtained holes, into which the screws for the fasteners will be screwed.
Fixation
Before installation, fasteners are put on the pipes of the towel warmer, which are then screwed to the wall with screws. In this case, it is recommended to use brackets, since these allow, after installation, to adjust the position of the battery level and in relation to the supply pipes and the wall.
Fastener tightening
In the final stage, all fasteners and fittings are tightened using an adjustable wrench. Excessive force can strip the wires, requiring you to repeat the described procedure.
System check
To check the performance of the system, you must open the inlet and outlet shut-off valves slowly, in order to avoid water hammer. No water should flow out of the joints of the pipes.
Particularities of the electrical installation
Installation of the electrical appliance is carried out according to the described scheme. The only difference is that in this case the battery is mounted separately from the central heating or hot water supply pipes. Additionally, you will need to run hidden wiring from the coil to the power supply. At the joints, it is necessary to insulate the cables.
Common Mistakes
Basically, the errors of novice installers are due to non-observance of the diagrams for connecting the coils to the sockets (non-observance of the level of the connection points, etc.). Pipes of different cross sections are also often used. Also, during installation, it should be borne in mind that the supply pipe should be located at the top, and the drain pipe should be at the bottom.
Another common mistake is the refusal to install the Mayevsky crane, which is used to remove air from the system.
Additional tips and tricks
When installing electric heaters, it is recommended to maintain a distance of at least 20 centimeters from the wall and 60 centimeters from the floor. In this case, it is necessary to place the structural elements away from the furniture. And the socket, complete with a rubber gasket and a cover, should be located away from the radiator. When installing radiators, it is recommended to use components made of the same material. This will prevent the occurrence of so-called electrolytic corrosion.
It is recommended to cover the supply pipes hidden under the trim with heat-insulating material. If a vertical collector is installed, it is recommended to install a drain valve, which will prevent aeration of the system in the event of a water cut. Before buying water towel warmers, it should be borne in mind that the pressure in the hot water supply system is 8-10 (in new houses) or 5-7 (in old buildings). Therefore, to increase the service life of the coil, thick-walled products should be preferred.