Rules for finishing the slopes of plastic windows and do-it-yourself step-by-step installation instructions
The replacement of old frames with the installation of new window blocks renders the tracks unusable. Installation work is accompanied by cleaning the plaster layer adjacent to the attachment points. As a result, the space near the window looks unsightly. When finishing the slopes of plastic windows, both the traditional method and modern, less labor-intensive technologies are used.
Content
Slope device and materials
Window slopes perform decorative functions, protection from light and heat.The assembly joints between the window system and the wall are covered with foam, which must be protected from ultraviolet rays. Under its influence, the building material begins to crumble, which can lead to the formation of cracks.
An insulating layer next to the frame will eliminate the penetration of cold air from the street.The design of the window space is an integral part of the design of the room, which should harmoniously fit into the interior.
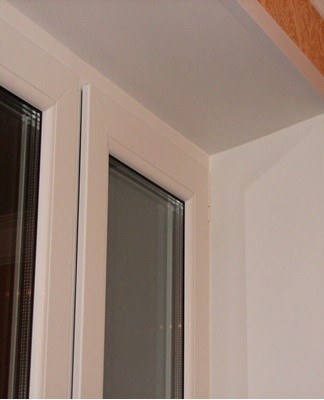
pvc panels
For slopes, use a plastic ceiling covering. It is made in the form of two plates with internal bridges, which give it rigidity. As a finish, panels with a thickness of 1.2 centimeters are suitable. The thinner ones will have bumps in the fingers when installed and will not withstand the pressure of the foam. The color range of plastic panels allows you to choose any tone. Plates with imitation of natural material are suitable for frames made of natural wood. When installing PVC planes, you will need fittings that hide the corner joints and the points of contact with the wall and the frame.
The surface coating is also made with special heat-insulating sandwich panels, in which there is polystyrene between the plastic plates. The thickness of the wall panels is 1.2-1.5 centimeters with a width of 1-1.2 meters.
Advantages of PVC slopes and sandwich panels:
- moisture resistance;
- frost resistance;
- ease of care;
- respect the environment;
- create a hard, flat surface;
- combination with plastic windows;
Installation is not accessible to a professional finisher if the installation instructions are followed carefully and slowly.
Plaster
The traditional way of finishing the slopes with a mixture of cement and putty, followed by painting. Plastering work requires experience and time so that the coating is smooth, without cracks. Quality plaster has a long service life.
drywall
Dry plaster (drywall) is often used as internal slopes. The building material is simple to work with, it can be installed with insulation.To protect against moisture and create an interior, plasterboard is primed and painted.

Tools and materials required for installation
The complete list of tools depends on the finishing option.
Tools needed for any type of decoration:
- Level.With its help, planes are leveled, profiles, strips are installed.
- Edge. The starting angle of the slope relative to the frame can be straight or higher, which is determined by the tool.
- Pencil for marking walls and panels.
- Tape measure to determine the size of the opening and material consumption.
To plaster the surface of the opening you will need:
- trowel for applying the cement-mastic mixture;
- spatulas for leveling slopes;
- ruler for guides;
- trowel for grouting surfaces;
- corner leveler;
- container for receiving the mixture;
- a power tool with a kneading attachment.
For plastic panels and drywall, you need:
- sharp blade for cutting foam;
- saw for metal - cut panels;
- scissors for metal - finishing trim;
- gun for polyurethane foam and mastic;
- construction stapler.
Plaster surfaces and drywall are primed and painted with flute brushes. Finishing materials for installing plastic panels:
- start the profile;
- F profile;
- corner profile;
- screws / dowels;
- Staples.
Wooden slats are required for plastering openings and can be used when installing PVC panels. When replacing plastic plates with sandwich panels, it is not necessary to have a starting and corner profile.
Depending on the type of tracks, they get polyurethane foam, putty, primer, paint, white silicone.
How to properly finish the internal slopes with your own hands
Regardless of the finishing option, preparatory work is carried out:
- remove old plaster if cracked;
- remove wallpaper or a layer of paint;
- clean surfaces from dust;
- primed with an antifungal agent.
Further steps depend on the type of window wall design.
Plaster without insulation
The sequence of finishing openings with a plaster-mastic mixture:
- Installation along the outer contour of the window opening of a metal profile (outer guides) using a level. Fixing to the walls with dowels. The profile should be wider than the edge of the wall by the thickness of the plaster layer (about 1 centimeter).
- The perforated corner is fixed flush with the frame in height and width (inner rails). Its height should correspond to the protruding edge of the outer profile.
- The prepared mixture is applied to the walls at a given thickness of plaster. The outer corner is formed.
- After the solution begins to harden, it is leveled using a ruler and guides. The movement begins from the window sill to the ceiling, along the guides. Excess mixture is immediately removed.
- Once the plaster is dry, remove the outer profile. A plaster putty is applied to the corner projections, on which a paint corner is installed.
- When the paint corner dries, its inner part is hidden under a new layer of putty, leveled with a ruler. Outside, they are fixed with mortar, pressed and leveled with a spatula.
- Use an angled spatula for the inside corners.
- A millimeter of finishing putty is applied to the finished layer.
- Last step: grouting the surface.

Plaster surfaces are primed and painted.
Insulating plaster
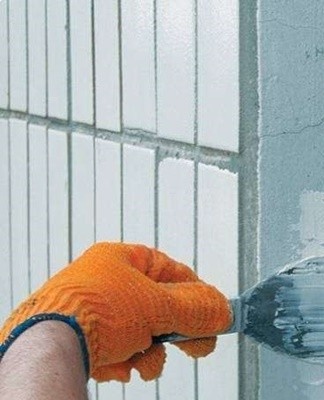
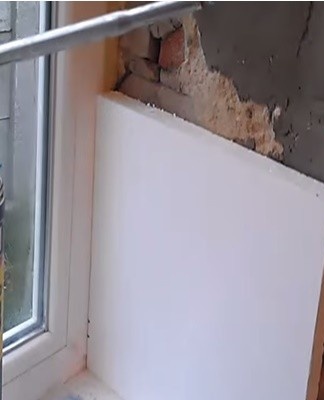
The thermal insulation of the plaster slopes keeps the walls warm in case of frost. For insulation, polystyrene foam boards are used up to 1.5 centimeters thick. Installation starts from the side slopes. "Liquid nails" are applied to the surface of the panel and glued to the prepared wall (leveled, dust-free).
Wide slopes require additional fixing for added strength. From the side of the wall, a large-head dowel (mushroom dowel) is inserted into the insulation (recessed 1 millimeter), through which spacer nails are driven.
Then the corners are glued to the outer corners, from which a fiberglass mesh is laid to strengthen the plaster layer.To evenly distribute the mesh on the foam, use buttons, after which a thin layer of starting putty is applied to it. After leveling and complete drying, a finishing putty is applied. The completion of the work is similar to putty without insulation.
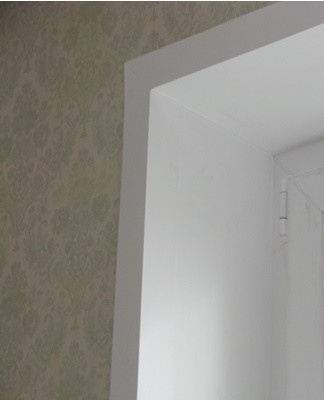
pvc panels
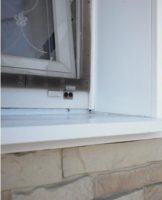
Fastening conventional plastic panels and panels with insulation have minor differences. A starting profile is attached along the inner contour, to which an angular profile is attached. A plastic F-channel is attached to the outer edge of the opening, which serves as a panel support and casing. Then they measure the slopes, cut the material and install. The sandwich panels are mounted with a starting profile or through a groove in the assembly joint.
Installation of plasterboard slopes
To eliminate the slopes of drywall, you will need polyurethane foam, putty. Installation begins by cutting a space in the foam around the window frame. With a clerical knife, a recess is made in it by 5 millimeters to the width of the sheet.Measurements of slopes and cuts of materials are carried out.
The upper slope is placed first. Putty is applied to the edge. The drywall is inserted and folded back slightly. The gap between the slope and the wall is foamed, after which the slope is pressed with a piece of board along the entire length of the slope.
Until the foam dries completely, the slope should be pressed against the wall.
The side walls are installed in the same way. Then a metal corner is glued with putty around the entire perimeter. After drying, the drywall is puttyed twice: with a starting and finishing mixture. The final stage of installation: priming, painting.

How to install plastic slopes step by step
In a more detailed description of the installation of plastic slopes, a step-by-step procedure is presented.
Conventional
PVC panels are installed using profiles and polyurethane foam.
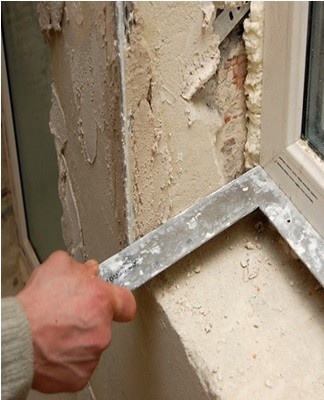
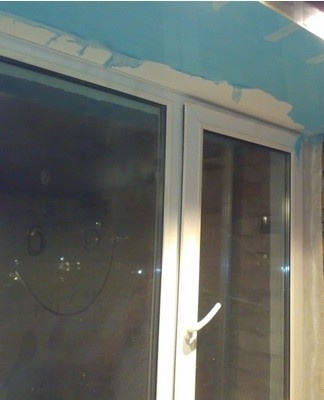
Opening preparation
If plastic windows were provided for replacement, wallpaper and paint should be removed from the slopes using water or a construction hair dryer. The old plaster, which prevents the window from fully opening, is removed.Then, with a sharp knife, the foam protruding from the horizontal of the window frame is cut. Moss is removed in the new building. The surface of the window opening is primed with an antiseptic.
Guide profile fixings
The starting plastic profiles are attached to the frame with self-tapping screws, starting from the upper opening.
Lathing
Plastic panels are cut to size. Assembly is done by inserting it into the groove of the profile.Polyurethane foam is applied to the surface of the opening in the form of a fine mesh.
Panel mount
The panels are inserted into the guide profile and pressed against the walls until the foam hardens.
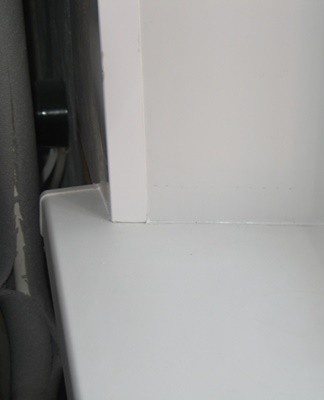
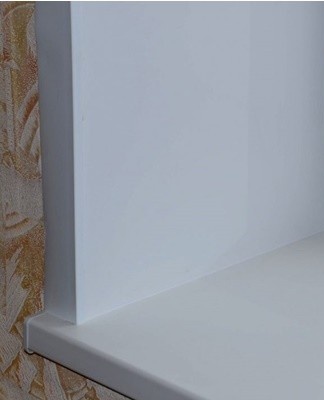
F profile fixing
On the outer perimeter, plastic F-profiles are installed on "liquid nails", which serve as panel supports and decorate the joint between the panels and the walls. At the contact points, the profiles are pre-cut at an angle of 45 degrees in order to obtain a right angle once aligned. The gaps are sealed with white putty.
Sandwich signs
Plastic insulation panels can be supplied without starter profile. A groove is made in the assembly joint along the contour. It should be close to the frame, have a depth of up to 1 centimeter and correspond in width to the sandwich panel.
Installation starts from the top. The plastic panel is inserted into the gap, slightly folded over and foamed. They are pressed to the ceiling and fixed with adhesive tape. By analogy, the side walls are installed. To seal the joint with the wall, a decorative plastic corner is used, which is glued to the panel and the walls with mounting glue. The gaps are closed with a white putty.
How to finish the external slopes in a private house
After installing plastic windows from the outside, it is necessary to protect the assembly joints and decorate the facade of the house. Street slopes are made of metal, plastic, tiles and finished with plaster. The choice is up to the home owner.
Common Mistakes
What will make the installation of embankments ephemeral and of poor quality:
- if you place the panels under the window profile;
- leave voids under drywall, PVC panels;
- applying an excessive amount of polyurethane foam;
- exterior slopes will be without seals and without filling voids with cement plaster.
When choosing external slopes, climatic features should be taken into account: plastic panels crack at low temperatures.
Plastering errors:
- without insulation on a concrete base will lead to the formation of condensation;
- reinforced mesh - to microcracks;
- the adjacent profile - to cracking.
Before starting the installation, it is necessary to check the quality of the tightness of the joints between the wall and the window.
Tips and tricks from experienced craftsmen
For beginners, in order to avoid errors when installing plastic panels, it is recommended to use the fastening scheme. Putty is applied to the surface of the opening, starting from the window sill. The slope is leveled with a laminate template or a ruler. When performing plastering work, finishing starts from the upper slope. To speed up the drying of the putty, you can add a little gypsum, alabaster or tile glue to it.
Plastic panels are installed on openings up to 25 centimeters. Sandwich panels are suitable for walls over 25 centimeters. The choice of external slopes depends on the width of the opening. The easiest way to install slopes is to use clips. This is a plastic profile with a width of 90x60 or 180x90, which is installed on studs fixed to the frame.