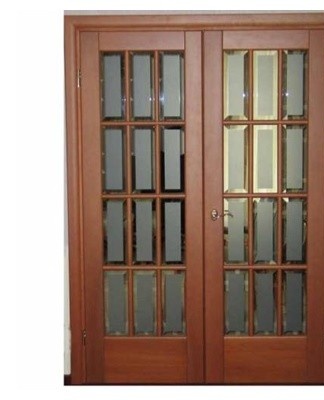
Step-by-step instructions for repairing different parts of interior doors
During operation, microcracks and other defects appear on the surface of the interior doors, which not only spoil the appearance of the canvases, but also interfere with the operation of the structures. Also, problems often arise with related fittings. Most often, you can eliminate these defects yourself. Before proceeding with the repair of interior doors, you will first need to find out what caused the jamming of the mechanisms.
Common problems
According to online reviews and search engine searches, people are more likely to experience the following issues with interior doors:
- the handle sticks;
- the latch does not work;
- sagging of the canvas;
- The "tongue" of the handle stopped moving;
- the handle does not return to its original position.
No less often there are problems with the hinges or the door leaf. The latter, being exposed to extreme temperatures and changes in humidity, swells and sags.Some of the faults are eliminated only by replacing the problematic fittings.
In other cases, you can limit yourself to cosmetic repairs: tightening screws, greasing hinges and other similar work.
sticky grip
The doorknob will stick for various reasons. Basically, this problem arises due to lack of lubrication or band sag. Often, to restore the functionality of the handle, it is enough to untwist this part and process it with machine oil. You should also inspect the center pin connecting the handles for small and large flaws.
Lock issues
If the latch stops coming out or going in, this indicates a spring malfunction. For some door handle models, this element is threaded directly onto the axial rod. Breakage of the latch in such mechanisms will require a complete replacement of the structure.
Release
The departure of the door leaf or the sagging of the handle is due to the lack of sufficient fastening. To eliminate this problem, you will need to tighten the screws or replace the entire mechanism. It is also possible that the elements of the door lock diverge.
The handle does not return to its original position
Due to prolonged use, the following problem is often observed: after pressing, the handle does not return to its original position. This indicates a weakening of the spring built into the locking mechanism. Such a defect is characteristic of both the lever responsible for the return of the handle and the latch.
The "tongue" does not move
The "tongue" of the door after being pressed can either remain in its original position or sink. This problem is also often caused by a malfunction in the spring or other elements of the handle that are responsible for the movement of the parts.
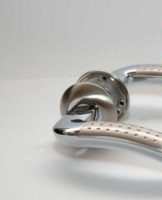
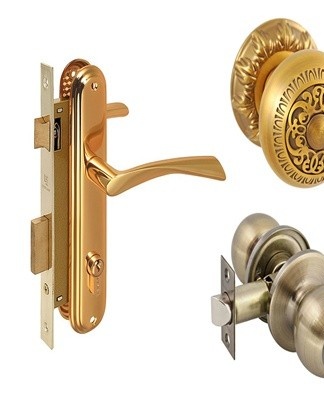
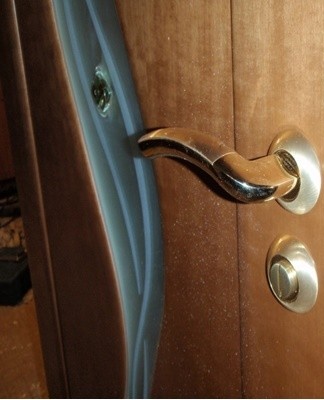
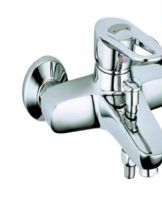
Handle design
Door handles differ among themselves not only in appearance, but also in design features. It is the latter that cause difficulties in restoring the operation of the locking mechanisms. In particular, in inexpensive accessories, the main "weakness" is the central four-sided collar. This part is often made of poor quality metal.
Due to this, the neck wears out faster, so the latch and the "tongue" stop working.
Pivot
Rotary models (nobs) are completed with a latch. In some cases, these grips have a locking mechanism located in the center of the ball. The nobs are classic and light. The advantages of rotary models are:
- relatively low price;
- safety against injury (there are no sharp corners);
- suitable for almost all types of interiors.
Swivel knobs break frequently. The second drawback of such models is that the locking mechanisms are difficult to install: to install the handles, you will have to drill a perfectly flat round hole in the door leaf.
Push
Crutches consist of two L-shaped handles connected by a rod. The latter drives the latch. Such a mechanism is supplemented by a spring, with the help of which the door handle returns to its original position after being pressed. Push models are distinguished by the following characteristics:
- reliability;
- ergonomics;
- sustainability;
- silence.
Lever handles often fail with a spring, which can be replaced for 50 rubles. A number of these models are complemented by a decorative rosette.
Stationary
Fixed models are considered the simplest option for interior doors. These handles are not complete with locking mechanisms (except for roller varieties). Therefore, to fix the door leaf, it is recommended to install stationary models with a roller latch or a magnetic lock.
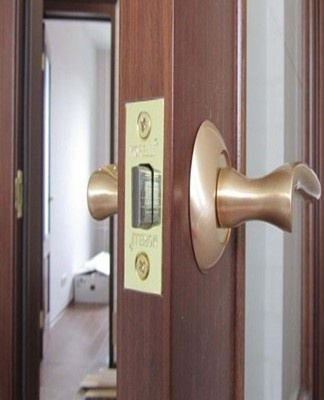
Main components
Since the jamming of the locking mechanism is often caused by the presence of dirt on the handle elements, to restore the latter, it is enough to lubricate them with engine oil. In other cases, it is necessary to disassemble the entire structure in order to find the defective part.
Door handles are made up of five basic elements:
- lock;
- center pin;
- lever;
- decorative overlay;
- answer part.
Some models of door handles are supplemented with other details.
Lock
The base of the doorknob lock is a deadbolt which locks the latch or "tongue". In the event of a breakdown, this mechanism requires a complete replacement. To extend the service life, it is recommended to periodically lubricate the lock with engine oil.
square brooch
The center pin acts as a pivot mechanism. This part is responsible for the movement following the handle of the latch and the "tongue". The square pin should also be lubricated periodically. In case of failure, this part must be replaced.
Lever
The handle comes in different shapes. This part rarely breaks. But if pronounced defects are detected, the handle, like the central pin, must be replaced.
Decorative overlay
The cover serves as a decorative function and hides the interior parts of the door handle. The damage to this part is mechanical. The liner also cannot be repaired in the event of chips or other defects.
Response part
The counterpart is a strip that is attached to the end of the door, where the "tongue" and the latch are located.
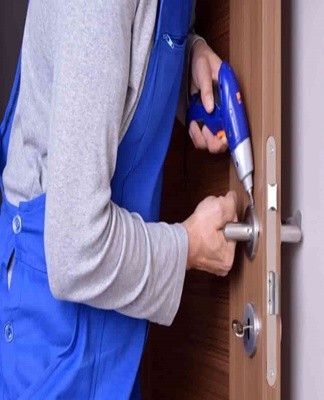
Disassembly and diagnostics
The algorithm for dismantling the door handle depends on the type of model installed. It is easier to remove fixed fittings, since such a product does not have hidden mechanisms. To disassemble this type of door handle, it is enough to unscrew the self-tapping screws that fasten the structure to the canvas. Damage to fixed equipment is revealed during an external examination.
If the fixed handles are completed with a built-in latch, then to remove the latter, you need to unscrew the screws (self-tapping screws) securing the counterpart.
Push models are disassembled as follows:
- The front plate is removed, which covers the screws.
- The screws are unscrewed, the handle is removed.
- The central bar is removed and the handle is removed on the other side.
- The counterpart is unscrewed, the locking mechanism is removed.
To identify a malfunction in such models, it is recommended to put the handle on your hands or on a table and press the handle several times. This will reveal the parts that are not moving.
Rotary models are disassembled as follows:
- Using a flat screwdriver, remove the cover near the handle.
- Press the stopper with a spanner or pointed object (knife) and pull the handle towards you.
- Unscrew the open screws and remove the handles on both sides.
- Unscrew the strike plate and remove the locking mechanism.
After unscrewing the rotary handle, it is also recommended to assemble and check the performance of the individual elements of the locking mechanism.
Ways to eliminate door handle breakage
The algorithm for eliminating door handle failures depends on the type of fault detected. Often, to restore the locking mechanism, it is necessary to replace failed parts.
If the handle sticks
Seizure of the handle is caused by particles of dust and dirt accumulated on the elements of the locking mechanism. To avoid this problem, the internal parts should be lubricated periodically. To do this, just put a little oil on the bolt and turn the handle several times. Thus, the lubricant is evenly distributed on the internal parts.
If the above action does not help and the handle continues to jam, it is necessary to disassemble the mechanism and tighten the parts with the mounting bolts.
When the handle falls
The handle fell off due to the retaining ring breaking. The latter moves or deforms over time, which leads to this problem. To eliminate the malfunction, you need to perform the following steps:
- Remove the decorative strip that is attached to the door area. To remove this part on some models of locking mechanisms, you will need to unscrew a small bolt.
- Remove the screws and bolts that secure the main part of the door handle.
- Remove the handle and inspect the condition of the retaining ring. If visible defects are detected, this part must be replaced with a new one.
Caution is advised when installing the retaining ring. This item is small in size. Due to this, with strong pressure, the circlip can injure your hand.
Inner square pin broken
Breakage of a tetrahedral axis is possible in two cases: when excessive force is applied and if this part is made of silumina, a brittle metal alloy. The second option is considered the most common. If the square pin breaks, you will need:
- Dismantle the locking mechanism by removing the handles. These are usually held in place by a small bolt.
- The fixing bolts are removed and the entire structure is removed, along with the decorative strip.
- The central pin is removed and a new one is installed.
To avoid this problem, it is recommended to purchase door handles with a sturdy square shank. Purchasing a new center piece also solves the problem of the latch, which does not fit into the reverse bar when the handle is turned. To solve this problem, just buy a bigger spindle.
No return to initial position
When the handle does not return to its original position after being pressed, this indicates a malfunction of the spring. It is possible that the problem is due to the jumping of this element. To eliminate the malfunction, you need to dismantle the locking mechanism and return the spring to its original place. The algorithm of work in this case is the same as that used when replacing the retaining ring.
If the spring has burst, the door handle cannot be restored to work. This is explained by the fact that it is difficult to find this part on the market. In such situations, a complete replacement of the entire structure will be required.
Features of the repair of a Chinese door
Handles made in China are often made from poor quality materials, which leads to parts of the structure breaking in the first few years after purchase.The repair of such mechanisms is carried out according to the algorithm described above. The only difference is that when working with Chinese products, do not overtighten the bolts.
What to do in case of relaxation
Loose door handles do not require repair. With such a problem, it is enough to tighten the fixing bolts more tightly. This also applies to interior details. But in some cases, when the bolts are not attached to the door, a complete replacement of the structure will be required.
If it squeaks
If the door squeaks, it is necessary to lubricate the hardware with engine oil. This problem is caused by the accumulation of dust and dirt. The metal, in contact with these particles, emits unpleasant sounds.
Installation, replacement
To repair interior doors, you will need the following tools:
- sharp knife (office);
- tape measure and pencil;
- screwdriver;
- chisel and hammer;
- Screwdriver;
- drill;
- aerosol to remove plaque.
Depending on the type of work performed, additional fasteners may be required, through which holes can be drilled in the canvas for the installation of locking elements. If the door is crooked, a plane is needed. In some cases, hex keys are used for fitting installation.
Staples
The brackets, or fixed handles, are attached as follows:
- Marks are put on the doors, along which the fittings will be fixed in the future.
- Through holes are formed with a drill on the wood.
- The bolts are inserted into a part of the handle and inserted into the through holes.
- The second part of the structure is fixed and tightened with bolts.
Some stationary models are equipped with hidden bolts. In such cases, you will need hex keys to tighten the fasteners.
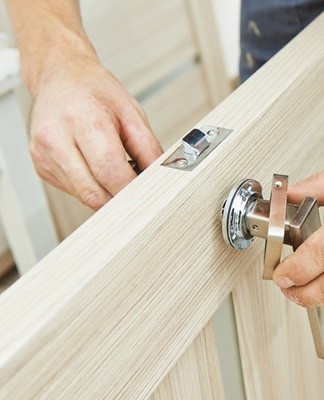
Button
The knobs, or rotary knobs, are installed according to the attached diagram. Templates are included with these products, according to which through holes are provided on the interior door. According to this scheme, a niche is also cut out for installing a counter-blade and a locking mechanism (latch). In the latter case, you will need a pen drill.
Then, using a wooden crown, drill a hole in the door leaf for the handle at a distance of 60-70 millimeters from the end and at a height of 90 centimeters from floor level. After that, the latch, square pin and button are inserted. When assembling the latter, it is necessary to press the spring latch using the special key included in the kit. At the end, all bolts and screws are tightened and the operation of the mechanism is checked.
Push option
Installation of push models is carried out according to a scheme similar to buttons. First, you need to drill a hole to install the latch and the square pin. In some cases, additional holes will need to be drilled.
Then the locking mechanism and the central pin are installed. At this stage, it is recommended to insert the handle and check the functionality of the indicated elements. Further, with the help of bolts and self-tapping screws, the remaining structural parts are fastened.
When working with push models, it is also recommended to follow the attached instructions. This is because these products differ significantly from each other, therefore the general order of installation may vary.
on the bar
Structurally, the bar handles do not differ significantly from pressure models.The main difficulty when working with such products is that several holes must be made in the door at a strictly defined distance.
Installation is carried out according to the scheme indicated in the instructions. As in the previous cases, marks are first applied to the door, along which holes are then cut for the installation of locks, locks and a square pin. If necessary, the canvas is additionally sanded with emery paper. This helps prevent chipping and burr formation. Subsequently, a lock and a square pin are inserted into the drilled holes, then a handle. Each of the elements is fixed with the supplied bolts and self-tapping screws. At the end, a board is installed on the door jamb, for which it will be necessary to make a recess of the corresponding diameter.
Other repair options
Problems with interior doors are not always caused by a breakdown of the locking mechanisms. This interior detail is constantly exposed to external influences: temperature changes, changes in humidity, etc. This influence has a negative effect on the condition of wood and accessories. If problems unrelated to the handles arise, then before proceeding with the repair, the door must be removed from the hinges. For this, the canvas is opened to the maximum and wedged from below. Then the door hinges are rolled out.
Fixing the box
Frame warping is the most time-consuming problem that affects interior doors. To eliminate this fault, you will need to perform the following steps:
- Determine where the distortion occurred. To do this, measure the sides of the door frame diagonally and identify the gaps.
- Remove the door frame.
- If the box is fixed with anchor bolts, these must be tightened.
- Remove the foam with a utility knife and install the spacers.
- Apply a new layer of polyurethane foam.
If the door frame is fixed on studs inserted into a concrete or brick wall, new holes will have to be drilled in the latter. In cases where the deformation is due to swelling of the wood, with the help of a planer, part of the material is removed from the problem areas.
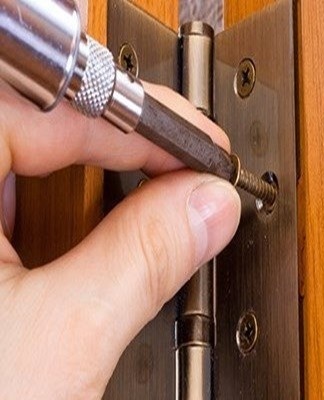
Replacement of hinges and trays
If the doors sag, you will need to tighten the self-tapping screws on the hinges or replace the hinges. The second option is more laborious, as it will require cutting new holes. To do this, you must first put spacers between the door and the box and make marks according to the dimensions of the hinges. Then, using a chisel, new holes are cut out. At the end, the hinges are attached to the door and frame with self-tapping screws.
To replace the defective housing, the old part must be removed, the rest of the polyurethane foam removed and the blank fixed to the opening. Then, from this element, at a distance of 5 millimeters from the box, it is necessary to cut off the excess part at an angle of 45 degrees. Similar actions should be performed with the other two blanks.
Restoration
The restoration of a wooden door is carried out according to the following algorithm:
- The door leaf is removed, sanded and puttyed (if deep defects are found).
- The tree is treated with an antiseptic and primed.
- The door is covered with paint, varnish or other material.
- New trays are installed to match the color of the door leaf.
If necessary, the old fittings can be replaced during the restoration.
Painting and decorating
The decoration of the door leaves is carried out taking into account personal preferences.For staining it is recommended to use acrylic paints or furniture varnish. You can also apply different patterns to the door using special stencils.