How to putty the walls under the wallpaper or paint yourself step by step
The durability and appearance of the finish coating depends on the quality of the preparation of the walls. For almost all types of decorative materials used for final processing, it is necessary to prepare a smooth base. To level the surface, you can do it yourself by plastering the walls for subsequent painting, wallpapering or plastering.
Varieties of mastic
Putty compounds reliably adhere to wood, concrete, cement and painted base. Mixtures are used for carrying out internal and external construction and repair work in the preparation of walls, floors and ceilings for decoration.
On appointment
Depending on the purpose, sealants have different properties, so they are used for different purposes.
Departure
Mixtures with high grain size, good adhesion and strength are designed to form a base layer on walls with pronounced defects (chips, cracks, drops). The allowable coating thickness is 3 to 20 millimeters.Can be used as an independent leveling agent or applied after plastering.
Finishing
The starting mastic is rubbed with a finishing plaster, which makes it possible to obtain a perfectly homogeneous coating. The material is less durable; layers up to 4-5 millimeters thick can be formed from it. The mixture is used before decorative finishing to eliminate minor defects.
Universal
Combines the properties of leveling and decorative plasters. They are used to level small surface defects with minimal differences. Not used to seal large defects.
By membership
Manufacturers produce dry, ready-to-use mastic. Powder materials are packed in bags. A solution is obtained from the powder by adding water. Ready-to-use mixtures are delivered in hermetically sealed containers. They can be used immediately.
Acrylic
Acrylic-based products are ideal for leveling paintable substrates. Universal materials are used to process all surfaces in internal and external do-it-yourself work. Acrylic solutions have good adhesive properties and good moisture resistance.
On a note! Polymer sealants also include mixtures of latex to create a topcoat and polymer-cement materials with high plasticity.
Dispersible in water
The composition of the aged viscosity with the content of the polymer emulsion is produced as a ready-to-use mixture in a plastic container. The treated coating is durable and smooth. Water-dispersion mixtures are suitable for preparing walls for any decorative finish.
oil and glue
A varnish-based mass has good waterproofing properties and protects the plaster from moisture.Putty is suitable for decorating walls in rooms with high humidity. Wooden surfaces are kept longer under the oil-glue mixture. The only drawback is that the drying oil appears in places under the wallpaper, so it is recommended not to glue on the walls, but to paint them.
Cement
Products are produced in the form of dry powders, which have maximum strength, moisture-proofing properties and resistance to low temperatures. Mixtures reliably "grab" with different surfaces, they are easy to cook with your own hands, diluting them with water. Disadvantages include shrinkage after drying, due to which the solution layer must be reapplied.
plaster mix
Gypsum fillers are the most common due to their good leveling properties and affordable price. Compositions are used only for internal work, since gypsum is destroyed by moisture. The material is plastic, adapts well to vertical surfaces (does not "float"), adheres well to the base, improves thermal insulation.
The main criteria for choosing a filling material
In order to choose the right mixture, it is necessary to take into account humidity, changes in the temperature regime in the room, the type of surface to be treated, the nature of the basic defects. You can choose both a dry composition and a ready-made composition. What to look for:
- In rooms with normal humidity, gypsum materials are used.
- In the bathroom and kitchen, moisture-resistant acrylic or cement sealants are used.
- For wooden walls, an acrylic compound with good antiseptic properties is suitable.
- When preparing the base for painting, polymer mixtures are used, which form a uniform and smooth coating.
- Any type of putty is suitable for wallpaper, except for oil and glue.
Concrete, cement walls, as well as plastered surfaces are best treated with cement compounds. They demonstrate maximum adhesion to such materials. Universal mixtures are used to eliminate minor defects - small cracks, grooves, joints. To level the base with large drops, chips, deep flaws, use a starting and finishing putty.
Coaching
It is necessary to remove traces of old paint, grease stains, soot, construction dust, loose plaster. Before applying putty, the walls should be primed in one layer, evenly distributing the composition, and let them dry well.
Tools required
To putty the walls with your own hands, you need the following set of tools:
- drill with mixer attachment;
- a set of spatulas;
- rollers, brushes;
- to reign;
- level;
- sandpaper 60, 80, 120;
- manual flayer;
- ability.
If there are large cracks and depressions in the wall, they are sealed with cement mortar. A thick layer of putty (more than 20 millimeters) will not adhere firmly to a vertical surface.
How to calculate and prepare materials
Each type of mastic mass is consumed differently. This is influenced by the content of the composition, the nature of the base, the correct preparation and application of the mixture. Things to consider:
- The most significant is the consumption of the starting mass due to the inclusion of coarse fractions of gypsum or lime. Standard packaging is 25-30 kilograms. The average consumption is 1.0-1.4 kilograms per square meter of wall with a layer of 1 millimeter.
- You can use a ready-to-use finishing putty. Packaging in buckets of 25, 17, 8 kilograms. The material is applied thinly over the starting layer. Estimated consumption - a capacity of 17 kilograms is enough for 35-40 square meters of wall. Finishing dry putty is packed in bags of 25 kilograms. The consumption of the mixture is 1.0-1.2 kilograms of solution per 1 square meter of wall with a layer of 1 millimeter.
- The universal "start-finish" composition is immediately applied to the prepared surface. It is packaged in bags of 20 or 25 kilograms. Approximate consumption is 1.2-1.5 kilograms per square meter with a layer thickness of 1 millimeter.

Material costs depend on the quality of the preparation and the correct application of the mass.
To level the walls with significant irregularities, prepare a mixture of a dense consistency. To crush small defects, prepare a less thick solution.
How to prepare the walls
To ensure strong sealant adhesion, you must:
- clean the walls of debris;
- remove the old coating;
- check the relief by level;
- knock down the protrusions with a plane or a sharp spatula;
- for embroidering and sealing cracks, seams, chips with a solution;
- treat with a primer for high-quality adhesion;
- let the floor dry for at least 24 hours.
The application of a primer is imperative. One layer is enough, after which you can proceed to putty.
How to prepare a putty
There are two options for preparing the mass. For the treatment of small areas, the putty is sealed with water - the powder is poured into the container and the liquid is gradually poured. Stir with a spatula until smooth.The second way is technologically more correct:
- Pure water is poured into the container by a third or a quarter of the volume of the container.
- Putty is poured in a thin stream until the top of the blade appears.
- Let the powder soak in the water.
- Knead for a few minutes with a mixer installed in a drill (the device is turned on at low speed).
- After a minute, mix the mass again.
The prepared composition can be used for puttying the walls. It is recommended to prepare the solution in small portions in order to have time to develop it within 20-30 minutes, otherwise the composition will dry out.
Important! Do not add water or putty to the finished mass. They work with the composition obtained when mixing.
The main stages of the work
There are three options for the treatment of the walls. The starting putty is made with a coarse material. If you install a masking net under the layer, you can putty a large part of the wall. Finishing the lighthouse is carried out with the installation of lighthouses (wooden slats), forming a layer as a rule. Finishing is the last step.
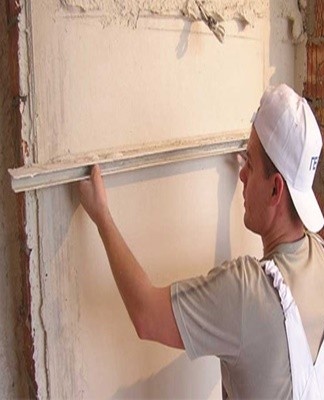
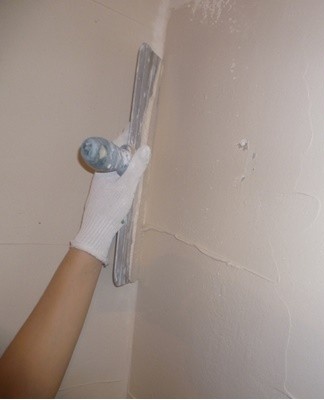
Applying the starter layer
The recommended thickness is one and a half millimeters. Rough material is used to hide grooves, holes, joints. Apply the starter mix with a wide spatula, holding the tool at a 30 degree angle to the surface. With a trowel, take a small amount of mass and evenly distribute with a spatula along the wall, moving diagonally. If the surface has large drops, you should additionally use the ruler up to 1.5 meters long. After the first layer dries, you need to repeat the procedure.
Align corners step by step
Internal and external corners, niches, arches are difficult to putty.It is convenient to process smooth areas with a special corner tool:
- lay a serpyanka trellis along the corner;
- take a little solution with a small spatula;
- applied to the entire height of the corner (slope);
- with an angled spatula, level the mixture in one motion.
When aligning the outer corners, the mass is applied on both sides. To create a sharp slope, use metal corners, which are "planted" on the base layer of mastic, leveled with an angular spatula, and then treated with finishing material. Periodically check the plane with a build level.
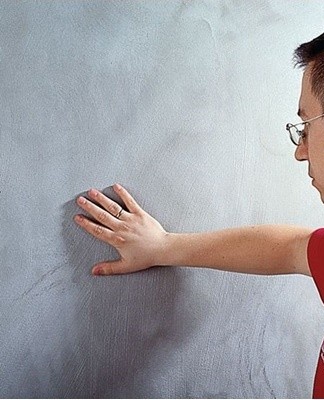
First grout after drying
To do this, use a sanding bar with sandpaper or an abrasive pile, a sander for large wall surfaces. The first grouting is done with coarse sandpaper with a grit of 60 or a sanding mesh. Start the work from the corner, moving up and down and grabbing a strip 1 meter wide. Make an effortless spiral movement so as not to break the coating.

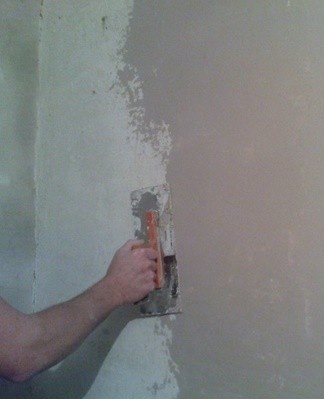
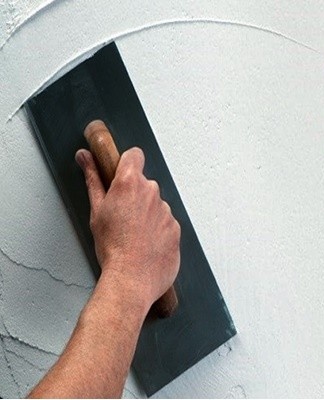
Top coat
Finishing material can be putty on the walls after drying and grouting the starting layer.The mixture is applied in a thin layer (usually up to 2 millimeters) to smooth the walls and eliminate the smallest pores and cracks. Put putty on a larger tool with a small spatula, spread it evenly over the surface.
Drying
To properly dry the treated walls, it is not recommended to accelerate the natural drying process. Do not direct fan heaters at base, use hair dryers, electric heaters. The material dries in 12-16 hours, and if specially heated, the layer will crack.It is not necessary to organize drafts, it is enough to organize internal ventilation - open the doors to the living rooms, kitchen, bathroom. Entrance and balcony doors, vents are left closed.
Sanding
The finish coat gains strength in half a day, but it is better to start sanding and sanding the surface in a day. The coating is cleaned with sandpaper - first coarse, then fine-grained. When processing, you do not need to apply strong pressure to the tool, so as not to scratch the coating.
Sharpening
For the final finish, you can use blocks, hand floats or grinders. To obtain a perfectly smooth surface, use fine grit sandpaper (80-120) or an abrasive mesh. In a single pass, they capture a strip of wall of about one meter, rubbing the coating in a circular motion without pressure.
Important! After completing all stages of work, you need to carefully remove construction dust from the walls and treat them with a primer.
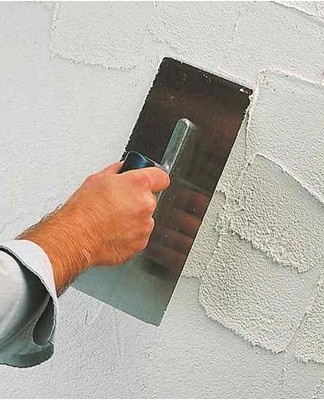
Features of puttying under wallpaper
In order to properly level the walls for wallpapering, puttying is carried out in wide, overlapping strips using a large trowel. The tool is held on the surface at an angle of 20-30 degrees, observing the same pressure. This is followed by standard steps:
- drying the base coat;
- raw primary grout;
- apply a finishing coat;
- drying and grinding.
If bumps remain on the surface, they are removed with an abrasive. Sometimes it takes multiple grinding approaches to get the plane "to zero" - to make it perfectly flat.
Tips and tricks from experienced craftsmen
Putty for painting is carried out in the same way as for wallpaper.The difference is that after careful leveling and smoothing with an abrasive material, a finishing coat of plaster should be applied. Additional recommendations for do-it-yourself wall putty:
- It is necessary to properly prepare the solution by adding the mixture to the water, and not vice versa.
- To prevent the mass from drying out, the putty should be kneaded in small portions.
- Allow the coating to dry completely before applying each coat.
- The tool must be constantly washed - small particles of dried mass can spoil the treated surface.
- To prepare the base for the wallpaper, carefully sand the walls, after which a layer of primer should be applied.
Before puttying, it is necessary to calculate the amount of material, prepare the necessary tool and prepare the base.