How to glue wallpaper on the ceiling, step-by-step instructions for self-help
During repairs, beginners have a question: how to stick the wallpaper on the ceiling yourself? This type of work requires certain knowledge and skills. First, you need to choose the materials, buy the right glue, the right tools, and be patient. Ceiling gluing is a laborious process, which consists of preparatory work on the preparation of the ceiling surface and the gluing itself.
In which cases it is not necessary to glue the ceiling wallpaper
There are cases when it is better to refuse to wallpaper the ceiling. For example, if the surface is uneven or consists of narrow floor panels, between which many butt joints are visible. Alignment and preparatory finishing of such a ceiling will take a lot of time and money.
It makes no sense to stick paper over it in the kitchen or bathroom. Moist air vapors will constantly rise and will soon warp and peel off the paper liner. Designers do not recommend wallpapering ceilings in small rooms.Such a finish will visually reduce the room even more. It is advisable to paste the wallpaper on a flat concrete or plaster ceiling surface in a moisture-proof room with a height of more than 3.5 meters.
How to choose wallpaper for the ceiling
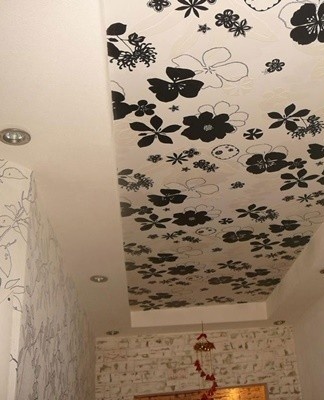
On sale you can find special wallpapers for ceilings. They differ from others in a relief pattern and thicker paper. Usually this type of wallpaper is white. Fans of interesting colors and original patterns can purchase paper, vinyl or non-woven wallpaper for painting with water-dispersion paint.
The following materials are suitable for gluing the ceiling:
- light but firm;
- the weight of the sheet of wallpaper should not exceed 110-150 g / m2;
- no more than 50-60 centimeters wide;
- white or pastel shade;
- preferably non-woven.
Paper
The service life of such a finish is only 3-5 years. Over time, the paper coating loses its appearance under the influence of dust, light, cigarette smoke. But the cost of one roll is minimal. You will need to make repairs using this material together. The glue is applied to the paper itself and to the ceiling.
Nonwoven
Such a two-layer, but lightweight wallpaper is ideal for gluing on a ceiling surface. The glue is applied only to the ceiling, which means that you can do the repair yourself. The cost of rollers is slightly higher, but such a finish will last more than 10 years. In addition, non-woven wallpapers can have a relief pattern that hides small surface defects, and they can also be tinted with acrylic or water-soluble paint every year.
Vinyl
Such wallpapers can have a paper or non-woven backing. It is this detail that affects the price of the material and the method of gluing. Vinyl siding has a dense structure, an interesting pattern or an original embossed design. This finish will last about 10 years.
Fiberglass
The fiberglass material is glass-based. This finish does not absorb moisture, inhibit fungus growth or accumulate dust. The material can be washed, its quality does not change even under mechanical stress. Fiberglass fabric can be painted with water-based paint or latex paint.
It is true that the price is high. But the service life is more than 10 years.
Liquid
This is a kind of decorative plaster, consisting only of paper-textile putty and mortar-glue. It is applied with a spatula to the surface and leveled with a rubber roller. The paper from which the liquid wallpaper is made does not tolerate moisture and accumulates dust. Over time, this coating will become dusty or flake off. But it can be updated at any time by applying part of the new composition to the surface, having previously cleaned the old one.
Possible gluing difficulties
When wallpapering the ceiling, beginners may have difficulty. For example, strips of paper begin to tear during use. There are several reasons for this problem: too thin wallpaper was selected, a lot of glue was applied, the material was soaked in adhesive for a long time. Also, you will not be able to glue the ceiling yourself with paper strips, you need an assistant.
It is easier to buy non-woven wallpaper for finishing. Medium-thick glue is applied only to the ceiling and left for 30 minutes for impregnation.Then the rolled up dry tape is rolled out on the surface and pressed tightly. The fabric is smoothed with a cloth or roller.
How to glue with your own hands
The selected type of wallpaper is cut into strips of the desired length and glued to the ceiling. First, you need to impregnate the surfaces to be bonded with an adhesive.
Surface preparation
Before sticking on the surface, you need to prepare it. Old paper or plaster coverings must be removed. The wallpaper is removed with a spatula, after wetting the surface with warm water. The enamel paint cannot be removed, however, it must hold firmly and not peel or fall off. Lime or acrylic paint is best removed by first washing the surface with warm water. The ceiling should be smooth and even, not crumbling or peeling.
Alignment
The uneven ceiling is leveled with plasterboard. True, such a repair is suitable for rooms with high walls. After leveling the surface with drywall, you need to glue the seams with perforated paper and carefully putty them. The top should be primed with an acrylic primer before applying the adhesive.
putty
If there are seams, holes or flaws on the surface, they should be hidden. For this purpose, a plaster putty is used, which is diluted with water. The ceiling is fully plastered or some separate areas are covered. After plastering, the surface is treated with an acrylic primer. It dries quickly, does not emit toxins and prevents the appearance of yellow spots on the paper.
To slice
Before proceeding with gluing, it is necessary to calculate the amount of material, cut the roll into strips of the required length and mark the ceiling.It is better to glue the wallpaper starting from the center, since this is where the pattern should fit perfectly.
The canvases should be placed vertically to the stream of light coming from the window. Joints glued in this manner will not show joints. The length of the panel must be equal to the length of the ceiling (plus 5 centimeters of reserve). The quantity depends on the width of the surface to be bonded.
When cutting wallpaper with a pattern, you need to adjust the panels according to the pattern. Each strip should start with the same ornament. Smooth, single-color wallpaper without a pattern can be cut, taking into account only the length of the surface to be glued.
How to properly cover with an adhesive solution
Each type of wallpaper has its own type of glue. Do not use an unsuitable adhesive when bonding the surface. Dry glue is mixed with water and left to swell for 30 minutes. Then the adhesive mass of medium density is applied to the wallpaper and the ceiling. True, each type of material has its own bonding technology.
Instructions for covering different types of wallpaper with an adhesive solution:
- Paper. First, the glue is applied to the ceiling for 10-15 minutes for impregnation. Then a thin layer of adhesive solution is passed over the entire canvas. The impregnation paper needs 5 minutes.
- Nonwoven. Glue is applied only to the ceiling for 15-25 minutes for impregnation. Dry strips are glued to the surface.
- Vinyl. If the base is paper, then the strips and the ceiling are impregnated with glue. If the material is non-woven, then only the wall should be treated with an adhesive solution. The soaking time is 10-25 minutes.
How to glue correctly
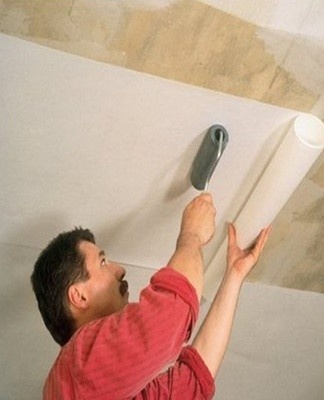
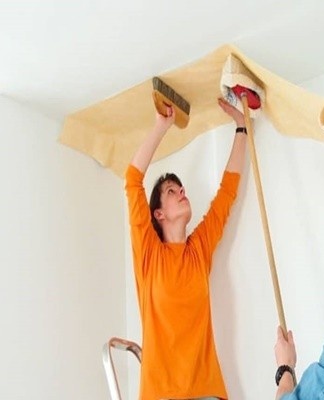
The first strip is glued along the line drawn on the ceiling. The rest is joined according to the pattern and along the width of the surface. The dry cloth can be rolled up and glued to the ceiling coated with glue by yourself, standing on a ladder or on a table. The glue-impregnated strip should be folded like an accordion on top.
To stick to the ceiling with such a panel, you will need the help of an additional person. He must hold the folded wallpaper in his hands while the artist glues the strip to the ceiling. The cloth should be firmly pressed against the surface, then walk on it with a rubber roller. Level the wallpaper from the center to the edges. Excess glue, driven out, is removed with a cloth.
The canvas should fit snugly to the surface, not bulge or form wrinkles.
Common mistakes when pasting
For beginners, a panel glued to the ceiling is sometimes blown in certain places. This means that the surface has not been carefully treated with glue. Before starting work, you need to run the adhesive solution over the entire strip of paper or the entire ceiling, leaving no unlubricated areas.
Sometimes errors occur when gluing a place near the lamp. You don't need to punch holes in the canvas in advance. The wire exit slot is cut out of the strip already glued to the ceiling. Before gluing places near electrical appliances, you must first turn off the electricity to the shield and remove all ceiling lights.
Additional tips and tricks
Pasting the room with wallpaper is done with closed windows and doors. There must be no drafts in the room, otherwise the strips will come off. It is best to carry out repairs in summer or winter, with the radiators on. The glue should dry at room temperature.Until the adhesive is completely seized, the sections protruding on the side wall are cut. The paper is cut with a spatula or a sharp knife.
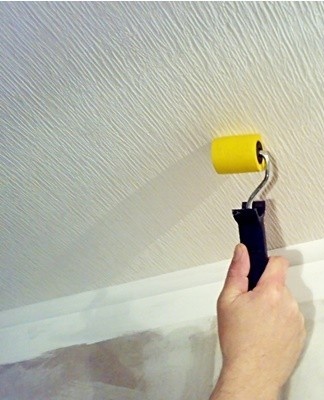
If the wallpaper is used for painting, you need to give them time to dry completely. Then the water-based paint is applied to the surface using a roller. The ceiling is painted several times until a perfectly homogeneous result is obtained. If an air bubble is encountered, it should be pierced with a needle, and the puncture site should be carefully painted.