How to hang a chandelier on a stretch ceiling with your own hands, setting the rules
Regardless of the type of construction, the stretch ceiling always retreats at a certain distance from the rough surface. This feature both simplifies and complicates the task of fixing light sources. Therefore, it is impossible to unequivocally resolve the question of how a chandelier should be hung on a stretch ceiling. To do this, it is necessary to take into account a number of important nuances, including the connection features of lighting sources.
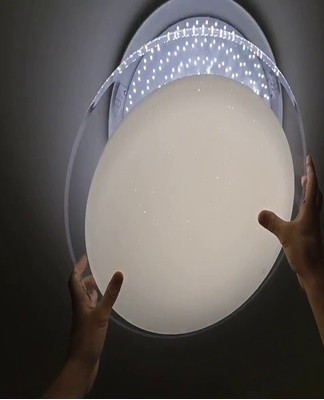
What lamps are there
A stretch ceiling is understood as a canvas or PVC canvas, fixed above the corresponding structure. The installation is carried out using glazing beads, harpoons or wedges. After fixing, there is a free space between the base and the stretch ceiling, in which the electrical wiring can be hidden.
When choosing lamps and chandeliers, it should be borne in mind that some types of materials from which the canvas is made cannot tolerate constant exposure to high temperatures. The second nuance that you need to pay attention to is that the stretch ceiling is fixed only along the perimeter. That is, the canvas wrinkles when pressed.
In addition, when choosing a chandelier and lamps, it is also recommended to take into account that the lamps are mounted exclusively on the rough ceiling.
Incandescent
Incandescent lamps are not recommended for chandeliers attached to a stretch ceiling. These light sources heat up quickly and can damage the fabric. For chandeliers mounted on a stretch ceiling, it is allowed to purchase incandescent lamps with a power of less than 60 watts. Such sources can be fixed at a distance of more than 40 centimeters from the canvas.
LEDs
LED lamps are considered preferable for mounting on a stretch ceiling. Such light sources consume little electricity and do not heat up. The LED lamps can be encased in fabric or PVC fabric.
Halogen
Recommendations for the use of incandescent lamps also apply to halogen lamps. There is no significant difference (compared to stretch ceilings) between these light sources.
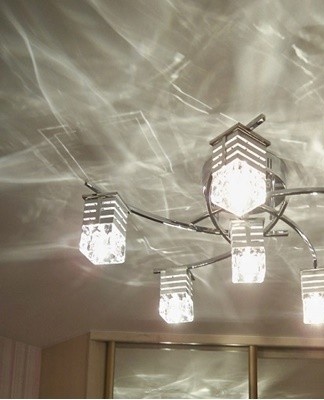
Selection rules
When choosing chandeliers for mounting on stretch ceilings, the following requirements should be considered:
- ceilings should be directed down and to the sides;
- the base is not made of metal (the metal heats up, deforming the fabric);
- the presence of a universal ceiling into which you can insert LED lamps;
- the ceiling should completely cover the lamp, thus protecting the canvas from the effects of artificial light;
- the minimum distance from the canvas to the ceiling is 20 centimeters.

The latter must be completed. The ceiling must be 20 centimeters from the section, and not from the rough ceiling. It is also recommended to purchase chandeliers without a pointed end, so as not to damage the canvas during installation.
Tools and materials
To install the chandelier, you will need:
- soldering iron;
- insulating tape;
- knife;
- ruler, pencil;
- screwdriver (screwdriver);
- self-tapping screws.
You will also need terminals to extend the wires and the wiring itself.
Stepladder or table
Due to the fact that the chandelier is mounted below the ceiling, a stepladder is required to mount the lamp. Instead of the latter, you can take a table of sufficient height. It is recommended to place the stepladder slightly away from the chandelier, so as to allow convenient access to the attachment point.
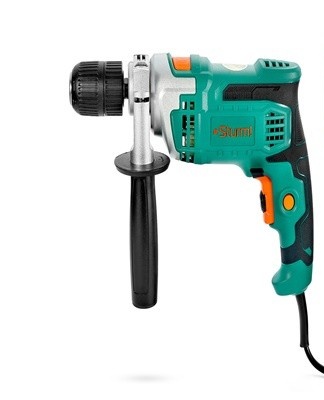
Drill
A drill may be required to mount a clip that attaches directly to the sub-ceiling.
Insulated handle pliers
Pliers are needed to work with the wiring. The requirement for handle insulation is due to the need to ensure safety during installation. The power is not always turned off when installing a chandelier. And the insulated handles will protect you from electric shock.
Screwdriver
A screwdriver (screwdriver) is needed to attach the chandelier to the fastening element that holds the lamp to the ceiling.
Electrical tape
Such a tape will be needed to insulate the bare wires leading to the chandelier.
Wire VVGng-LS
If during installation it is necessary to bring electrical wiring, it is recommended to take a cable in the VVGng-LS format. This thread is very strong.
Terminal blocks for wire extension
Terminal blocks may be required when the available wires are not long enough. These devices are cheap.Therefore, it is recommended to stock up on terminal blocks before starting work.
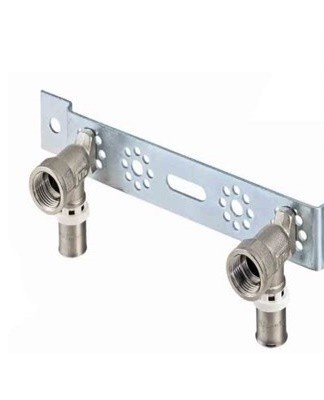
Correct type mounting plates
The type of mounting plate is selected taking into account the design features of a particular chandelier. In some cases, you will need wooden blocks to secure the fixture.
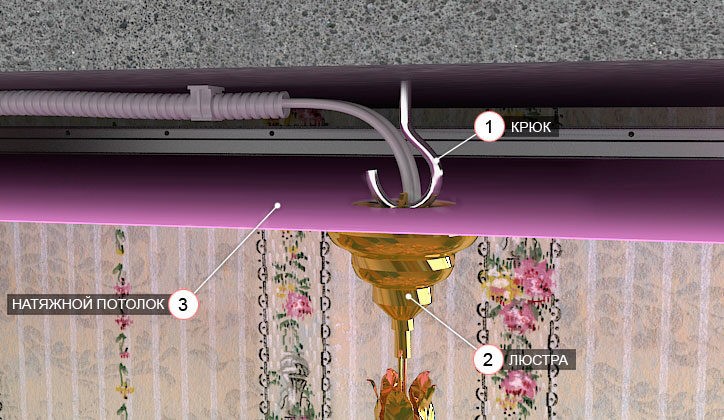
anchor hook
Some chandelier designs may require an anchor hook to hang. The latter is mounted directly on the sub-ceiling.
Self-tapping screws
Self-tapping screws are not always needed, but it is necessary to prepare such fasteners.
Pegs
Anchors are required to mount the bracket to a rough ceiling. These components are necessary regardless of the design features of the luminaire.
Plastic rings for stretch ceiling
Due to the fact that during installation it is necessary to cut the canvas, the edges of the hole made should be closed. Otherwise, the material will not only spoil the appearance of the stretch ceiling, but also begin to "diverge". To do this, you need to install special plastic rings.
Mortgage block
As mentioned above, when installing the board in some cases it is necessary to attach a wooden block of the appropriate size to the ceiling.
Preparing the wiring
Before starting work, it is necessary to determine which wires refer to zero, phase and ground. For this, it is recommended to use a special “dial” tool. When connecting, it is important not to confuse the neutral and phase wires with each other. Otherwise, the chandelier will shock.

De-energize the room
Having found out the type of wires, you need to completely de-energize the room. It is forbidden to start the installation of the chandelier when the power is on.
Wiring
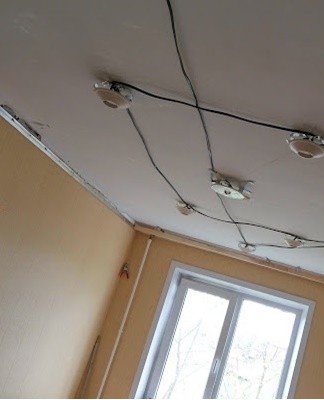
If the chandelier is mounted far from the place where the wiring passes, then it is necessary to stretch the cables under the stretch ceiling to the point of installation of the lamp.
Ripple
Often when laying a cable, a corrugation is used, which is attached to the rough ceiling by means of dowels. You can also use zip ties or plastic boxes for this. When passing through the corrugation, it is recommended to leave at least 30 centimeters of cable on each side.
To mount if necessary
The extension of the cable is carried out using terminal blocks, to which already laid and new wires are supplied on each side.
Fixation
Chandeliers are mounted on a stretch ceiling, mainly using anchor hooks or mounting strips. The choice of installation method largely depends on the characteristics of the luminaire.
On mounting plate
This mounting option is used when the design of the luminaire provides for mounting on a longitudinal strip or in the form of a cross. The latter determines the size of the platform on which the entire structure is fixed. You must also choose the right thickness for the board, taking into account the weight of the luminaire. The base of the mounting plate is most often made of a bar or plywood.
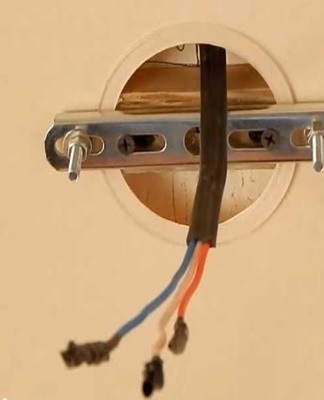
Longitudinal
You must drill holes for the base before installing the canvas. The thickness of the bar should correspond to the distance between the rough ceiling and the stretch ceiling. After that you need:
- Cut a hole in the canvas through which the threads will be passed.
- Along the edge of the cut hole, attach the longitudinal bar to the base using self-tapping screws.
- Fix the base of the chandelier on the bar.
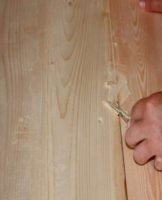
It is also recommended to sand the wooden base before starting work. After that, a chandelier is attached to the base and ceilings are installed.
cruciform
The chandelier is mounted on a cruciform bar according to an algorithm similar to that described above. However, in this case, a heavier structure is used. In this regard, the installation is carried out according to the following scheme:
- Before starting the stretching of the canvas, the base and the bar in the form of a cross are fixed on the rough ceiling.
- After stretching, 5 holes are cut in the canvas. One (located in the middle) is for the wires, the rest for the ties.
- A chandelier is attached to the transom.
Due to the fact that small holes are cut for the fasteners, it is difficult to find suitable thermal rings to protect the canvas. You can replace these parts with plastic pieces that need to be glued to the stretch ceiling.
Fixing hook
Most compact chandeliers are hook mounted. For this mounting method you will need a hammer drill with a set of concrete drills.
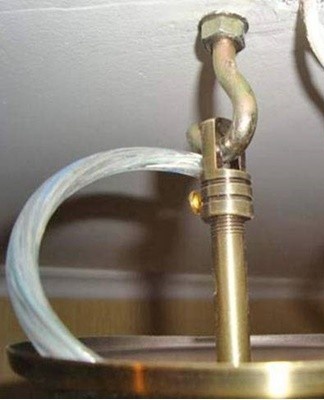
Anchor
To hang the chandeliers on an anchor hook, you will need:
- Using an awl with an 8-10 millimeter drill, make a hole in the ceiling with a depth of 4 millimeters.
- Use a hammer to drive the anchor into the hole.
- Insert the hook into the anchor and tighten until it stops.
- Hang the lamp.
The difficulty of this method of installation lies in the fact that it is necessary to tighten the hook so that this part does not protrude from the stretched ceiling. In this regard, it is recommended to accurately measure the distance from the concrete floor to the canvas and make a hole of the required depth before starting work.
Thanks to fixing
This option is only suitable for private homes. To hang a chandelier, you will need:
- Make a through hole in the interfloor slab.
- Place an orthogonal plate on the floor of the upper floor (size 25x25 or 35x35 centimeters, thickness - no more than 3 millimeters).
- Fix the second plate under the ceiling.
- Connect the two plates with a hook and a nut.
Chandeliers of different sizes (including large ones) can be hung using the through bracket.
We connect correctly to the network
You can connect the luminaire to the network after the installation is complete. To do this, push all the wires into the hole in the stretch ceiling. In addition it is necessary:
- Measure the required length of wires. The cable must be completely covered by the decorative cover of the chandelier. Cut the wiring if necessary.
- Strip the ends of the bare wires.
- Using the terminals, connect the electrical cables to the wires of the chandelier.
In the last operation, you should be guided by the instructions attached to the luminaire. At the end of the work, it is recommended to close the terminal box. If the latter is not there, the wires can be connected by winding them together. In this case, the bare ends must be covered with insulating tape.
Functional check
Finally, you need to check the performance of the lighting fixture. To do this, it is enough to connect the chandelier to the power supply and turn on the bulbs. If the latter lights up, the connection has been made correctly.

How to decorate the point of attachment
As mentioned above, at the point where the chandelier is fixed in the false ceiling, a round hole is formed through which the wiring is led. At the end of the work, this area must be closed with a plastic cover. The latter is fixed directly to the canvas with glue.
Tips and potential problems
Basically, problems arise due to the fact that the distance between the anchor hole and the stretch ceiling is incorrectly calculated.In this case, you can attach a chain to the hook that can hold the large lamp.
The second common problem is that the diameter of the electrical cables in the house does not always correspond to the dimensions of the wires of the chandelier. In such situations, a terminal connection should be used.
Also, problems often arise when installing a spider chandelier. The latter has a non-standard design. The ceilings of such a luminaire are fixed on elongated strips, which must also be fixed to the ceiling. In this case, you need to make several holes in the canvas.