Do-it-yourself bathroom enamel repair methods at home, how to remove scratches
Acrylic bathtubs are more demanding in terms of maintenance. Such a surface does not tolerate mechanical stress, due to which chips, scratches and cracks are formed. Such defects contribute to the formation of rust. To repair the enamel in the bathroom, various methods are used, each of which is selected depending on the type and characteristics of the damage.
Basic methods
The need for timely restoration of the enamel is due to the fact that the defects of the bath have several unpleasant consequences:
- Rust formation. As corrosion grows in the problem area, a through-hole forms, which is quite difficult to eliminate. Often, due to rust, you have to change the bath.
- Development of bacterial microflora. The grooves on the acrylic collect grease particles and other contaminants, which create an environment conducive to the emergence of pathogens.
- Unsightly.Chips and rust make the tub look unattractive.
The choice of the method of restoring the walls of the bowl is chosen depending on the nature of the damage. For minor cracks and chips, a layer of enamel is applied and through-holes are removed with acrylic.
At the same time, regardless of the chosen method of restoration, in each case it is recommended to carry out preparatory measures, after which you can proceed with the repair.
Two-component enamel application
This option is suitable for eliminating minor defects. A mixture of enamel and hardener is applied like paint.
Acrylic filling
Acrylic filler significantly extends the life of the bathroom. For this, the mixture is applied to a previously prepared surface. Plumbing after the procedure is ready for use after two days.
Install a bathtub in a bathtub
This option is used for direct damage. In this case, an acrylic insert is attached to the place of the defect on the other side of the bowl with glue.
How to properly prepare the surface at home
To restore a steel, cast iron or other bath, you will need to perform the following manipulations necessary for the preparation of the surface for the application of acrylic:
- Clean the surface of the bowl with abrasive substances (washing powder is suitable).
- Sand the bowl with sandpaper or a grinder. The procedure should be carried out until scratches appear.
- Remove the soap and crumbs from the bowl. Then you need to first apply oxalic acid, then soda.
- Fill the tub to the rim, wait 10 minutes and drain the water. After that, you need to wipe the bowl dry.
- Apply automotive sealant to areas with defects.After drying, the material must be sanded, and the bath must be cleaned of dust.
- Treat the bowl with a degreaser (alcohol) and wipe with lint-free towels.
At the end of the described manipulations, you need to remove all plumbing fixtures: siphon, shower hose and others. In the end, it is necessary to seal the places adjoining the bowl with tape, and cover the floor and adjacent household appliances with cling film.
Tools and Materials Required
To restore the bathtub, you will need:
- cleaning powder;
- solvent (alcohol is suitable);
- sandpaper or sander;
- fast curing car filler;
- screwdriver, wrench and other tools needed to remove the plumbing.
Additionally, you will need a lint-free cloth, paper, plastic wrap, and a vacuum cleaner to remove dirt and dust.
How to apply enamel correctly
The restoration of the enamel bath is carried out in several stages:
- The enamel is mixed with the hardener in a separate container.
- Enamel is applied to the bowl using a brush and roller. It is recommended to machine the horizontal surfaces first, then the vertical ones.
- Immediately on the first layer, without waiting for drying, the second is applied.
After this treatment, you can use the bathroom after 5 days. When painting the bowl with enamel, it is recommended to wear protective equipment: the paint has a pungent smell.
How to restore with a glass with your own hands
Glass restoration is convenient because this material flows into the bowl on its own, forming a flat surface. To eliminate defects in the bath, you will need to perform the following steps:
- Mix liquid acrylic in a separate container.
- Collect a small amount of acrylic in a glass. Place the container on the corner of the bath and pour the material until the mixture reaches the middle of the wall of the bowl. After that, you need to move the glass around the perimeter.
- Repeat the process on other parts of the bath.
If bubbles form during the restoration, these defects should be smoothed out with a roller. This mixture dries in four days. To restore the bath, you can also opt for quick-drying acrylic.
Application of the acrylic liner
Plumbing renovation inserts are sold in stores. For a quick bath restore, you will need to do the following:
- Using a grinder, dismantle the harness.
- Clean the surface and cut the technological edge on the insert with a grinder.
- Insert the insert into the bath and make marks along which technological holes will be cut (for draining, etc.).
- Drill holes in the liner.
- Apply two-component mixture and putty to the surface of the bowl, working in a circle around the technological holes. It is recommended to purchase both materials with the liner. Foam should be applied both on the bottom and on the walls.
- Insert insert, press down and remove excess sealant and foam.
Upon completion of the described manipulations, you need to install a siphon and a tap, then fill the bath to the brim. In this form, the updated bowl is recommended to be stored for at least a day. Then you can drain the water and use the bathroom.
Cast iron bath repair
Repair of a cast-iron bath is carried out according to the described algorithm.The difference between these procedures can be traced to the fact that in this case other reducing compositions are used.
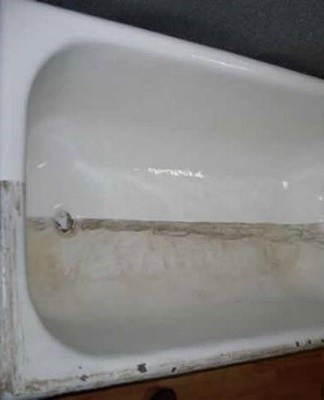
Remove superficial scratches
It is recommended to immediately repair any scratches on the surface of the tub. Otherwise, rust will form in this place over time, which is more difficult to remove.
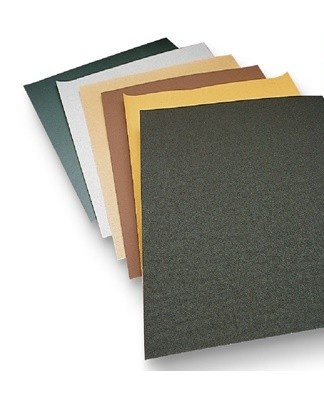
Fine grit sandpaper
It will not work to repair the bath with sandpaper. This material is used to grout the damage, after which you need to apply acrylic or another agent used to treat the bowl.
Fine abrasive car polish
This material is used in the second stage of scratch removal. It is recommended to apply car polish on a wet surface, making sure that the surface has acquired a matte shade.To do this, you must first process the problem area vertically, and then horizontally.
Abrasive-free wax polish
This varnish is applied at the finishing stage. The wax is water-repellent and gives a shine to the treated surface. After applying this polish, the bowl should be rinsed with liquid detergent.
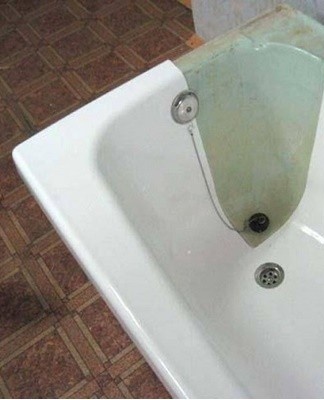
Methods for removing chips and deep scratches
To get rid of chips and deep scratches, you will need more expensive tools. In addition, in each of the described cases, the surface is prepared according to the specified algorithm (derusting, degreasing, etc.).
porcelain filling
This option is to use a piece of porcelain and epoxy. The first material should be ground to a powder state. After that, you need to apply epoxy resin to the problem area and pour porcelain on it. If necessary, the defect is closed in two layers. In this case, the material should be applied after two hours. At the end of the procedure, the sealed defect is sanded.
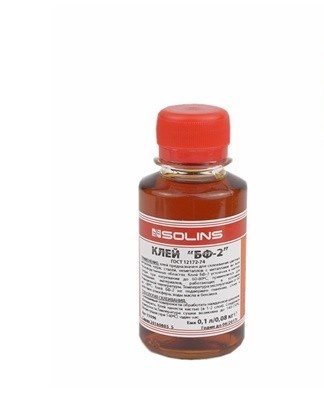
Application of BF-2 glue
BF-2 glue contains a polymer that forms a flat surface at the location of a chip in the metal. This tool, before sealing the problem area, is mixed with toothpowder, dry whitewash or chalk. After preparation, the material is applied to the place where the defect is located and left for a day. If necessary, scratches and chips are treated in two layers. In this case, you must wait at least three days.
Use automotive sealant and enamel
For covering the bathroom, Body Soft or NOVOL Fiber sealants are used. The material is applied to a prepared surface using a rubber or plastic spatula. Putty during the procedure should fill all the voids.
After application, the material is sanded and coated with automotive or two-component enamel according to the described algorithm.
Localized filling of the neckline
To eliminate minor defects localized in a small area, enamel is used for restoration. The material is applied to the problem area with a thin layer. After four hours, the procedure must be repeated. You can use the bathroom after a day.
Additional tips and tricks
The bathtub can be repaired by cold welding or epoxy. The first agent is applied to the prepared surface and then sanded. In the second case, first a layer of epoxy resin is laid, then a fiberglass, after which again this material. Small cracks are also repaired by soldering using 100 to 200 watt soldering irons and steel and aluminum flux.
During restoration work, it is recommended to remove animals and children from the house, as well as to use personal protective equipment. To add shine, the bath should be treated with a soft flannel.