Ideas for creating New Year's drawings on the windows, how to make them and what to depict
Preparations for celebrating the New Year begin well before December 31. Creating a festive atmosphere with your own hands is the most pleasant part of the preparation. Dressing up a Christmas tree, imagining a festive menu and gifts are enjoyable chores that can be combined with home decorating. New Year's drawings, which are made on the windows, not only set the mood. It is a decorative element that can reflect the taste of home owners.
Content
- 1 What can be drawn for the New Year
- 2 How to draw a pattern correctly
- 3 Step by step instructions for drawing Santa Claus and Snow Maiden
- 4 How to draw a snowflake
- 5 How to paint windows with toothpaste
- 6 Gouache painting on windows
- 7 We use flour, semolina and icing sugar
- 8 How to Create Soapy Winter Designs
- 9 Create artificial snow in the decor
- 10 The use of stained glass paints for children
- 11 How to make paper decorations
- 12 PVA and hot melt glue in New Year's designs
- 13 An unusual way - beer and magnesia
- 14 Application of tulle and vinyl for window decoration
What can be drawn for the New Year
The idea of painting on windows originated in Soviet times. This type of decor was accessible to everyone, making the windows more elegant and festive. With the arrival on the market of goods from Europe, America and China, the idea of painting the windows was somewhat forgotten.Apartments and houses began to be decorated from the inside. Over time, modern designers were able to bring back the tradition of window decoration. But now a variety of materials, stencils, paints, garlands began to be used for creativity.
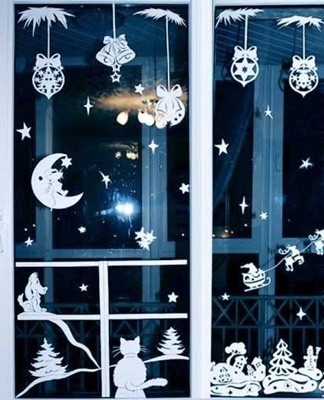
Sometimes in the windows you can see whole plot compositions that bring a smile and lift your spirits. It is customary to take classical subjects as the basis for the drawings:
- Ded Moroz and Snegurochka;
- snowflakes, frosty patterns, stenciled ornament;
- inscriptions in different languages with the obligatory specification of dates;
- candles with flames, contours of a fireplace or bonfire;
- Christmas decorations;
- spruce branches, needles, needles of conifers in different interpretations;
- watch face, watches of different sizes, watch hands;
- children's winter cartoon characters;
- snowmen, forest animals;
- fairy tale heroes;
- imitation of snow, snowdrifts;
- gift boxes;
- fireworks, salutes.
The best option would be to choose a window accessible from inside and outside. This means that the window should not be covered with blackout curtains, blinds or tall furniture.
How to draw a pattern correctly
Modern technology allows you to create beautiful patterns on windows without having the skill or desire to draw. To do this, it is enough to purchase special stencils and apply a pattern. You can create patterns on windows using scrap materials. Each of them has its own advantages and disadvantages.
| Material | The description |
| Toothpaste | It is easily washed off, with its help you can create the simplest drawings and complex plot paintings. |
| Gouache | Excellent material, easy to apply, easy to wash off.With gouache you can draw color pictures. |
| Stained glass paints | Stained glass paints are almost impossible to wash off, but they can be used to create unique paintings. |
| Watercolor | They are washed with water and cleaning powder, adapt well to window panes. |
There are recipes for making alternative formulations at home. A compromise must be found between ease of application and ease of rinsing of the chosen material. Variants are possible when compositional drawings with different bases are created on the same window. Patterns are made with a thin brush in watercolor, and snow or snowdrifts under it are painted with toothpaste.
The most convenient way to create patterns is considered to be the use of stencils. With them, the patterns are smooth, identical and spectacular. To do this, stencils are printed on a thick sheet of paper, cut along the dotted lines. A sheet of paper is applied to the selected area, the edges are fixed with tape, then alternative paints or mixtures are applied with a sponge or brush. You can only remove the stencil once the design is dry. Correct any edges or irregularities with a damp sponge.
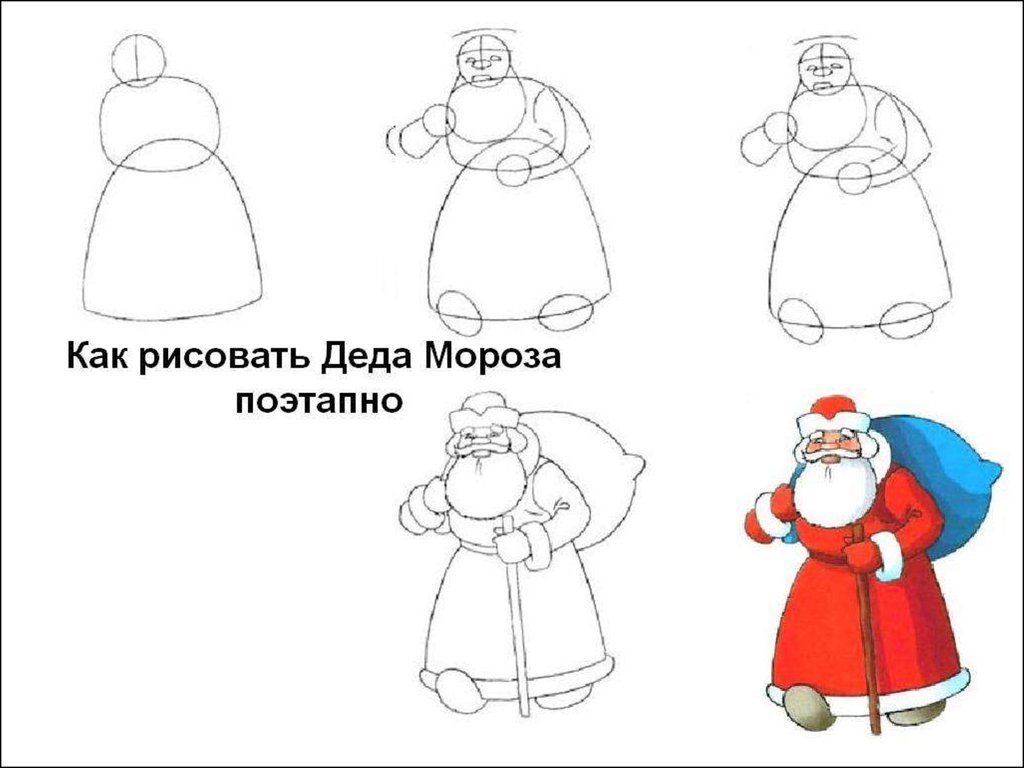
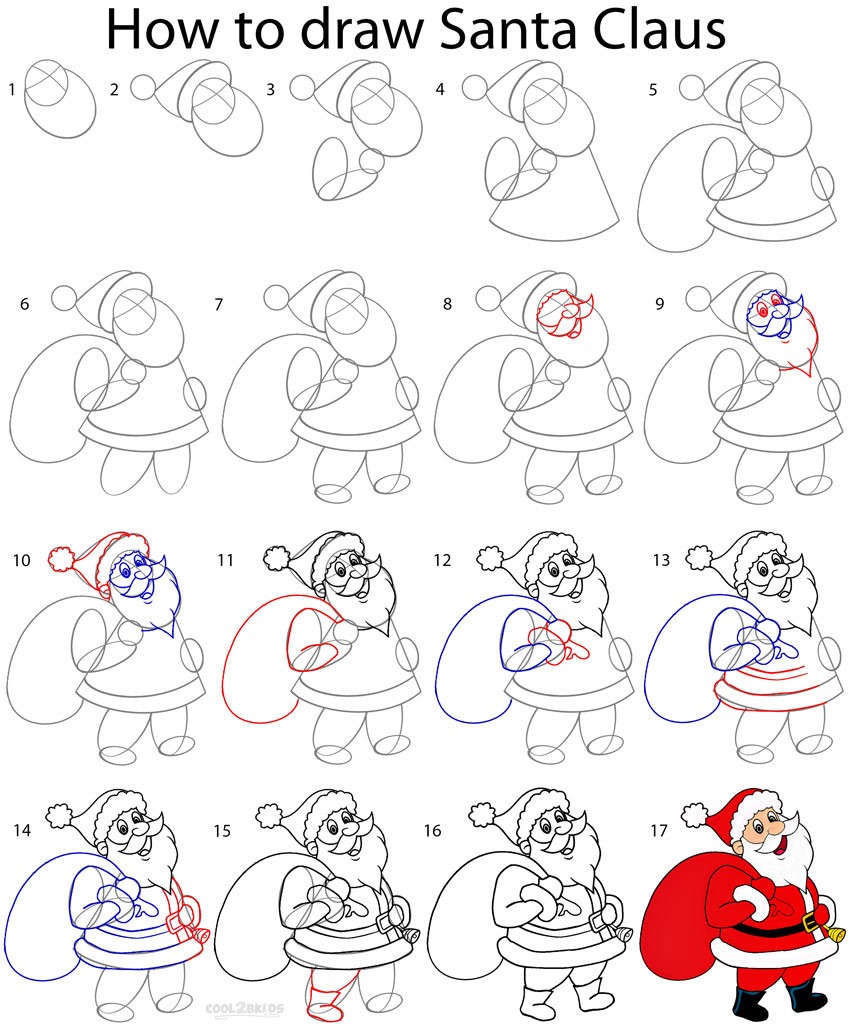
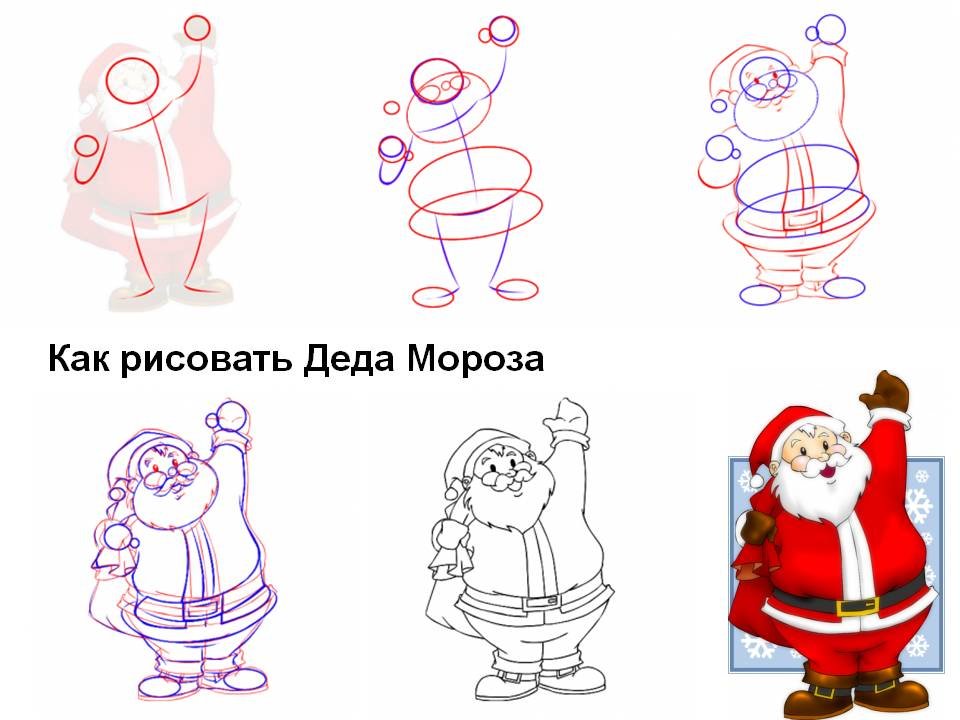
Step by step instructions for drawing Santa Claus and Snow Maiden
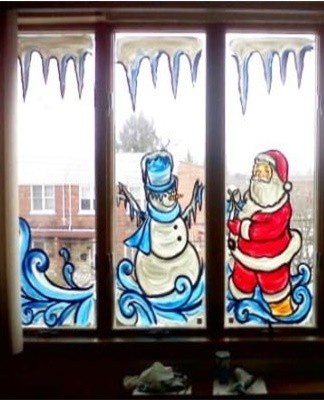
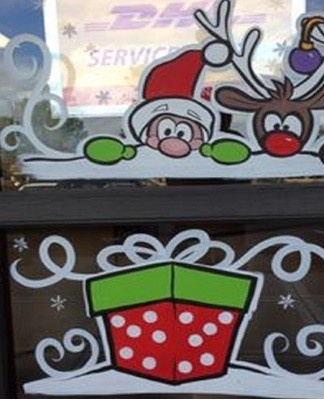
Santa Claus and Snow Maiden are the main characters of the new year. It is a symbol of gifts for children and adults, so fairy-tale characters often decorate windows. It is customary to depict Santa Claus in a blue or red fur coat with a fur collar. One of the main details of his image is his beard. There should always be a bag with gifts behind your shoulders or in your hands.To create a festive mood for your surroundings, you should not deviate from the canon and draw Santa Claus according to your own rules. Chances are young children won't recognize it and the surprise will be spoiled.
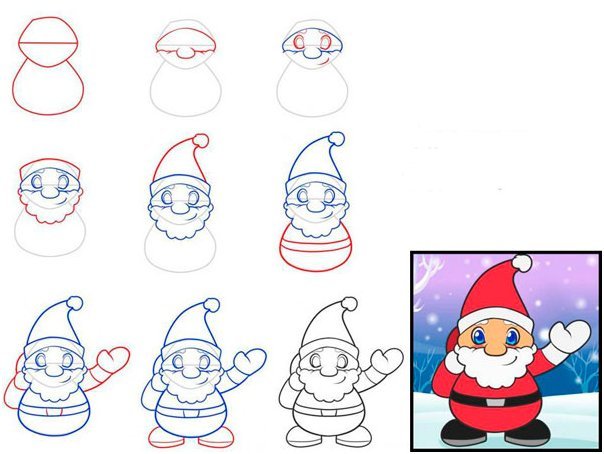
It's easy to draw Santa Claus and Snow Maiden using a selected stencil, but you will have to create details and paint clothes yourself (provided the drawing is colored). Progress:
- Use a thin brush with white or black paint or a black marker to make the marks.
- After marking with a brush or marker, you need to make a sketch, indicating the body parts of Santa Claus and Snow Maiden.
- From the sketch, the details are drawn: a fur coat, a bag, mittens, a beard, a braid, hats.
- After that, the brush or marker should be changed. The figures must be painted in different colors according to the intended pattern.
Attention! When using gouache or watercolors, it is necessary to allow parts of the drawing to dry before picking up and applying a different shade.
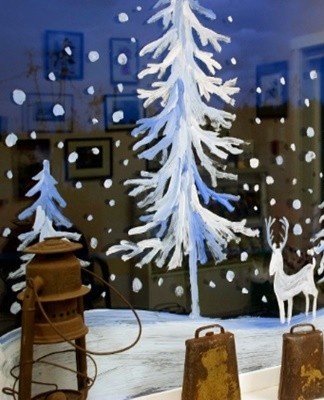
One of the variants of the image of Santa Claus is considered his image in the night sky on a sleigh with reindeer. This plot is familiar to both children and adults. According to the classic scenario, Santa Claus delivers gifts to children at night on a reindeer sleigh.

To depict this plot, it is enough to choose a template and make a drawing on a stencil. By choosing this image, you can solve several problems at the same time. The upper part of the window can be decorated with a sleigh with Santa Claus, and the central and side areas can be used to decorate with symbols of winter and the coming New Year.
How to draw a snowflake
Traditionally, snowflakes are painted on the windows. It is a beautiful, simple and light decorative element. The difficulty level of the snowflake can be increased at will. For drawing, it is customary to use arbitrary sizes or to make symmetrical snowflakes according to a stencil.
Using snowflakes, you can create an entire composition or arrange elements on the window randomly. Options for creating composite paintings using snowflakes:
- TREE. The trunk and branches of the tree are painted with toothpaste, watercolors or gouache. After the painted elements are completely dry, the "crown" of the tree is created from snowflakes of different sizes.
- Plan. To create a pattern, take 5 identical snowflakes. One of them is placed in the center, the others are fixed around the central character.
- Ornament. Snowflakes of the same size and weave are attached to the bottom and top of the window, creating a frame for the composition.
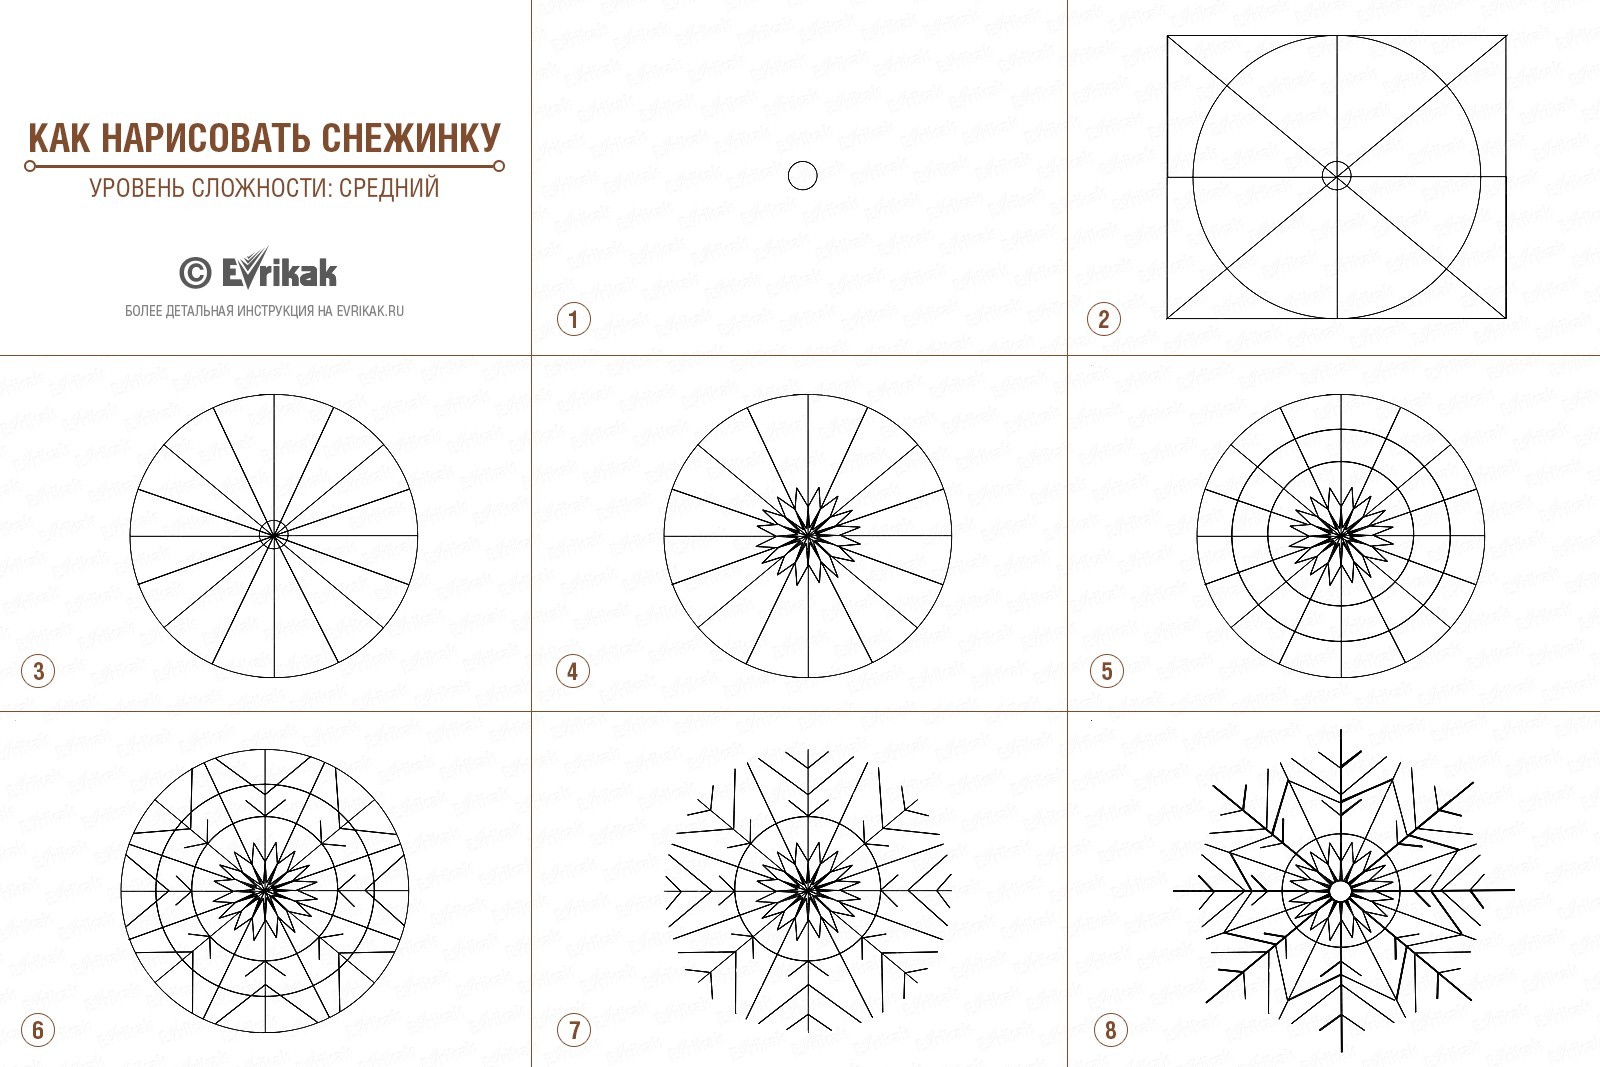

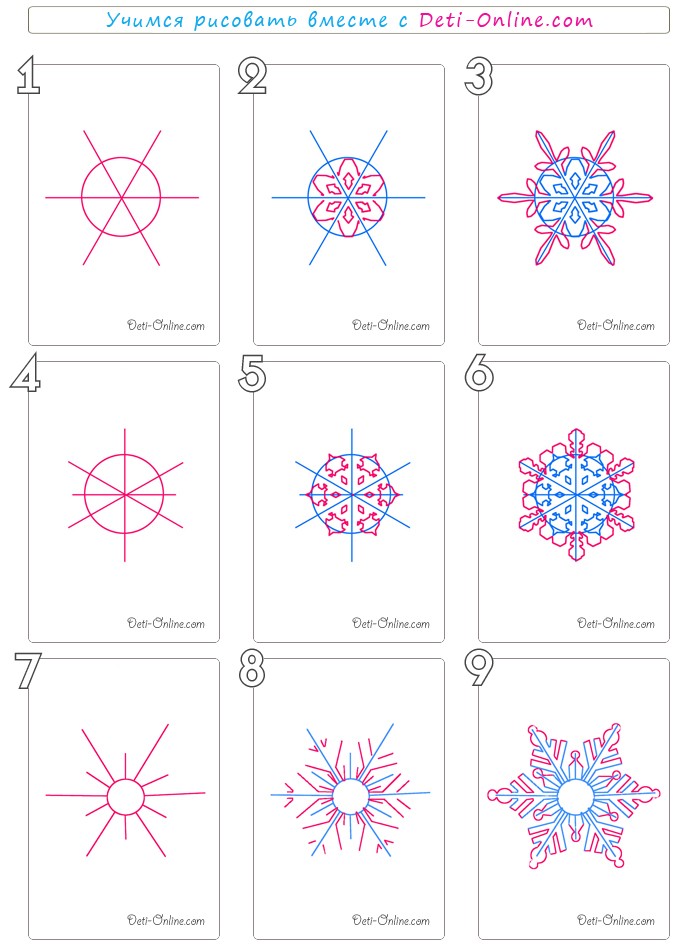
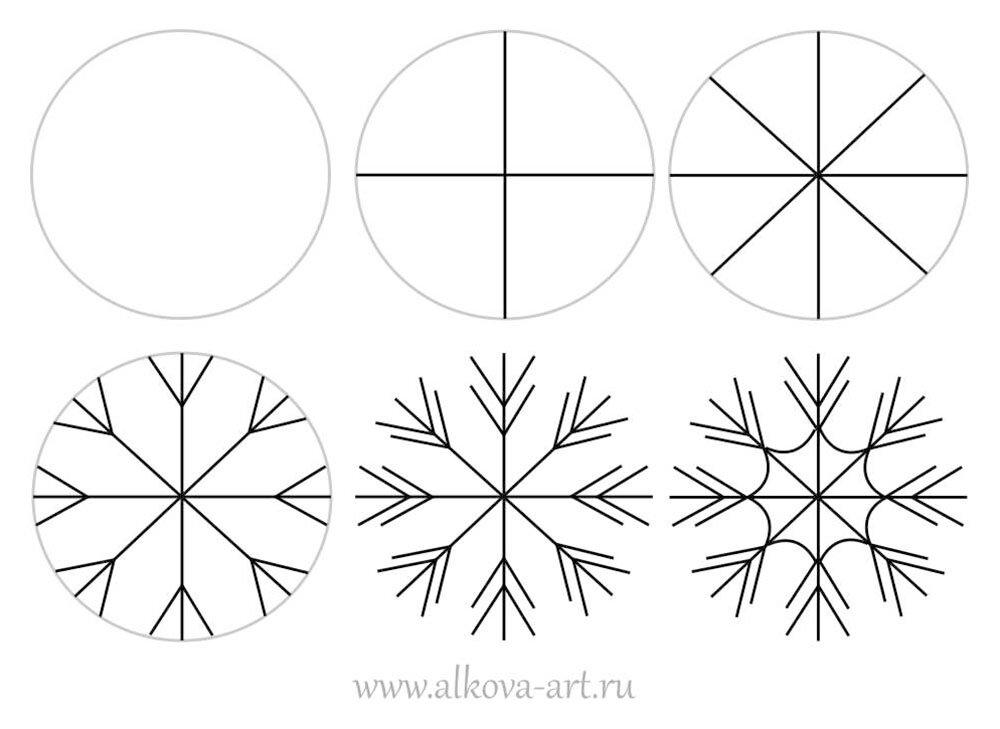
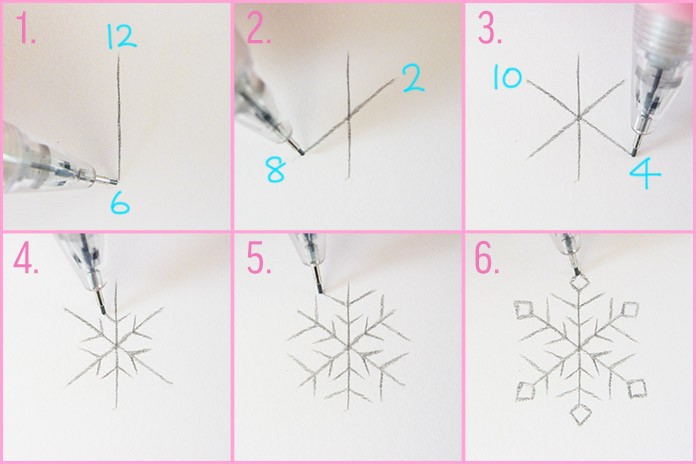
If you choose a watercolor or gouache self-painting method, the brush should be thin so that you can create spaces between the elements. To make a snowflake, drawn by yourself, symmetrical, you need to take a paper round blank.
Progress:
- A circle cut from paper is applied to the window, and the contours are carefully marked.
- Mark the center of the circle and the axis of the snowflake.
- Each axis is shaped.
- The center of the circle is painted according to the planned plan.
Information! Snowflakes are most often painted with white gouache, watercolors or toothpaste. Possible options to create blue, blue, silver or gold snowflakes.

Snowflakes are easy to draw with a stencil. It should be understood that the stencil must be reversed.If a body is cut for decoration with paper snowflakes, then to create a pattern on the glass it is necessary to make a hollow contour, which can be filled with paints or toothpaste. It is this outline that will remain on the glass after removing the stencil.
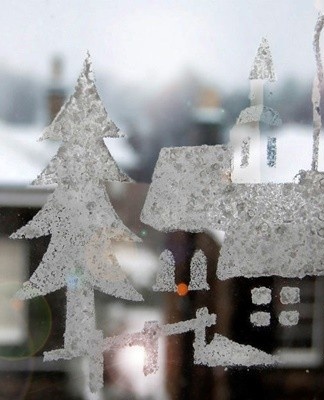
How to paint windows with toothpaste
The most accessible material for painting windows is toothpaste. Traditionally, drawings are made with white toothpaste, but modern materials allow you to take additional dyes and create color images with toothpaste.
To decorate a window with toothpaste, you need to prepare the following materials:
- toothpaste (white, blue or mixed with dyes);
- the water;
- thin brush;
- sponge;
- damp cloth;
- toothpick or wooden skewer.
Toothpaste is squeezed into a prepared wide container to facilitate its work. The dish sponge is cut into several pieces. The tip of the sponge is dipped in toothpaste and lines are drawn. With the help of a sponge, volumetric snow patterns with soft edges are obtained. To make the edges clear and correct, after the base coat dries, take a wooden stick or a toothpick and draw small details.
You can create the following designs with a sponge and toothpaste:
- fir branches;
- candle surrounds;
- snowdrifts;
- trees.
It is very convenient to draw with toothpaste on a window canvas using a stencil. To do this, the stencil is applied to the selected area of the window, fixed with adhesive tape. The sponge is dipped in toothpaste and the voids on the stencil are filled with light strokes. After the stencil is filled, it is removed, the details are painted over with a brush or wooden sticks.
Toothpaste can be applied to the stencil with a toothbrush. In this case, a spray effect will be obtained.A stencil with a snowflake is attached to the glass, then the brush is moistened with water. The brush is worn on the toothpaste. The brush is placed in front of the stencil at a distance of 1-1.5 centimeters and is carried along the bristles, moving it away from you towards the window. Toothpaste is sprayed on the stencil, filling in the voids. After covering the entire stencil, you need to wait until the pattern is completely dry. After that, the paper is carefully peeled off, a snowflake made by spraying remains on the window.
Gouache painting on windows
Gouache adapts well to glass, takes any contours, helps to create a subject composition. Painting on windows with paint is no longer just the creation of New Year's decor, but a manifestation of creative imagination and a demonstration of certain artistic skills. There are a few tips for working with gouache. It is recommended to process the glass with half an onion so that the applied pattern adheres well, the gouache does not spread on the surface and does not change its contours. Before you start drawing, you need to prepare all the colors you need. It is better to take several brushes of different sizes, prepare wet wipes and water.
Attention! Do not strongly dilute the gouache with water. A thin layer of paint on the glass can make the drawing look pale, insufficiently drawn.
Stencil drawing begins by drawing an outline on the treated glass with black paint. When working with gouache, it is necessary to strictly follow the rules for drying parts, otherwise the drawing will turn out blurry and sloppy.After applying the outlines with a fine-tipped black brush, they begin to draw the details inside the drawing field. After the contours are completely dry, the drawing is gradually filled with different colors. One of the rules for using gouache is to apply white paint last.
We use flour, semolina and icing sugar
Using the materials at hand, you can create the illusion of falling snow, spray and add detail to an already drawn composition. The use of cereals or powdered sugar for painting on the window has its own characteristics. Bulk materials should be firmly attached to the surface so that they do not crumble in the future, but create a dense visible outline. PVA glue or lacquer is used as a base. The adhesives begin to dry a few minutes after application, so you will have to act very quickly:
- PVA glue is applied to the selected area, a line is drawn with an adhesive pencil or lacquer is sprayed near the window frame.
- Then take the loose materials scattered on a plate and spray them with a sponge on the glue base.
- After applying to the entire surface of the loose material with a wide brush, brush off the remnants.
- Make adjustments if necessary.
Semolina creates a thicker layer than powdered sugar or flour. It adheres perfectly to the PVC glue base and hardly crumbles. You can also spray hairspray on the semolina layer to fix the result.
Powdered sugar or flour is usually attached to a base of sugar syrup. For this, a thick sugar syrup, cooked from water and sugar, is applied to the selected area with a brush, then powdered sugar or flour is sprayed with a sponge or brush.
How to Create Soapy Winter Designs
Children are very fond of decorating an apartment for the New Year holidays. Drawing with soap will appeal to any child. Creating a pattern with soap suds is easy and fun. Various patterns can be made with soap suds, which will look like winter snowdrifts or airy snowflakes.
Soap Usage Options:
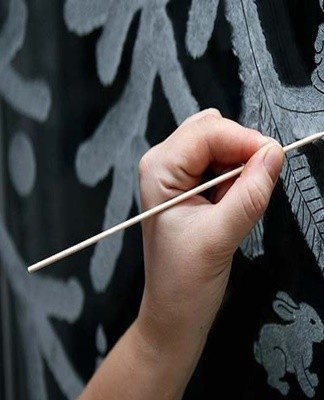
- To apply an even and neat pattern, take a thin piece of soap, specially dried on a battery. Use the thinnest edge as a marker or brush. With the help of a remnant, you can create snowflakes, draw outlines for plotting pictures, draw details of compositions made with other materials.
- To make a thin and delicate ligature from light air patterns, take soap bubbles. You can make them yourself or buy them from the store. To apply soap bubbles to glass, you need to prepare several cocktail tubes. The tubes are tied together, wrapped with tape or threads. The tubes are dipped in soap bubbles, then quickly removed from the container and blown out the window. The closer the tubes are to the window, the clearer and smoother the pattern will be.
Information! To make the soap patterns colorful, various dyes are added to the soap bubbles.
Create artificial snow in the decor
Snow is the most common element of decoration in view of the New Year. Store-bought artificial snow is ideal for decorating windows. Most commonly, artificial snow is material sprayed from a balloon.
The thickness of the layer depends on the distance at which the snow is applied. If you spray snow from a distance of 2-3 centimeters from the glass, the thickness of the layer will be dense and even. Spraying from a distance of 10 to 15 centimeters will create a light spray.
The use of stained glass paints for children
The main property of stained glass paints is the ability to provide strong adhesion to the base of the glass. Painting with stained glass paints does not require additional dilution with water, they easily fall on a flat surface, provide a dense layer of saturated uniform tone.
For drawing, they take traditional brushes of different thicknesses, use stencils, add various materials to decorate the created composition.
Attention! Stained glass paints are difficult to wash off the surface of the glass because they are designed to adhere firmly to it. You will need a sharp knife to remove the pattern. The window is very susceptible to scratching.
How to make paper decorations
Paper decorations cannot be called a classic design on the window, but cut-out paper elements are often used to decorate the upper or side zone. To decorate the central part, whole compositions with a specific layout are made of paper. The advantage of using paper is quick attachment and removal of windows. Paper parts can be securely attached with clear tape and carefully removed after use.
Paper decoration options:
- glue different types of snowflakes over the entire surface of the window;
- the design of the side surfaces;
- creation of central compositions from paper stencils.
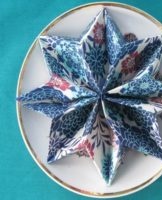
A variant of window decor is the use of volumetric 3D snowflakes, which are cut out of paper. They can be hung with white threads from the window frame.A composition of several volumetric snowflakes in the center of the window will look attractive.
Paper garlands can be put on one of the doors. The best option would be to create the same details on the garland so that the overall composition is not overloaded. Families with young children often make paper toys of different sizes and hang them in the window without following the pattern. Deliberate chance creates an overall impression of comfort and harmony.
PVA and hot melt glue in New Year's designs
The glue holds its shape perfectly, it can be used to create a decorative sticker and apply it to the glass. The sticker will stay stuck to the surface until you want to remove it. Instructions for creating a pattern:
- The drawing of a snowflake or a pattern is done on paper.
- The paper is put in multifor.
- The glue is drawn into a syringe without a needle.
- The glue is squeezed along the contours of the drawing.
- The drawing is left to freeze for 5 minutes.
For better grip, we recommend using patterns with multiple weaves. After hardening, the sticker is carefully peeled off from the multifor and glued to the selected area of the window.
Advice! Adhesive-based stickers can be decorated with beads, rhinestones, sequins.
A more difficult option is to draw with hot melt glue. To make colorful stickers, you need to prepare several containers and mix the glue with the dyes. The hot melt glue must be worked very quickly because of its adhesion. The advantages of the stickers created in this way are strength and durability. For the convenience of work, hot melt glue is applied using a special glue gun. The device makes it possible to control the thickness of the extruded layer.
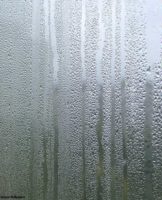
An unusual way - beer and magnesia
Modern technologies significantly improve the comfort of residents. Double-glazed windows of a standard type do not allow frost to "pattern" by imposing icy frost on the exterior due to the nature of the materials used. With the help of assistive devices, you can artificially create such patterns on the windows of the interior.
An unusual but effective way is to use a mixture of light beer and magnesia. 50 grams of magnesia and 125 milliliters of light beer are intensely mixed until a homogeneous texture is obtained. To speed up the process, it is recommended to warm the mixture in the microwave. Apply the solution to the glass with a brush, let it dry for 2-3 minutes and do another coat. There may be multiple layers. The moves are made randomly, without adhering to the scheme. After drying, a frosty pattern forms on the panes. The mixture can be easily washed off with lukewarm water.
Application of tulle and vinyl for window decoration
One of the options for decorating a window is to decorate with fragments of tulle fabrics or glue a vinyl film. The materials have an interesting texture. The fine woven laces look like an ornament or a frosted pattern, as long as they are firmly attached to the glass. Materials can be used in one of the following ways:
- decorate the upper, lower or side area by gluing solid fragments;
- cut out figures from tulle or film according to the pattern, glue in the center of the window.
The advantage of using tulle or mesh to create a composite pattern will be the unusual texture of the material. Vinyl film on an adhesive base fits well on a flat surface, adheres firmly, does not form creases. The tulle is attached to the glass using stationery or PVA glue.The canvas is well coated around the edges or completely dipped in glue, then pressed to the glass.