Step-by-step instructions on how to change the bearing on a washing machine
Internal parts of the washing machine, which receive a strong load, fail over time. One of the important components is the bearing. If the part began to malfunction, you need to figure out how to properly change the bearing in the washing machine.
First steps
Faced with a problem, you must take a number of actions immediately to reduce the risk of new defects. It requires in particular:
- remove the laundry from the drum if the bearing breaks during washing;
- turn off the machine and unplug it.
Causes of bearing assembly failure
Bearing malfunction occurs when the washer is misused, natural wear of internal parts and mechanical damage. If there is a fault, you must establish a specific cause in order to perform the appropriate repair or replacement.
Worn oil seal
Wear of the oil seal leads to water leakage during the washing process, which causes the bearing to be destroyed by moisture. The oil seal is used to protect the bearings from direct contact with liquid. The element is mounted on a single axis with bearings on the drum side. A bushing is located under the stuffing box, which provides movement of the edges of the lip, which excludes the ingress of water.
A broken oil seal is not able to protect the bearing, so a complete replacement of components is necessary.
Violation of the rules for installing a washing machine
When installing the machine, certain rules must be observed. Before the first wash, unscrew the transport bolts, fix the appliance on a flat surface and connect it to the electricity and water supply according to the enclosed instructions.
Regular overfilling of the tank
Constant overloading of the washing machine drum with laundry leads to increased stress on the bearing. A high load will destroy the component.
Symptoms
Bearing problems can be detected by characteristic signs. If there are symptoms of bearing failure, it will be possible to investigate the cause and make repairs.
The drum does not turn, but the motor turns
In cases where the motor of the machine works correctly, but the drum does not rotate, it is necessary to carry out diagnostics.Inspecting the condition of internal components is very likely to detect bearing failure.

The drum rotates but makes an abnormal sound. Significant vibration
If during washing the machine makes unusual knocks and noises, and the vibration increases compared to normal operation, these are the main signs of bearing failure.
Typically, these symptoms occur when a component is mechanically damaged.
Without the spin cycle
Rotation function starting problems are often associated with broken or worn bearings. There are several options for failing spin mode:
- the machine does not spin the laundry and stops the washing cycle;
- the spin does not start after draining the liquid from the drum;
- the mode starts during washing, but does not occur at the final stage of rinsing.
Depending on the nuances of the malfunction of the spin function, a specific type of breakdown is determined. The corresponding repairs are carried out depending on the symptoms of the malfunction.
Tools required
With most bearing failures, it becomes necessary to replace them along with the oil seal. To perform a complex replacement, you need to prepare a set of tools, without which it is impossible to perform the procedure correctly.
pliers
It is convenient to unscrew the internal fasteners using pliers. Several mechanisms will have to be removed to access the bearing, so you can't do without pliers.
Spanners of different sizes
Spanners have a U-shaped working base and are suitable for loosening hex retainers. The keys extend over 2 or 3 sides of the fastener.Several types of spanners must be prepared to replace the bearing, including the following:
- Double-sided wrenches that have 2 working areas with different diameters. Using these keys, you can install and remove fasteners of different sizes.
- Impact type spanners that help remove old fasteners with rusted threads. For disassembly, the impact force of a hammer must be applied to the key.
- Convex seat wrenches, used for wrinkled edge fasteners.
- Open-end wrenches with different angles between shaft and head. The standard is 15 degrees, but keys with an angle of 30 to 70 degrees are also available. The greater the angle, the easier it is to use the tool in confined spaces because you have to throw it less often.
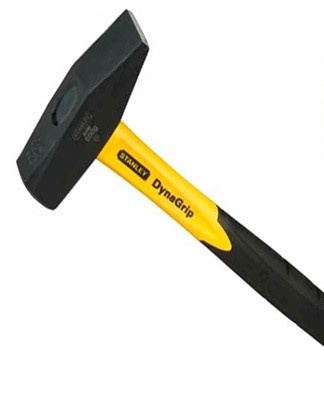
Hammer
The impact of a hammer is necessary to dismantle fasteners which, due to prolonged use of the machine and contact with moisture, are covered with rust. The hammer creates sufficient impact force to unscrew the clips.
Diameter metal rod pencil or blunt chisel
Using a chisel, you can punch a hole in metal parts or separate stuck components from the surface. Externally, the chisel is a metal rod, at the end of which there is an active part in the form of a sharp point.
The base of the chisel is flat and is used to install the tool in a jackhammer, impact drill or other tool with a similar purpose.
Phillips and slotted screwdrivers
Several types of screwdrivers are used to loosen the bolts holding the internal components. Different sizes of screwdrivers may be needed depending on the design of the washing machine.

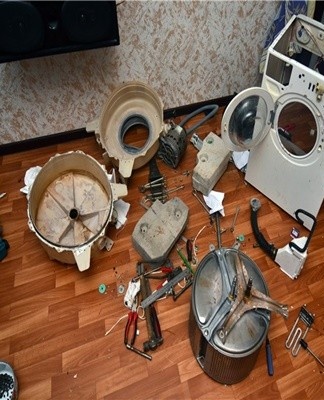
Dismantling steps
The direct process of dismantling a washing machine consists of several stages, during which a number of nuances should be taken into account. Otherwise, you may encounter difficulties and provoke the appearance of new malfunctions. It is also important to follow the sequence when dismantling the equipment.
Switch disconnection
For safety and convenience when disassembling the washer housing, you must disconnect it from utilities. First, the machine is disconnected from the network, then the pipes connected to the water supply system are unscrewed.
Fixing all the steps using a camera or camcorder
Without sufficient experience and skill in disassembling washing machines, you can get lost in the reverse collection process. Incorrect attachment of parts will lead to equipment malfunction and serious damage. To simplify the task, it is recommended to take photos and videos of each disassembly step and, after replacing the bearing, reverse the assembly process.
Remove the cover and the dashboard
The process of unscrewing the cover depends on the design features that various manufacturers adhere to. In most models, you can remove the top cover by unscrewing the self-tapping screws located at the end just below the cover. Then the upper part is shifted by 3-5 cm, slightly pressing in the horizontal direction.
After removing the cover, you get to the dashboard, which is fixed from the inside with fasteners. Self-tapping screws are located under the powder dispenser and on the back of the panel. First you need to remove the compartment, then unscrew the screws that hold the panel and pull it towards you.
Unlocking the hatch, removing the rear wall
The rear wall is fixed with latches and is very easy to remove. It is enough to pull the wall towards you, and if it does not come out of the latches, you need to bend them with a screwdriver and remove the wall.
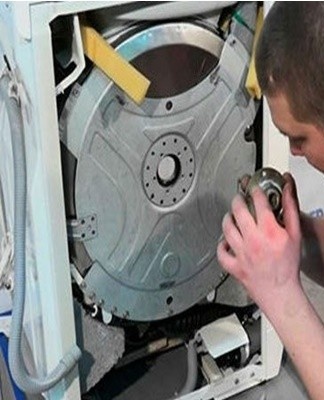
Removal of heating element, wiring, tank
The heating element and wiring are located under the rear panel, so the next step is to remove these components. Then it remains to remove the tank, which can be solid or consist of two halves.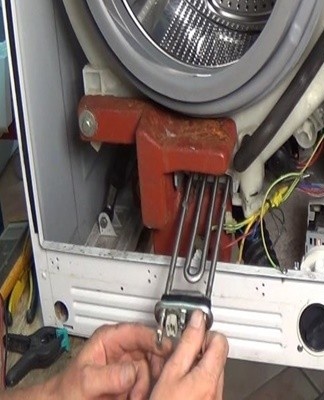
Dismantling of the dismantled structure
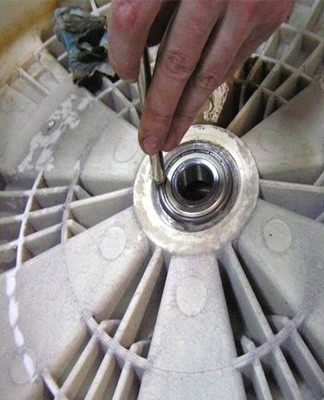
To disassemble an unsoldered tank, you need to find the junction of the two halves and unscrew the screws that hold the two parts together. Then they take out the oil seals, prying them out with a simple flat screwdriver. Bearings are knocked into metal using a hammer and a rod, the cross-sectional diameter of which must be the same as the diameter of the bearings. Carefully disassemble the components of the drum so as not to damage its integrity.
Open a one-piece tank
It is more difficult to disassemble a solid tank than an unsoldered tank. The dismantling process is as follows:
- The tank is removed from the washing machine and the place of welding is found. At a distance of 4-5 cm, holes are made on the seam using a drill with a drill diameter of 3-4 mm.
- Using a hacksaw for metal, saw off the tank along the seam.
- After dividing the part, they go to the shaft and replace it, after which the tank is assembled in the reverse order. To connect the parts of the tank, use a special glue and additionally fix it with screws.
Step-by-step replacement of worn bearings by yourself
After dismantling the washing machine, you need to proceed directly to replacing the old bearings.The process of removing and installing components requires compliance with a number of nuances.
Preparatory work
For bearing replacement work, it is recommended to keep the body of the washing machine away from the walls so that it can move freely around the device. To make a replacement, you need to arm yourself in advance with the necessary tools and purchase new bearings. Component selection is easier based on the characteristics of the worn parts.
Removal of a damaged part
After splitting the tank into two halves, the area around the bearings should be cleaned of contamination and knocked out with a chisel or other suitable tool. In addition to the bearings, the oil seal must be removed. The freed seat nest must be cleaned of dirt and lubricated with lithol.
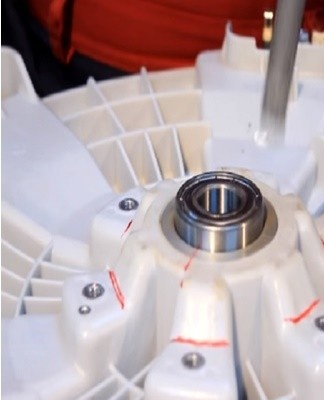
Installation of new bearings
Changing bearings, as well as removing old components, is done with a chisel and hammer. The bearing should be lubricated with grease and fitted securely in the seat.
Reassembly of the washing machine
Assembly of the washing machine is carried out in the reverse order. First, the tank is installed in place, then all other parts are removed. When assembling, you should use photos and videos taken during the disassembly process to avoid mistakes. After final assembly, it is advisable to carry out a test wash to ensure the proper functioning of the equipment.
Features of repair with vertical loading
If it is necessary to replace a faulty bearing in a top loading machine, a number of design features must be considered. In these types of equipment, the drum is supported on 2 axle shafts and 2 shafts. The replacement process is much easier with such a device.
After disconnecting the washing machine from utilities, it remains to remove the side parts of the case in order to gain access to the internal mechanisms.
First replace the bearing on the side where the drive pulley is missing. For this purpose, the caliper is removed, which consists of bearings and an oil seal connected in a single housing. To change the caliper on the inner motor side, start by removing the belt and pulley from the drum. Then they begin to remove the grounding blocks, after which the caliper itself is unscrewed.
The location of the oil seal and the shaft itself is cleaned of accumulated dirt, then treated with a lubricant. When installing a new bearing, it is important to ensure that the sealing material is not askew. Otherwise, it will not be able to provide protection against fluid leakage, which will cause the appearance of another malfunction. After installing the new oil seal and new bearing, tighten the caliper firmly, avoiding damage to the threaded connection. Further assembly of the washing machine is carried out in the reverse order.