Step-by-step instructions on how to repair the current faucet in the bathroom with your own hands
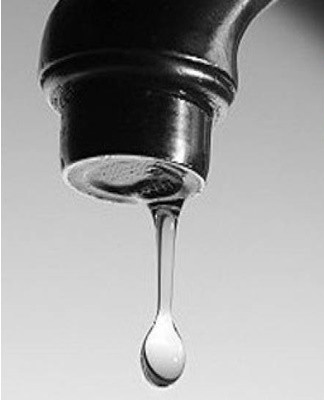
Plumbing leaks are a common occurrence that leads to discomfort, fluid buildup on the floor, and subsequent mold growth. If a faucet is leaking in the bathroom, you need to find a way to repair the faulty equipment, after finding out the reason.
Main reasons
Depending on the cause of the breakdown, an appropriate plumbing repair is carried out. Faucet leaks can be caused by human error or problems with equipment components.
Bad device
Buying an inexpensive blender to save money often leads to the fact that the device turns out to be of poor quality and quickly breaks down. The result is a faucet leak or an accident.Permanent repair of a poor-quality mixer requires significant financial and time costs, so it is easier to immediately supply good equipment from trusted manufacturers.
Installation errors
Self-installation and neglect of installation instructions lead to disturbances in the operation of plumbing. Mistakes not only cause leaks, but also more serious breakdowns.
To protect against such problems, it is better to entrust the work to specialists or carry out the installation only after carefully studying the instructions.
Violation of operating rules
Improper use of the crane will affect its performance. Common violations are:
- high pressure on the mixer;
- valve twist;
- fix the mixer at the wrong angle.
These violations negatively affect any plumbing equipment. For similar reasons, the kitchen faucet may start to leak.
Wear of main parts
Major equipment components wear out with use. To avoid leaks due to wear of parts, it is recommended to periodically check the condition of the valve and update outdated components.
Clogged aerator filter
Accumulation of small debris causes leaks and a weak, erratic spray from the fluid supply valve. In addition to debris, salt deposits and rust form on the strainer. The clogged filter must be unscrewed, held in a vinegar solution and returned to its original place. If rust is holding the filter securely in place, pour the cleaning solution into a bag and hang it from a faucet so that the area to be cleaned is submerged in the liquid.

Diagnostic
Having found a leak, you should immediately carry out diagnostics in order to determine the specific cause of the problem. Based on the results of the diagnostics, the optimal method of plumbing repair is selected.
The water flow has become too low
The main reasons for the weakening of water pressure with the correct operation of the mixer are clogging of the filter, damage to the valve or cartridge, wear of the seals. While the aerator filter can be cleaned, replacement of faulty components is necessary to eliminate other problems.
Leak under the sink
If leaks occur under the sink, there is a risk that the supply pipe is damaged or that the O-ring at its connection to the body is badly worn. In such a situation, you will have to install a new pipe or replace the joints.
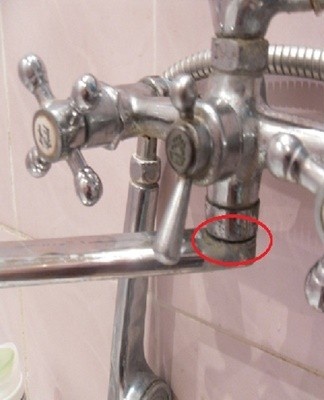
Leak at spout connection point
When water flows at the junction of the gander with the body, it means that the seals at the base are damaged or worn.
To solve the problem, you need to buy a new set of gaskets and replace the old rubber parts.
Gander sinks
The only case where a gander leaks is mechanical damage to its shell. A common cause of the defect is clogging of the strainer, which creates high pressure and cracks in the metal product. If the problem arose on single-lever mixers with a non-separable reflux design, then you will have to completely change the mixer except for the cartridge. In a two-valve design, the gander can be replaced separately.
Other cases
Sometimes the blender malfunctions for no apparent reason. In such situations, the faucet may leak due to the buildup of lime deposits on the internal components.To eliminate the problem, it is necessary to dismantle the structure and remove sediment by washing the walls with cleaning agents.
The device of kitchen faucets
There are a large number of mixers on the plumbing equipment market. According to their design features, valves can be divided into a lever and a valve. There is also a category of sensor faucets that deliver water without direct contact and when hands come within range of the built-in sensor. The sensory variety is rarely used at home, so it is worth considering the features of the simplest models.
Single lever
The principle of operation of such mixers is based on the regulation of temperature and water flow with a single lever. The main components responsible for water supply are built-in ball-shaped cartridges with several holes. The single-lever mixer is designed in such a way that a defective cartridge can be replaced yourself without any problems.
Two valves
Faucets with a pair of valves are a classic type of plumbing fixtures. Fluid flow regulation and temperature control are carried out by turning the separately placed taps. The device can consist of two types of locking devices, ceramic and auger with a rubber stop valve.

The ceramic version differs in that to start and stop the water supply, it is enough to make a half or quarter turn of the valve. This variety is less sensitive to different temperatures, but the ceramic can be damaged due to the ingress of hard particles of debris into the pipes.
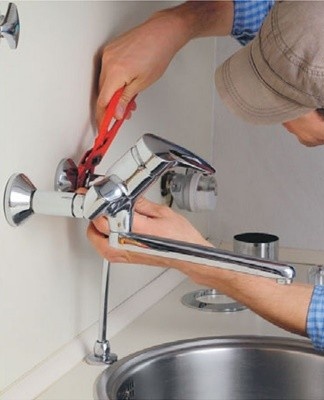
DIY repair
Armed with a set of inventories and basic plumbing repair skills, it will be possible to eliminate malfunctions without much difficulty. The easiest way to repair single-lever mixers is to simply replace a damaged cartridge.
Tools required
To perform certain tasks during the repair process, you will need the appropriate tool. It is better to prepare all the devices in advance so as not to be distracted during further work.
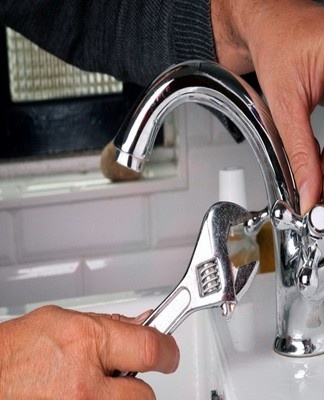
Adjustable plumbing wrench
Using an adjustable wrench, you can unscrew the two-valve version of the mixer. Using a wrench, unscrew the decorative strip and the nut that secures the cartridge.
Allen key or screwdriver
The need to use a hexagon and a screwdriver arises when dismantling various components. Some parts are attached to the lock boxes using cross-shaped or hexagonal fasteners.
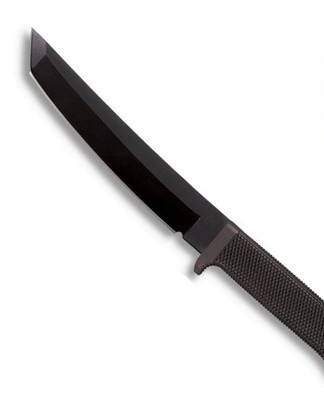
Sharp knife
The blade can be useful for removing tightly fastened corks, adjusting rubber bands, cutting sealant and linen cable. The knife should be sharp to make it easier to cut through the material and remove the elements.
Preparatory work
Before starting work, you need to purchase parts if you need to replace them, as well as auxiliary materials (rubber seals, fasteners, silicone grease).
Cleaning agents will also be useful in the works to remove the plaque formed inside, which creates problems when dismantling the plumbing.
Without much practical experience, you must first leave a small supply of water, which will come in handy in the event of prolonged repairs or the appearance of a new breakdown. Repairing plumbing requires turning off the water supply, so before starting work, you need to close the general valves.
Replacing the rubber pad
Sealing rubber bands are located on the lock housing and in the area where the gooseneck connects to the body. Most often, the seals wear out on the axle box. When you start replacing a component in the area where the faucet is leaking, you should:
- Remove the bezel and, using a screwdriver, loosen the fasteners that hold the rotating flywheel.
- Use an adjustable wrench to unscrew the axle box, which is hidden behind the nut.
- Install new seals, having previously treated the material with silicone grease.
When replacing refluxing material, it is important not to let the metal tool come into contact with the fastener head, so as not to destroy its structure. For this, an insulating material is laid turnkey, for example, insulating tape.
Gander repair and replacement
Replacing the jar in the two-valve version is carried out according to the basic principle - they unscrew the obsolete element and put a new one in its position. In a single-lever design with a non-separable body, the best option is to install a new mixer.

Cold welding and epoxy are used to repair damage to the spout body. Since the gander is metal, sealing is an effective way to eliminate cracks. First, the top layer of metal is removed from the jar with sandpaper, then the cracks are treated with a soldering iron.
Replacement and repair of axle boxes
If it is necessary to install a new lock box, you must purchase a part of the same size and design.In most situations, it is permissible not to change the body of the old part, but only to disassemble it and replace internal components.
Preventive repair
To reduce the likelihood of leaks and serious damage to your plumbing fixtures, periodic preventative maintenance is recommended. For this purpose, you need to inspect the condition of the mixer, renew the gaskets and tighten the loose components.
How to repair a faucet with a cartridge
There are slotted plates inside the valve with the cartridge. The lower part is firmly fixed, while the upper part remains mobile and is connected to the upper. Turning the lever moves the rod and moves the movable plate, thereby supplying water.
If problems arise in the operation of a crane with this design, a new cartridge must be installed. In most situations, water begins to flow under the handle and it is inconvenient to try to repair the structure. At the beginning of the assembly of the component, turn off the water first and then remove the handle. To do this, remove the plug hiding the screw, lift the handle and remove the pressure ring. After replacing the cartridge, the assembly of the structure is carried out in the reverse order.
How to Repair a Ball Valve
The central component of the structure is a ball with several holes. Turning the lever rotates the ball and controls the flow of fluid. If the tap is leaking, you must successively follow the following steps:
- unscrew the cap to access the housing fixings;
- remove the lever and the cap;
- check the condition of the seals and replace them if they are worn;
- assemble the structure in the reverse order.
After the repair is completed, it is worth turning on the water and making sure that there are no leaks.If the problem persists, a full hardware replacement will be required.
Rules of operation
Compliance with the standard rules for the use of the crane is the key to its continuous and correct operation. The rules include the following:
- do not twist the mixer, this could damage the valve;
- to clean the plumbing, you can use only special products, leaving them on the equipment no longer than the prescribed period;
- if the surface of the mixer is covered with cracks, exposure to detergents will cause new defects to appear.