DIY 220V LED Lamp Repair Instructions
LED bulbs have virtually supplanted conventional incandescent lamps in everyday life due to their efficiency and durability. However, despite all the assurances of the manufacturers, their work often fails, disabling the device. Many owners, out of habit, throw away the "spoiled" product, not suspecting that it can be repaired. Let's see how to repair a 220 V LED lamp at home with our own hands.
Device
Before proceeding with the repair of an LED bulb, you need to understand its structure and understand the basic principles of its operation. Each LED bulb consists of:
- base;
- Drivers;
- radiator;
- printed circuit board;
- optical element;
- LEDs.
Every detail of the bulb is extremely important; if even a small element fails, the whole system stops working.
Basement
The basic element of any light bulb, regardless of its operation. Performs many functions, including:
- Ensure the mechanical strength of the joint.
- Conductor insulation.
- Give the structure heat resistance, so that it is not afraid of overheating during operation. To heat the base to the critical temperature, a powerful surge of energy is required.
- Good electrical conductivity.
To note! When the base temperature exceeds 180 O the solder melts and the contacts of the bulb with the cartridge are destroyed.
Driver
A key element without which the operation of a diode lamp will be impossible. The driver is based on the following principles:
- When power is applied to the base of the bulb, current begins to flow through the LED crystals.
- Each crystal is made up of 2 semiconductors.
- One is responsible for the "+", and the other for the "-".
- When they interact, the voltage decreases by a certain number of units, which causes instability in the system.
- The driver is a kind of stabilizer, with the help of which the input and output values are equalized, forming a constant value.
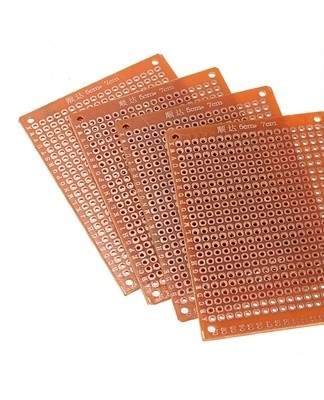
Printed circuit board
The printed circuit is a dielectric plate on which conductive patterns are applied. They are connected to a specific electrical circuit, with the help of which the LED lamp operates. They are found in the vast majority of household appliances and other electronic devices. Using a circuit board in an LED bulb allows you to:
- reduce the size of the bulb;
- reduce the total weight of the structure;
- assembling light bulbs with circuit boards is cheaper and much faster;
- the reliability of the bulb operation system is increased.
LEDs
Devices by means of which the bulb diffuses a powerful light which is pleasing to the human eye. Classification of LEDs according to the type of housing used:
- CMS.
- "Star".
- "Piranha".
The most popular are Piranha LEDs, as they have the best thermal conductivity and surface adhesion. The color of the lenses for different models of LED lamps are different and are:
- matte and painted;
- transparent, colorless;
- clear and colorful.
For white LEDs, the intensity and spectrum of the glow is determined in Kelvin. The lower the number, the warmer and yellower the light from the lamp will be.
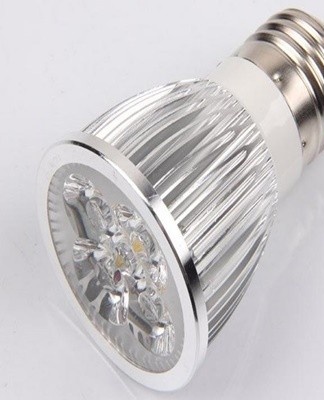
Radiator
During the operation of the bulb, the LED emits a large amount of heat into the environment. This leads to overheating of the structure and a decrease in its performance.
To avoid such situations, LED lamps are equipped with special radiators that remove excess heat from the control board.
The radiator looks like a large number of thin plates located in the middle of the lamp body. The more powerful the light source, the larger and heavier the LED heat sink.
Made of :
- ceramic;
- aluminum;
- glass;
- composite materials;
- Plastic.
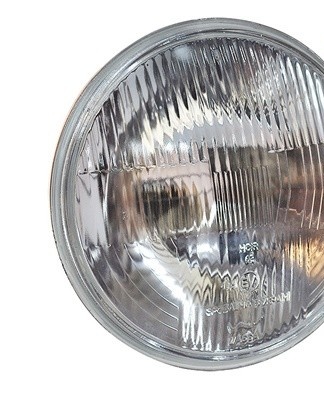
Optical elements
The optical elements included in the design of the LED lamp include a diffuser. Its functions:
- soften the light emitted by the bulb;
- luminous flux modeling;
- protecting the light source from external factors, which increases the safety of the lamp.
This is especially true for LEDs, as the light they emit is too concentrated and too harsh. In its pure form, it is unpleasant to the eye and can even harm, in case of prolonged exposure.
Some of the materials commonly used in the manufacture of bulb diffusers include:
- polystyrene;
- polycarbonate;
- polymethyl methacrylate.
Purpose and types of plinths
Despite the simplicity of the design, the lamp caps are divided into several large groups, formed depending on the purpose. Allocate:
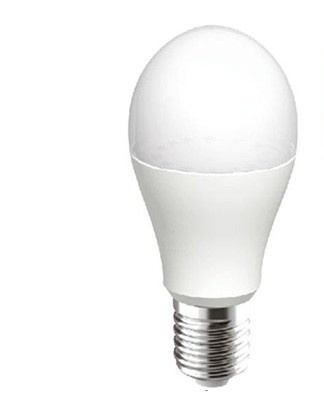
- E14 and E27 sockets.
They are used in everyday life and refer to standard elements. The numbers in the name determine the diameter of the base.
- E40 base.

A large element used in high power lamps. They are used for public lighting, large surfaces and large luminaires.
- GU3, GU10 and G9.
They replace halogen bulbs, completely reproducing the design of their base.
- GX 53, GX 70 and GX 40.
Lamps mounted in recessed luminaires, used to illuminate the ceiling or decorative elements.
- R7s and GX24q-4.
Lamps necessary for the proper functioning of the projectors.
- G13.
Rotating element used to operate T8 lamps.
In addition to the base classification by destination, there are:
- baseboards of metal;
- ceramic baseboards;
- skirting boards made of progressive temperature-resistant plastic.
To note! E14, E27, E40 refer to threaded sockets. The other variants have a hairpin design.
Made of metal
A standard crafting option that can be found at any store. Metal has all the necessary qualities, including:
- insulation of conductors from each other;
- strength and reliability of the structure;
- heat resistance;
- conductivity of electricity.
At the same time, a metal base does not cost a lot of money, which saves the family budget.
Ceramic
Ceramic baseboards are more modern and of higher quality than metal ones. Among the main advantages of ceramic skirting boards are:
- Lifetime. Much higher than plastic and metal.
- Reliability.Ceramics withstand overloads better, which cannot be said about plastic.
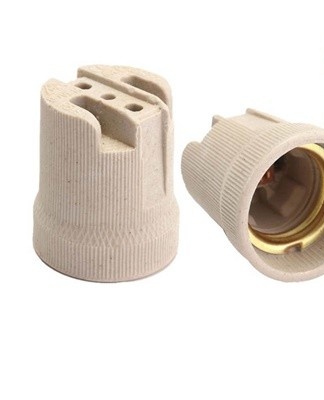
For the rest, it performs functions similar to metal baseboards, without being different. Halogen bulbs are the main area of application for ceramic bases.
Progressive temperature plastic
Progressive temperature plastic is a cross between ceramic and plastic, absorbing their best qualities. Among the advantages of the material are:
- low manufacturing cost;
- good heat resistance;
- high service life;
- resistance to physical influences.
The only drawback is considered poor compatibility with halogen lamps, which negatively affects the strength of the material.
The principle of operation of the driver in an LED lamp
The main principle behind the arrangement of the LED lamp driver is to maintain a stable output voltage. It should not change in the event of a drop in current in the network, otherwise the device will not be able to correctly perform the functions assigned to it. Driver Algorithm:
- Power is supplied to the device.
- With its help, it acquires the required frequency and stabilizes.
- In addition, the current is transmitted to the diode bridge, in the amount necessary for the operation of a certain number of elements.
Basic driver characteristics inherent in any design include:
- the power of the voltage produced by the output device;
- rated current;
- the rated wattage of the bulb.
With current stabilization
Drivers for current stabilization are used to create light bulbs for household and other needs. Their main task is to stabilize the output current, regardless of fluctuations in the input pulse. This is the standard technology used in most of the lighting technologies we use.
Stabilized voltage
They are used when connecting an LED strip, which has some differences in the principles of operation. They are the following:
- In the strip, the LEDs are connected in series, in groups of three.
- Each group is connected to the power supply by a current limiting resistor.
- The operating voltage of the LED strip sold in stores is 24 or 12 V.
- The conductor in such a strip serves to stabilize the voltage at 12 or 24V.
- The rest of the work is done by the current limiting resistor.
This is necessary in order to equalize the difference in power supplied if the original length of the LED strip is reduced.
Without stabilization
Cheap LED bulbs do not have a built-in stabilizer, which makes them extremely susceptible to power surges. When using them, it is important to understand the principle and the quality of your electrical network, otherwise bulbs without stabilization will quickly fail. Some craftsmen try to modify a cheap product on their own, but this does not lead to anything good without special skills and knowledge.
To note! If you are unsure of your own abilities, do not undertake the repair or modification of LED lamps. You will only aggravate the situation and endanger your life and that of those around you.
Reasons for failure
After understanding the basics of LED lights, we can move on to why they fail. These include:
- large overvoltages;
- inaccuracy in the process of installing a light bulb;
- incorrect lamp selection;
- the influence of external factors.
Voltage drops
Despite the stability of 220 volt LED lamps, sudden voltage fluctuations have a destructive effect, deactivating the lighting element.
The reason for the differences may be:
- Wrong wiring installed in the room by yourself or unskilled workers.
- Problems at the power station.
- Weather.
It should be noted that other lighting elements also suffer from voltage drop, burning out even faster than their LED counterparts.
Incorrect lamp selection
The reason for the failure of an LED bulb may be the lamp itself, if you buy it in a hurry, without foreseeing all the nuances of the interior. For example, due to an unsuccessfully selected ceiling, the bulb will not cool well and will constantly overheat. In this case, its service life will be significantly reduced, and owners will spend a lot of money on replacing bulbs and troubleshooting. Try to approach the purchase of a lamp in the room responsibly, and most problems can be avoided.

Installation error
Many owners who buy a chandelier or a ceiling for a house mount it themselves, without observing the necessary rules. All this affects the operation of appliances, including light bulbs. In the absence of appropriate experience, try to mount the lighting under the supervision of a competent person who is able to discern erroneous actions and report them in time.
Otherwise, you will still have to call on specialists who will correct your mistakes.
External factor
External factors are no less destructive for LEDs and you should pay attention to them. External factors include:
- knocks on the lamp housing;
- vibration;
- weather.
Remember that a bulb is fragile and should be handled with care. The same vibrations will in no way affect the LED itself, but will quickly destroy the bulb driver.
How to repair an LED bulb
Repairing an LED lamp is not as difficult as it seems at first glance. All you need is a minimum of tools and a little patience. Tools are useful:
- a soldering iron, preferably with a fine point, because you have to work with small details;
- tweezers;
- rosin;
- solder;
- support to fix the board. If he is not there, you will have to call the assistant;
- miniature gas burner;
- multimeter.
As a "donor" of parts, you can take the same defective lamp, in which you will find everything you need. It will save you money. Once everything is ready, you can proceed with the repair.
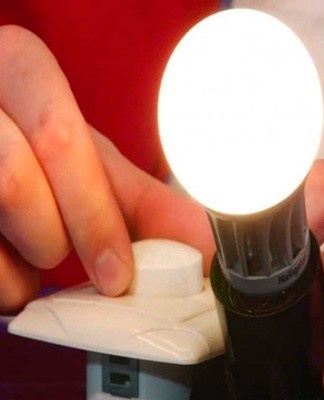
Checking the cartridge and the voltage it contains
To check the ceiling light for a faulty cartridge, you must:
- Switch the multimeter to the state of measuring the voltage in the network.
- Measure carefully in the area between the central petal of the cartridge and its threaded part.
- If the lights are around 220 V, the cartridge is in good condition.
To note! Make sure all tools used are safe and properly insulated. Don't neglect this, or it's easy to hurt yourself badly.
Soldering station requirements
There are no special requirements for the soldering station when working with light bulbs. The only condition that should be observed is the presence of a fine tip on the soldering iron. If it is not there, then in the process of work there will be problems with small details. Otherwise, any soldering iron you or your neighbors have in stock will do.
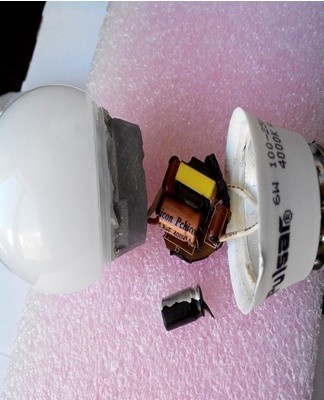
How to disassemble
If the cause of the malfunction is not in the chandelier holder, and the other bulbs work fine when connected, it's time to disassemble the bulb. Sequencing:
- the faulty element is unscrewed;
- we heat it with a hair dryer;
- disassemble into components.
The main rule that must be followed during dismantling is that all actions should be carried out with the utmost care. Most parts are easy to replace but very fragile. One careless move can undo all your work.
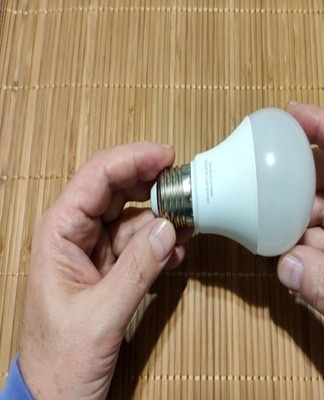
Unscrew
To separate the diffusion circuit from the cartridge, all you need to do is:
- grasp the bulb holder with one hand and the bulb with the other;
- detach the two parts with slight rotational movements.
In most cases, no problems should arise, since the connecting layer is very thin, it quickly yields to physical force. Do not squeeze the bulb tightly or twist the bulb sharply - the glass will shatter and you will cut your hand. As a safety measure, thick gloves will not interfere, which will hold the fragments in case of clumsy handling.
Heating with hair dryer
A hair dryer will come in handy when opening large ampoules with thick glass. Their glue layer is usually more important - you will not be able to unscrew the diffuser with your bare hands. You will need:
- turn on the hair dryer at maximum power;
- treat the seal at the junction of the glass bulb and the cartridge with hot air.
If everything is done correctly, the parts will separate from each other without any effort.
Break detection
Before proceeding with the dismantling of the damaged part, it is necessary to determine the exact location of the breakdown by carrying out a diagnosis. The main thing is to follow the correct sequence of actions, then no problems will arise:
- First, we unscrew the potentially inoperative lamp and insert a new one in its place. If the light still does not appear, the reason is in the lamp itself.
- Next, we use a multimeter to check for the presence of voltage in the circuit.
- The next step is to check the contact between the lamp socket and the base.Pay attention to the presence of carbon deposits and dirt. If they are present, the lamp must be disconnected from the mains, then the dirt must be removed.
- The switch is checked last. It may have burnt out and prevent the lamp from working properly.
Having checked all the above nodes, you can safely say that the problem lies with the bulb itself.
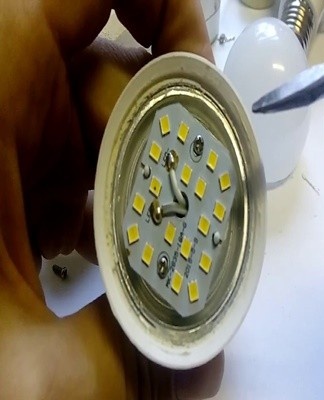
LED replacement
The most common cause of bulb failure, which occurs in most cases, is LED failure. This problem is easy to solve, just determine which diode has burned out and change it.
For that:
- we check every detail with a multimeter until we find the source of the problem;
- we weld non-working elements;
- we insert new ones in their place;
- return the array;
- we solder new parts to the tracks.
Solve the problem with the driver
The second common cause of failure is failure and failure of the lighting element driver. In this case:
- We examine the driver for burnt parts, after which we replace them with new ones.
- Find an open circuit with a multimeter.
- The blown power supply will need to be discarded and replaced with a new one.


Visual inspection and replacement of burnt radio components
The driver consists of a large number of resistors and capacitors. They can fail, thus compromising the integrity of the system. The breakdown is determined visually, after which it is easily eliminated using a soldering station. The reason for the failure of the radio components:
- overheat;
- manufacturing defects.
To note! You can find the replacement of a defective part in the nearest radio market or in specialized stores.
How to ring and find a break with a multimeter
Check the circuit for an open circuit with a multimeter. The master will have to perform the following manipulations:
- We check the resistance of the resistors. If the multimeter shows large numbers tending to infinity, it's time to throw the coin away.
- To test the diode, place a black probe on the cathode and a red one on the anode. If the indicators do not fall within the range of 10 to 100 ohms, the part is defective.
- It is difficult to ring the microcircuit itself, since it will take a long time. For this, it is advisable to use special testers.
How to check and replace the power supply
Checking the bulb power supply:
- we open the LED lamp unit;
- we carry out a visual inspection, after which we check the parts with a multimeter;
- we check the capacitors;
- we check the microcircuit.
In the event that one of the elements stops working, we replace it with a new one using a soldering iron or buy a new device.
Flashing reasons and methods of elimination
Reasons for the LED lamp flashing:
- violation of insulation;
- errors during installation;
- poor quality contact between wiring and electronic circuit elements.
Disposal methods:
- lamp replacement;
- channel upgrades;
- check the correctness of the wiring.
Do not try to repair the device yourself if you do not have the necessary skills. You can only make the problem worse.
Replacing the thermal paste in the cooling radiator
To replace the thermal paste in the heatsink, prepare:
- coarse, medium and fine sandpaper;
- Thermal paste.
We dismantle the bulb and separate the plate from the radiator. Then we protect both sides by removing the remnants of the old substance.Apply a thin layer of thermal paste to the entire surface of the plate and put it in place.
Examples of repair
Below are repair examples for the most common LED lamp designs, including:
- "LL-CORN" (corn lamp) E27 12W 80x5050SMD;
- "LL-CORN" (corn lamp) E27 4.6W 36x5050SMD;
- "LLB" LR-EW5N-5;
- "LLB" LR-EW5N-3;
- "LL" GU10-3W.
"LL-CORN" (corn lamp) E27 12 W 80x5050SMD
A more powerful analog "LL-CORN" (corn lamp) E27 4.6 W 36x5050SMD, which has no fundamental design differences. The only nuance that should be considered when repairing "LL-CORN" (corn lamp) E27 12 W 80x5050SMD is the short wires that attach the conductor to the base. If it is necessary to check it, you will have to disassemble the plinth, drilling the attachment points. This can be avoided by gently lifting the plinth along the edge, folding its edges.
"LL-CORN" (corn lamp) E27 4.6W 36х5050SMD
The most convenient repair lamp, the design of which makes it easy to ring all the LEDs without dismantling the case. The peculiarity of the bulb design is that the LEDs are connected in parallel, three pieces each, and during the test should light up together. The defective part is replaced with a new one or shorted.
If all the LEDs are working correctly, you will need to disassemble the lamp housing to access the driver. To do this, remove the lip on the back side of the plinth. At the end of the work, the driver returns to its place, and the bezel is glued with superglue.
"LLB" LR-EW5N-5
Due to the solid and impressive design of the LED bulb, it is almost impossible to disassemble it without the use of physical force. To remove the glass, you must:
- take a screwdriver;
- pick up the end of the radiator with its end;
- pull gently but firmly upwards.
Then we check the LEDs of the faulty bulb with a tester. To access the LED lamp driver, you will need to remove its base.
"LLB" LR-EW5N-3
The design of the 3-series bulb differs from the 5-series by the presence of a metal ring, which is located at the junction of the radiator and the glass. To disassemble the glass, it is enough to pick it up in any convenient place at the junction. The board is fixed to the radiator with 3 screws, and to access the driver of the LED lamp, it is dismantled from the side of the base. The rest of the repair procedure is similar to the associated model.
"LL" GU10-3W
This bulb is extremely difficult to repair. Algorithm of actions when working with the LED lamp "LL" GU10-3W:
- We drill a small hole in the aluminum body of the bulb.
- It should be at such a level that the drill does not touch the LEDs.
- A thin screwdriver or an awl is screwed into the hole, with which the glass of the LED lamp is removed.
- We check the LEDs on the bulb with a tester, then proceed to inspect the board with the driver.
Remote control lamp repair features
If your remote-controlled chandelier breaks down, pay attention to:
- a controller responsible for controlling a light bulb;
- transformer.
Most often, it is they that fail, causing the LED lamps to malfunction.