Do-it-yourself rules for applying plaster to the ceiling and varieties of compositions
Do-it-yourself ceiling plastering has a number of features. To achieve good results in this area, it is necessary to choose the right composition for the procedure and prepare tools and materials. Not inconsiderable is the precise implementation of the technology of repair work. Thanks to this, it will be possible to achieve the most even and uniform coating.
Content
Advantages and disadvantages of using plaster for the ceiling
The advantages of plastering the ceiling are:
- The procedure involves the use of harmless and environmentally friendly materials that provide strong and durable coverage.
- Self-administration of the procedure is considered the least expensive.Installing a stretch ceiling will cost much more.
- Natural materials are used for the procedure. Thanks to this, they can be used to decorate the houses of people suffering from respiratory pathologies and allergic diseases.
- The use of plaster for surface treatment practically does not reduce the height of the room.
The disadvantages of using plaster mixes are:
- There are restrictions on the thickness of the plaster layer. Masters do not advise to make more than 5 centimeters. Significant differences cannot be leveled with this material. In this case, too much mixture consumption is observed.
- If it is impossible to complete the work on your own, you will have to turn to professionals. Their services can cost a significant amount. The cost of materials should also be considered.
- Applying plaster mixes to the ceiling requires certain skills. The process takes a long time. Only by strictly observing all the procedures will it be possible to achieve a flat and smooth surface.
What tools will you need
To apply plaster to the ceiling, a large number of tools and various devices are required.
square container
It should be quite spacious. It is advisable to take a container with a capacity of 15-19 liters. It is better to choose dishes with high edges. This avoids splashing of the composition during mixing. The container should have straight sides. This makes it easier to adjust the composition of the instrument.
Metal and rubber spatulas
It is recommended to arm yourself with spatulas of different sizes. To make work more convenient, it is worth using devices with rubberized handles.

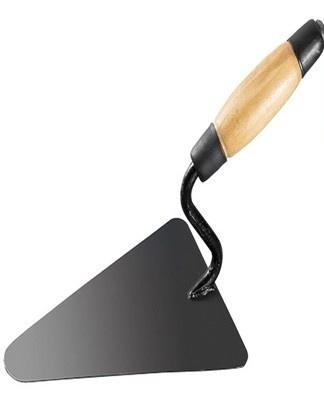
Site trowel
This accessory is necessary to pour the mortar.
Rule
Using the ruler, the ceiling surface is leveled. It is advisable to use a sufficiently long tool.
Brush
This tool is needed to apply the primer.
Building level
It is advisable to use the longest level possible.
Sandpaper
It should have different grain sizes. Sandpaper is used to eliminate surface defects at the initial stage of work. It is also used for the final sanding of the ceiling.
Drill with the right accessories or a construction mixer
These tools are necessary to prepare the composition.
Serpyanka
Serpyanka tape is used to seal small cracks in the ceiling.
Ladder
A stepladder is needed to apply the plaster to the ceiling. It should be as stable as possible.
Individual protection equipment
When carrying out repair work, it is worth using protective equipment. These include a respirator, gloves, mask.

How to choose materials
To facilitate the application of plaster on the ceiling, you need to prepare everything you need in advance.
Choice
For repair work, the following materials are used:
- cement - it is advisable to use a composition of grade 250-300;
- sieved sand;
- pegs;
- putty;
- alabaster;
- serpyanka mesh;
- polymer mesh;
- headlights;
- primer;
- concrete contact;
- antifungal impregnation.
Calculation of the amount required
It is worth calculating the required amount of materials, taking into account the following parameters:
- Ceiling area. It is easy to determine the indicator in a rectangular room. In rooms with a complex configuration, special methods should be used.
- The thickness of the plaster layer. It is selected taking into account special conditions. Usually a layer of at least 5 millimeters is made.
- Differences in ceiling height. They must be removed by applying plaster.
- Master's degree. For professionals, the waste rate does not exceed 5%, for beginners - it can be up to 15%.
How to prepare the surface
For plastering to be successful, the ceiling surface must be properly prepared.
Remove the old coating
If there is old plaster on the ceiling, it must be knocked down. If the surface is covered with lime, rendering is prohibited.
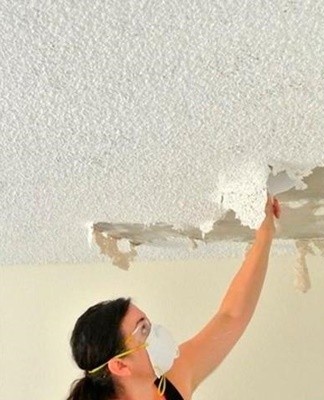
To remove the coating, the ceiling must be well moistened with warm water. Then remove the surface with a sharp spatula. Finally, the ceiling is cleaned with a wire brush. This must be done with goggles and a respirator.
After completing the specified work, it is recommended to take a damp sponge and wash the surface well.
Eliminate traces of mold and mildew
To get rid of mold, it is recommended to wash the ceiling with a damp sponge and treat its surface with a special antifungal agent.
Removal of irregularities
After removing the old coating, the ceiling should be sanded with coarse sandpaper. This will help remove irregularities and fragments of plaster. It also helps prepare the ceiling for priming.
Padding
If the ceiling is covered with concrete or other smooth material, it is worth roughening the surface a little before using the primer. For this, stripes or other irregularities are applied. This helps improve adhesion to primer and plaster.
After that, the cleaned and treated surface is primed. After applying the composition, it is recommended to wait until it dries.
How to perform plastering correctly
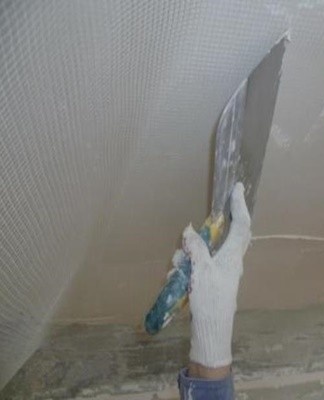
If the size of the irregularities does not exceed 2 centimeters, the plaster is applied in one layer.If their size is larger, the first layer should be thoroughly dried, and then the second should be applied. In this case, after applying the first layer, the surface is reinforced. This is done using a fine polymer mesh. It is fixed to a dry ceiling. The width of the stripes should not exceed 2 meters.
When preparing the ceiling for painting, it is recommended to apply a thin layer of putty on dry plaster, and then cover it with a primer. This will help to make the ceiling perfectly smooth and achieve high-quality staining.
Characteristics of the plaster of certain surfaces
For plastering to be successful, it is imperative to take into account the surface to be treated.
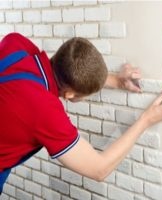
TREE
In this case, before applying the plaster, a metal mesh is attached to the ceiling. The size of its cells should be 10x10 centimeters. It is also permissible to fill a two-layer shingle.
Thanks to this, the nail heads will not exceed the limits of the rails.
This helps prevent cracking and chipping of the plaster. This is especially true if there is a second floor in the house. It is recommended to apply the plaster mixture in 2 layers. Each of them must be carefully leveled and dried.
drywall
The process of applying plaster to gypsum board involves filling the bumps and joints with a building compound. If there are significant gaps between the blocks of material, experienced craftsmen advise gluing the serpyanka.
In this case, the thickness of the layer on the areas not covered with a mesh should not exceed 15 millimeters.
Application of decorative plaster
The ceiling can be covered with decorative plaster. It helps to get the original texture.The combination of different techniques looks particularly impressive.
Varieties
Today, many interesting options for applying plaster are known, each of which has certain characteristics.
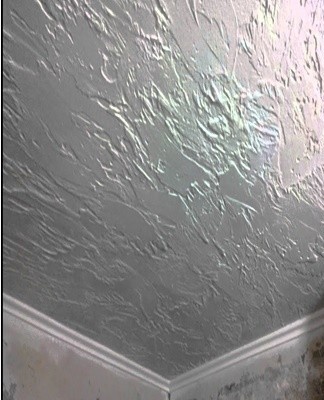
Texture
The textured plaster looks very impressive. However, it is not suitable for all premises. Such a surface is not used for cooking, since it will be very problematic to remove dust from irregularities. To decorate the textured ceiling, it is recommended to use polymer-based plaster. She is not afraid of moisture and is resistant.
Of construction
This term is understood as a granular mass in which small stones or quartz elements are present. Structural plaster is divided into several categories. Specialists identify mineral and silicate varieties. In addition, the composition is made on the basis of synthetic latex.
Venetian
This type of plaster is rarely used for ceilings. Usually it is used to decorate the walls. Initially, the composition was made on the basis of wax and marble chips. Today, acrylic resin is generally used as a binder.

Flokovaya
The composition of such plaster includes many small elements of acrylic paint. They are poured on an adhesive base and spread. The color scheme may be different. Before starting the procedure, the surface must be primed.
How to accomplish
To successfully complete the procedure, it is worth performing a number of sequential actions. This will help achieve even coverage.
Base
To begin with, the ceiling surface is cleaned of old finishes. This is done with a scraper. If the surface was previously covered with putty, then it must first be moistened with water.It is recommended that all protruding areas be knocked down and any cracks repaired. The base is treated with a special antiseptic compound, which helps to prevent the formation of mold.
Leveling layer
In case of strong drops from the ceiling, it must be leveled. To do this, use a starting plaster putty. Before applying the composition, beacons are placed on alabaster. The first board is installed 20 centimeters from the wall. The distance between the rest of the elements is determined taking into account the length of the ruler.
Then it is worth making a mortar using a construction mixer and screeding the ceiling. To do this, it is recommended to throw the mixture into the gaps between the boards with a spatula and remove it with a ruler. To speed up the process, it is allowed to use drywall. In this case, it will be enough to apply a primer.
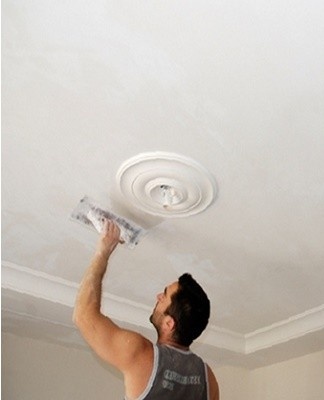
Finishing
Depending on the type of decorative plaster, a stain or polish is used for the final decoration. It is worth painting the ceiling if there are no color components in the material. The paint should be applied in 2 coats. In this case, it is important to wait for the first to dry. Waxing is carried out a week after the end of the plastering work. The wax will give the finish a shine and protection. For textured surfaces, it is better to use varnish.
So, decorative plaster on the ceiling is laid in approximately the same way as on the walls. The main difference is a faster application speed and compliance with safety rules when working at height.
Additional tips and tricks
To achieve good results when applying the plaster mixture, the following features should be taken into account:
- When applying putty, there is a risk of sagging. Getting rid of these defects can be very problematic.Violation of the technology of applying the composition leads to the appearance of problems.
- To avoid sagging, it is recommended to gradually tilt the trowel when applying the mixture.
- When laying the substance on the ceiling covered with putty, the movements of the spatula should be directed to the applied layer.
It is quite permissible to apply plaster to the ceiling to do it yourself. At the same time, it is important to choose the right materials and clearly follow the sequence of actions. Compliance with safety rules is not negligible.