Pencils for whitening plumbing joints and how to paint with them
Pencil or paint for whitewashing and grouting for grouting joints of plumbing tiles are applied at the finishing stage, that is, after laying the tiles. The appearance of the surface depends on the choice of tools and the good work done. Additionally, paint, crayon, or grout helps mask styling flaws. It is impossible to do without such funds at the finishing stage.
Preparing seams for work
It is recommended to prepare the tile joints before painting with a pencil, marker and filler. Wait until the tile adhesive is completely dry before beginning the grouting process. To fill the gaps between the tiles, a suitable composition is selected. When choosing funds, take into account the characteristics of operating temperature and humidity of the room. For the bathroom, sauna, tubs and floor, choose moisture-resistant grout and paint (pencil, marker). It is advisable to use funds from the budget to fill the tile joints on the wall of the kitchen, hallway, room.
In addition to grout or paint (whitening pencil, marker), tools are needed.They are chosen depending on the composition that will be used to fill the seams. The most popular tools: spatulas (metal and rubber), screwdriver, knife, pliers. During the work you will need rags, sponges, a vacuum cleaner.
Stages of preparatory work:
- purchase of grout or paint (felt pen, pencil);
- purchase of tools;
- seam preparation.
The joints are prepared as follows: they are cleaned of the remnants of tile adhesive with a metal spatula and a toothbrush, deepened a little with pliers or a screwdriver, and the plastic crosses are withdrawn. The surface is cleaned of dust, washed with soapy water. If desired, the seams can be treated with a primer or antifungal agent. Wait for the floor or wall to dry completely before starting the planer.
The choice of paint for tile joints
There are many products for whitening, painting or filling tile joints. They differ in composition and performance. All these means for tile joints should perform the following functions: protect against moisture and dirt, strengthen capping and prevent the development of mold.
Markers
It's a tool with a wide shaft and liquid paint that sits in a reservoir inside a plastic case and flows to the tip. It is applied to the surface by simple stamping or extrusion. Available in different shades. It is applied to the grout to paint joints or refresh the color. It can be used when laying tiles, glass tiles, ceramics, stone.
Special coloring compositions
Simple grouting in the grooves between the tiles spoils the appearance of the wall or floor. Paint (acrylic or water-based) will help improve the decorativeness of the surface. Painting the gaps between tiles is considered the cheapest option for updating tile joints. Paints are available in a variety of colors. You can choose a coloring agent to match the tile or the contrasting shade.
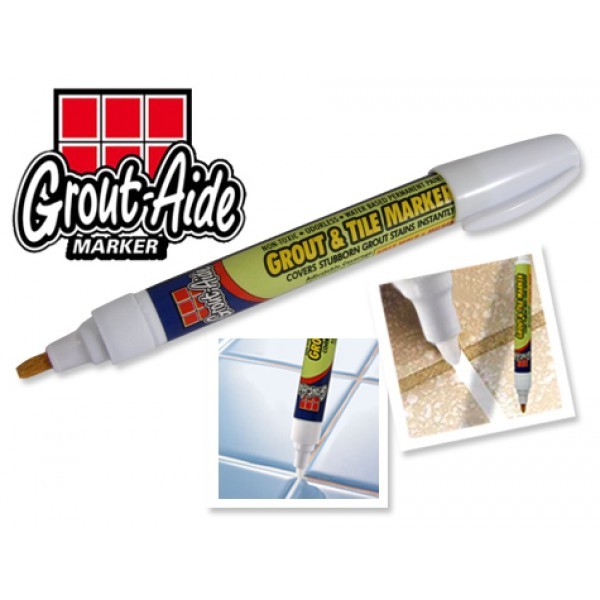
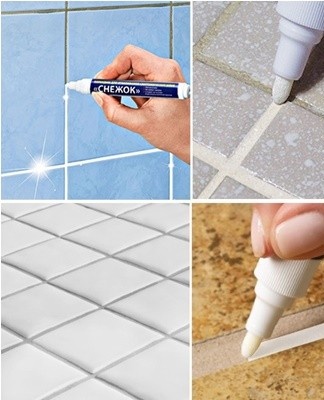
whitening pencil
To make the joints of the tiles white, use a special whitening pencil. This tool is also called marker. Using a pencil is very simple: just pass it over the surface of the joints previously filled with grout. Used for grouting tiles, ceramics, glass, stone tiles.
Cement grout
Cementitious grouting mortars are considered the most affordable, economical and easy to use.Sold in the form of a ready-to-use composition or powder, which must be diluted with water before use. There are two types of grout: for narrow or wide recesses. Each should include Portland cement, as well as various modifying additives. There is also sand in the grout for wide joints. Before work, the cementitious product must be brought to a pasty state. In appearance, the grout should resemble putty.

Epoxy products
Epoxy grouts with added hardener are considered more durable. Such compositions are not afraid of temperature fluctuations and prolonged exposure to moisture. True, it is more difficult to work with them, they dry out too quickly. They are used in swimming pools, saunas, bathrooms, floors, laboratories and hospitals. It is advisable to press the epoxy mortar exactly into the recesses between the tiles using a bag with a suitable nozzle.
Polymer coating
Polymer Grout is an easy-to-use, polymer-based joint filler compound. It is used in medium humidity conditions. Completely ready to use. Polymer grout is stronger than cement but inferior to epoxies. It is mainly used for interior decoration. Suitable for tiles, artificial stone.
Work rules
Means for filling the grooves between the tiles are applied in two ways:
- rubber spatula;
- a bag with a nozzle equal to the seam width.
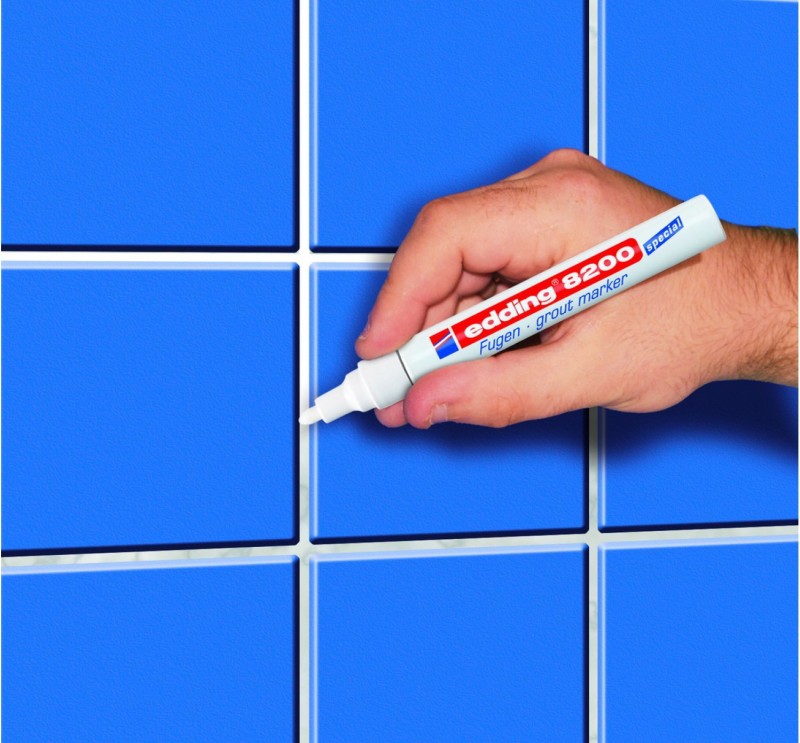
If you need to paint a seam, use a brush and paint or dye in the form of a ready-made marker or a whitening pencil. True, they paint only at the finishing stage (after filling the grooves with grout). To paint the filled seams, a marker or pencil is selected in the color of the tile or in a contrasting shade.
Assembly technology:
- preparation of a deepening and grout;
- apply grout;
- smooth the seams, remove the composition protruding from the surface;
- remove the solution from the tile;
- paint with pencil, marker, paint.
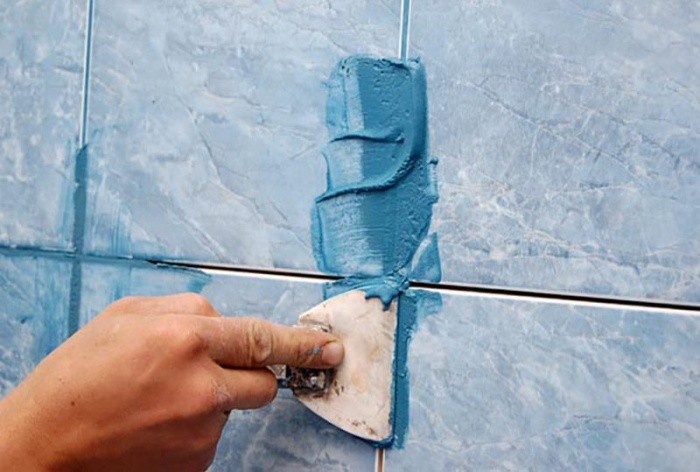
Creamy paste or grout is pressed into the grooves between the tiles with a construction trowel. The recesses are completely filled (to the top) with trowel compound. The grout is not only pressed inward, but also smoothed over the surface with a rubber spatula. The grout should not protrude from the tiles.
It is necessary to work quickly with the grout, because after 10-20 minutes it becomes hard. If a bag is used, inside which there is a grouting solution, then you just need to press it during work and move along the seams.
After filling the grooves, it is recommended to remove the remnants of mortar that rise above the surface of the tile with a special spatula.
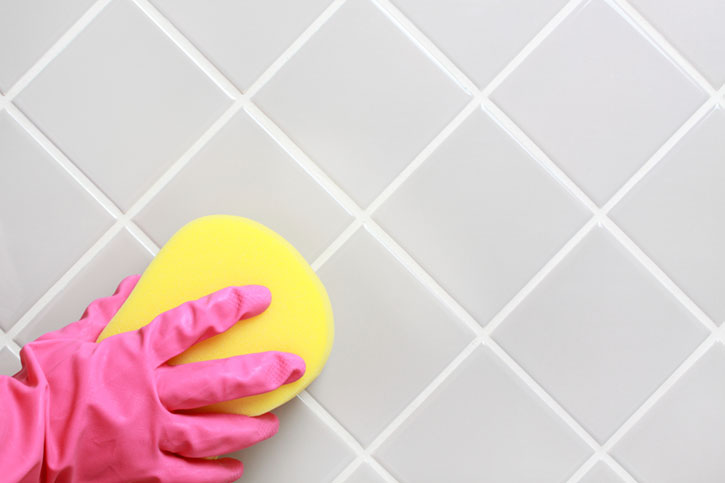
Stained tiles are cleaned with rags for the first 30 minutes after work. It is advisable not to pull when cleaning the tile from the remnants of grout, otherwise it will harden and adhere firmly. Once the grout is completely dry, the surface can be washed in soapy water using a sponge or rag and buffed to a high shine. Once the grout is dry, the joints can be painted with a marker or bleached with a pencil.
How to replace the grout layer
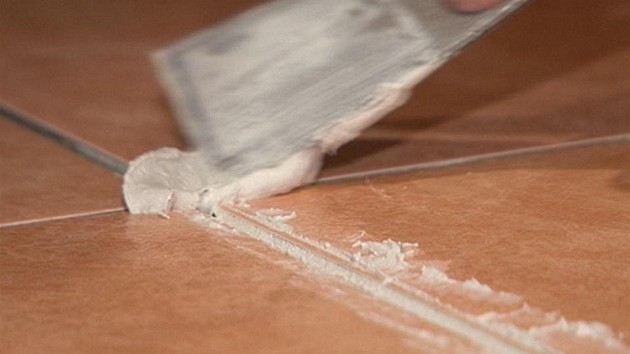
During operation, the trowel layer often cracks, crumbles, cracks and holes appear in it. In this case, repairs are necessary. In the place of damage, the old grout must be removed, that is, the joint must be completely cleaned of grout.
For repairs, use tools (spatula, knife, toothbrush), a vacuum cleaner and the same composition as before. The grooves are filled with grouting solution, leveled and residues protruding from the surface are removed.The tile surface is immediately cleaned of grout. If necessary, paint, pencil, marker are applied to the trowel (after complete drying).
How to superimpose a fugue on a previous one
When repairing the tile joint, it is permissible to apply a grouting solution to the old layer of the fugue. The main thing is to remove all ruined elements. The seams are cleaned of dust and dirt, washed in soapy water and dried. Then the grout is prepared.
The mixture should have the consistency of thick sour cream or paste. It is poured or squeezed into the recesses and spread evenly with a spatula. The grout should only remain in the grooves. The raised residues are removed with a spatula. The solution is cleaned from the tile with a cloth or sponge.