Do-it-yourself rules for applying plaster to the walls of lighthouses
No renovation in a new apartment is complete without leveling the walls. If this is not done by gluing wallpaper to an untreated surface, the room will look unattractive, and no designer interior will save it. Plastering the walls, like any other repairs, is an expensive pleasure, and many new apartment owners strive to do as much of it as possible with their own hands. How to plaster the walls of the headlights correctly and whether it is worth doing it yourself, we will find out below.
Content
- 1 Surface requirements
- 2 Potential wall alignment issues
- 3 How to choose the right mix
- 4 Review of popular brands
- 5 Tools and Materials Required
- 6 How to prepare the surface
- 7 Prepare the solution yourself
- 8 Detailed instructions for running the main process
- 9 How to align without tags
- 10 How to plaster the walls of the facades
- 11 How to coat the walls in the bathroom
- 12 The choice of plaster for different finishes
- 13 Advantages and disadvantages of mechanized methods
- 14 How to check regularity
- 15 Common Mistakes
- 16 Tips and tricks from experienced craftsmen
Surface requirements
The first thing to do when applying plaster to the wall is to familiarize yourself with the requirements of a particular type of work surface. They have their own nuances for different types of premises, which must be taken into account during the work.
Plaster finishing work is divided into three large groups:
- finishing with plaster of non-residential premises;
- finishing with plaster the facades of buildings;
- plaster finish of living quarters.
For non-residential premises
It is easier to work with non-residential premises, since special jewelry is not required, and the requirements for the mixture itself are also low. Keep in mind the following nuances:
- two layers are enough - one layer of bitumen and plaster loam;
- the presence of deviations from the vertical plane is allowed, but they should not exceed 0.3 centimeters per 1 m2 walls;
- 2-3 irregularities are allowed, the depth of which does not exceed 0.5 centimeters.
For facades
For the processing of building facades with plaster, in most cases, an extremely high level of quality is not required. This is due to the fact that some kind of finishing layer or facing tile is applied to the surface of the plaster. In such cases, the following requirements are imposed on the coated surface:
- three layers - plaster, a layer of soil and a cover;
- the presence of gaps is allowed, but not more than 0.2 centimeters per 1 m2 walls;
- no more than 2 irregularities, the depth of which does not exceed 0.3 centimeters.
For residential premises
Plastering of walls in residential premises means the application of a high-quality mixture, obtained by following the following standards:
- four layers - in addition to plastering, priming and coating, another additional layer of primer is applied. With its help, the surface of the wall to be treated is perfectly flat;
- deviations from the vertical surface should not exceed 0.1 centimeters;
- no more than 2 irregularities, the depth of which can reach 0.2 centimeters.
To note! The deviation of the plaster layer from the horizontal plane, when working in residential premises, should not exceed 0.1 centimeters.
Potential wall alignment issues
In the event of a decision to self-plaster the walls, be prepared for the following difficulties:
- the appearance of cracks on the plastered surface;
- rapid contamination of the working surface;
- high consumption of plaster;
- violation of the rules for carrying out repair work.
Cracks
Owners of residential premises who want to carry out repairs in an apartment on their own do not know how to properly knead this or that solution and what consistency the plaster should be. For this reason, it does not hold well on the wall, gradually collapsing under its own weight. This is the reason for the formation of cracks on the wall, which clearly does not improve the aesthetic appearance of the room.
The following rules will help avoid this situation:
- follow the instructions on the package with the dry mix, as they are considered the most optimal;
- do not add water to the dry mix. Due to this, when kneading, lumps are formed, which subsequently violate the integrity of the layer.It is best to put the mixture in water;
- do not add dry mix to ready-mixed mortar to change its consistency. The viscosity of the solution is regulated only with water. Add it carefully and you should have no problems.
Rapid contamination of surfaces
With careless finishing work, the surface of the walls quickly becomes dirty. A layer of dirt prevents the plaster from firmly adhering to the wall, therefore there is a high probability of delamination. Try to make repairs carefully, slowly and do not be lazy to again remove lumps of dirt from the wall that adhered during the work.
High mix consumption
Determining the optimal consumption of the mixture, especially if you are doing it for the first time, is quite a difficult task. This parameter depends, first of all, on the binder that is part of the plaster. If it is gypsum, then 1 m2 the walls will be consumed by 0.5 kilograms of plaster more than with a cement base. Experienced builders recommend buying plaster 5-10% more than the required amount, since force majeure situations arise during the work and increase consumption.
Violation of regulations
Working with plastered surfaces requires knowledge of many intricacies, which makes work difficult for beginners. Violations of the rules include:
- violation of the temperature regime during drying;
- beacons used as an auxiliary tool are left in the plaster, which affects the strength of the finishing layer;
- the drying time is violated.
How to choose the right mix
If you are not afraid of difficulties and are ready to approach the plastering process with full responsibility, then you need to learn how to choose the right building mixture that is optimal for your apartment. The mixtures are:
- gypsum;
- cement;
- clay;
- cement-lime.
Cement
If it is necessary to apply a strong and stable layer of plaster on the wall, pay attention to cement mixtures. In addition to the cement, the mixture includes:
- sand;
- additional impurities to increase the strength of the composition.
Benefits:
- sustainability;
- strength.
Disadvantages:
- the applied plaster dries for a long time;
- a lot of preparatory work.
Cement-lime
The cement-lime plaster has the following positive characteristics:
- adapts well to most work surfaces;
- easy to apply;
- dries quickly;
- sustainable;
- not affected by fungi.
Gypsum
An environmentally friendly material that has advantages such as:
- dries quickly;
- firmly tolerates exposure to negative temperatures and high humidity;
- easy to apply;
- due to the wide variety of ready-made compositions, you can choose an option for exterior and interior decoration.
Clay
Clay plaster is mainly used for interior decoration. With its help, sections of the wall are processed that will be exposed to high temperatures. If you plan to make a fireplace or a stove in your house, buy gypsum plaster.
To note! Before application, the mixture is rubbed through a sieve, the mesh size of which does not exceed 5x5 mm.
Review of popular brands
So, we have determined the type of mixture, it's time to decide with the manufacturer. The construction market offers a wide variety of brands, each with advantages and disadvantages. Among the most reliable manufacturers and the most demanded by buyers are:
- KNAUF Rothband;
- Veber Vetonit Profi;
- Forman 61;
- Veber Vetonit TT40;
- M100 Besto.
KNAUF Rotband
Universal plaster filler with a high adhesion rate thanks to unique polymer blends. Suitable for plastering:
- concrete surfaces;
- expanded polystyrene surfaces;
- masonry;
- PSD.
Used exclusively for interior decoration.
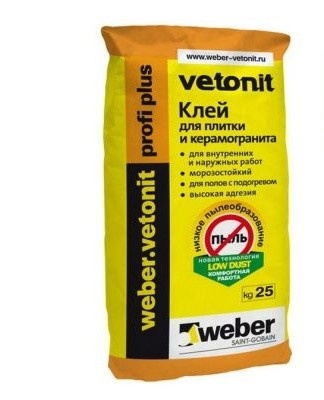
Veber Vetonit Profi
It is used for construction work carried out both inside the building and outside. Possesses :
- high elasticity;
- high adhesion rate;
- during work, little dust is generated, which allows you to keep the workplace and adjacent rooms clean;
- frost resistant structure.
Forman 61
Cement plaster for all types of construction work. Benefits :
- resistant to low temperatures;
- does not lose its performance in rooms with high humidity;
- the composition includes polymer additives which act as an additional reinforcement of the mixture;
- economic.
Veber Vetonit TT40
Universal cement-based plaster, the use of which offers the following advantages:
- the ability to apply both in wet and dry rooms;
- Versatility;
- operational reliability;
- can be applied manually or using special equipment.
M100 Besto
A cement-lime product sold as a ready-mixed compound. With its help, you can quickly prepare a working solution that allows you to:
- improve the microclimate in the treated room;
- maintain indoor humidity at a comfortable level;
- work with the solution both indoors and outdoors.
Tools and Materials Required
Before starting work, to ensure safety and speed of application, make sure you have all the necessary tools and materials. It will take a few minutes, but it will save you a lot of time later.
Selected plaster mix
The main component, without which further work is impossible. Forgetting it is problematic, but problems can arise with:
- incorrectly chosen composition;
- volume of material collected.

Make sure everything is done correctly before you start plastering the walls.

Drill with mixer attachment (impact drill with drill)
This tool will significantly increase the speed of preparation of the solution and its quality. You can also stir it by hand, but it's very dull. In addition, the manual method does not give the same quality of mixture as that obtained using a drill. A perforator is necessary to drill holes for beacons.
If the tool is not available, borrow it from friends or rent it.
Hammer
A universal tool, without which no repair is complete. With its help, you can beat a piece of old dried plaster or knock out a strongly protruding beacon, sinking it deeper.
Stud
They are driven into the holes prepared by the perforator. They serve to prepare the markings with which the beacons will be installed on the wall.
Self-tapping screws
Used to create markings on the wall to facilitate later installation of beacons. Without them, it will not be possible to fix the cord in order to obtain a uniform and high-quality wall finish.
Level
Needed to level walls. Mandatory to purchase, otherwise you will have to live in a room with curved walls. Don't expect to eye level the wall, as this can only be done by very experienced craftsmen.
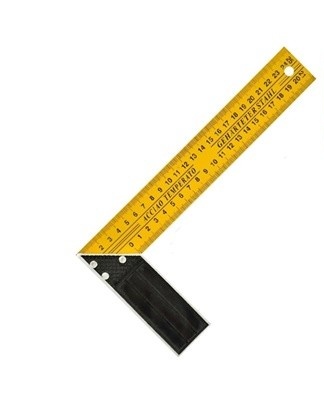
gon
Corner plastering is considered one of the most difficult stages of work, the implementation of which requires increased attention and auxiliary tools.The square will allow you to check the quality of the applied layer, indicating irregularities and imperfections.
Container for mixing the mixture and the primer
The plaster mix and the primer are mixed in a separate container, which must be prepared in advance. The size of the container depends on the amount of plaster needed for the preparation.
Primer
A primer is necessary for the primary treatment of the work surface in order to:
- increase the adhesion of the surface treated with a coating, which is performed by plaster;
- equalizes the absorbency of the treated material, which also affects the quality of adhesion.
Brush
With its help, the primer is applied to the wall. It is advisable to prepare the instruments with a wide and narrow brush. A wide brush will speed up overall processing speed, while a narrow brush will help gently apply primer to hard-to-reach areas.
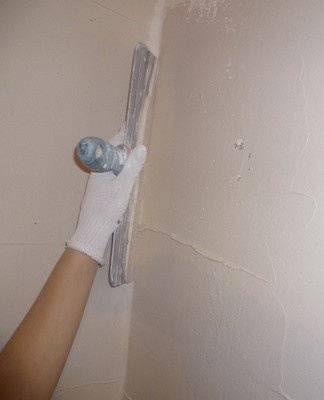
putty knife
The basic tool for applying and leveling a layer of putty. You can't do without it, so be sure to buy it in advance. It's not expensive, but it brings a lot of benefits.
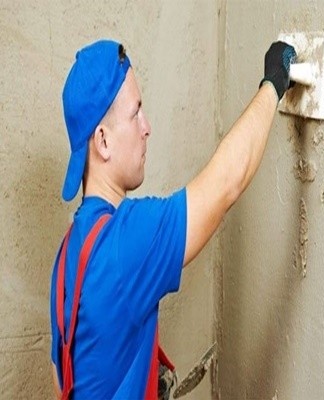
Gloves
Putty has a negative effect on the skin, dries it out and damages it. Remember to protect yourself by wearing thick gloves on your hands. It is not recommended to work without them, especially if a large amount of work is planned.
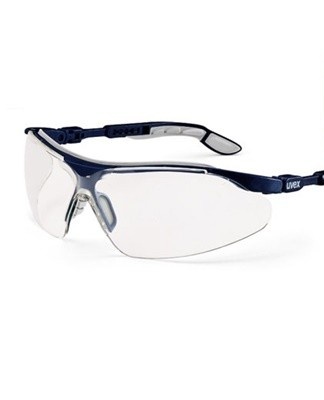
Protective glasses
Putty has the unpleasant property of scattering throughout the area, getting to the most unexpected places. It is easy to stain his eyes, which will be extremely traumatic. Don't be lazy to find safety glasses or borrow them from friends.
Protection's mask
Not a must, but not a superfluous wardrobe item if you have to work with putty. Whether you wear it or not is up to you, but experts advise not to neglect such protective ammunition.It's not expensive, but it gives a lot of benefits.
Work clothes
The filler quickly and deeply penetrates the fibers of the fabric, after which it will be quite problematic to remove it. You should not wear good clothes during siding work, because even the most careful owners will not be able to protect them from dirt.
How to prepare the surface
Once the tools, materials and protective equipment have been checked, it is time to move on to preparing the work plan. It has some shades for different types of materials, which are divided into:
- brick;
- concrete;
- TREE;
- whiten;
- concrete wood slabs.
Bleaching and tagging require separate preparation.
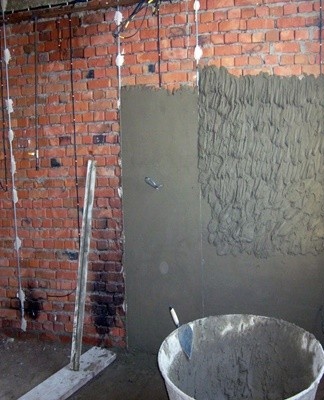
Brick
It is considered the most unpretentious material that does not require serious preparation and special solutions. It is enough to eliminate large irregularities and protrusions, after which you can start repairing. The only drawback of bricks is the high consumption of the mixture, which is necessary for high-quality leveling of the working surface.
To note! To save money on your brick wall, use a cement-and-sand sealer.
Concrete
Shallow notches are made on the concrete wall or the surface is covered with a special plaster mesh. This is to increase the adhesion of the materials, because the concrete is too smooth. As a plaster, it is recommended to choose compositions in which cement predominates. The larger it is, the more reliable and durable the layer will be.
TREE
When applying plaster to wooden slabs, be sure to use a reinforcing mesh. During kneading, a little clay is added to the solution itself as a plasticizer. The main thing is not to add too much, otherwise cracks will begin to form on the surface.
Arbolite plates
Arbolite tiles have a rough structure, which is why the plaster reliably fixes and no additional preparation is required. The only drawback is the high consumption of the mixture, since a significant part of it is spent on filling the cavities of the material structure.
bleach
Before whitewashing the plaster, it is necessary to apply an intermediate layer of lime, which will serve as the basis for subsequent facing. As soon as the lime layer dries, you can start whitewashing.
Expose tags
Beacons are installed according to the following algorithm:
- we determine the differences in height using the level;
- draw marks for fasteners;
- extreme marks must not be less than 30 centimeters from slopes or angles;
- we draw a vertical line, retreat from it such a distance that the ruler is 30-40 centimeters longer;
- measure 15 centimeters from the floor and draw a horizontal line;
- at the points of intersection we make holes into which the dowels are driven and self-tapping screws are screwed;
- pull a thick, strong thread between the screws;
- if the ceiling height is 275 centimeters, 245 centimeters are measured from the lower marking;
- draw a line, make holes, drive in dowels;
- we insert self-tapping screws into the upper and lower holes, exposing their heads at one level. There are several techniques for installing wall beacons.

Prepare the solution yourself
If you want to make your own cement-based plaster, rather than buying one already made from the store, follow these instructions:
- we mix cement and sand in the required proportion (the proportion varies according to the brand of cement);
- sift the resulting dry mixture through a sieve;
- add the mixture to the water until we get the substance of the required consistency;
- to increase the plasticity of the composition, it is allowed to add a little detergent to the water, at the rate of 50 milliliters of the agent per 5 liters of water.
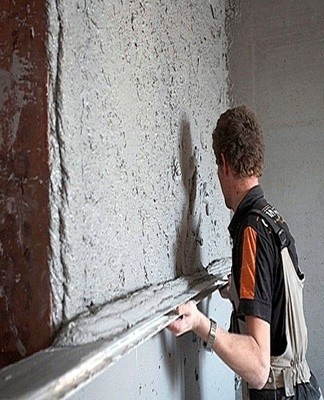
Detailed instructions for running the main process
The main process includes:
- splashes;
- reinforcement;
- plaster corners;
- padding;
- apply a finishing coat.
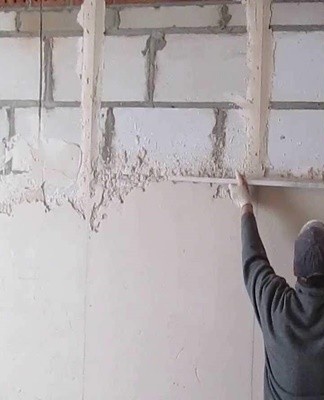
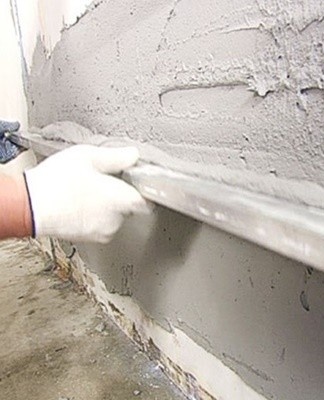
Splashes
The spray is the primary layer of plaster, which guarantees the reliability of fixing to the wall. The solution should not be thicker than sour cream, and its thickness should not exceed 0.5 centimeters. The application is done in separate bands, preferably from bottom to top.
Primer
With its help, the strength of the coating and its thermal insulation properties are enhanced. A thicker solution is used, the application thickness of which fluctuates in the region of 15-20 millimeters.
Top coat
The topcoat should be applied as follows:
- we wet the ground with water;
- apply a solution of creamy consistency;
- level the surface.
Layer thickness - no more than 2 millimeters.
Reinforcement
Reinforcement ensures the reliability of fixing the plaster to the wall, preventing it from falling off. In addition, the reinforcement provides:
- increase the strength of the plaster;
- reduces the risk of cracking.
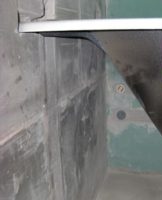
Plastering corners
For plastering the corners, a special perforated corner is usually used, along the edges of which a fine-grained mesh is attached. Keep in mind that the wedge is malleable, so you shouldn't put too much pressure on it.
How to fix a crack
It makes no sense to plug the cracks, because it is necessary to remove all the old layer of plaster and apply it to a new one, in the correct order.
How to align without tags
Along the entire length of the wall, 3 strips of mortar are applied, laid in a horizontal plane. The first strip is made at a distance of 10 centimeters from the floor, the second is in the center, and the third is along the top of the wall. We line up the three strips on one level and then fill in the gaps using them as beacons. High precision cannot be achieved, but the result will be digestible and fast.
How to plaster the walls of the facades
Action Algorithm:
- we prepare the base;
- we install markup using beacons;
- plastering.
How to coat the walls in the bathroom
The walls in the bathroom are plastered with cement plaster, which differs from others in its increased resistance to moisture.
The choice of plaster for different finishes
The choice of plaster is influenced by the finish, which is carried out using:
- floor tile;
- wallpaper;
- paints.
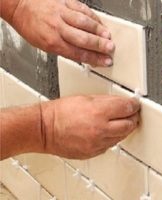
Tile
Plaster on a cement or gypsum base is suitable for tile. The first is more durable, the second is lighter and gives less shrinkage.
Wallpaper
For wallpaper in a room, plaster or cement plaster is suitable. Gypsum is not suitable for rooms where the humidity exceeds 70%.
Paint
Use dry mixes made specifically for paint jobs. These may be solutions based on:
- cement;
- gypsum;
- polymers.
Advantages and disadvantages of mechanized methods
Benefits include:
- high productivity;
- high quality of application, due to leveling of the layer using a laser level;
- the mixture solidifies uniformly;
- economic consumption.
Disadvantages:
- dries for a long time;
- the presence of specialists is required.
How to check regularity
The regularity of the application is checked using a laser or conventional level.
Common Mistakes
Common mistakes when plastering:
- the instructions for preparing the mixture indicated on the packaging by the manufacturer are not followed;
- the temperature regime is violated;
- the wall dries in full sun. Due to the temperature difference in the shaded and lighted area, uneven drying occurs.
Tips and tricks from experienced craftsmen
Masters recommend:
- do not treat the walls with a heat gun;
- apply the plaster from top to bottom, whether it is a rough finish or a top coat;
- do not forget to reinforce the surface of the wall with a mesh along which the seam between different materials passes;
- do not use water in place of a primer.