Step-by-step instructions on how to install a bathtub and attach it to the wall
Many people decide over time to buy a new bathtub to make their bath more comfortable. Before using it, you need to fix the structure to the wall. It is recommended to familiarize yourself in advance with the basic guidelines for installing a steel bath.
Installation features
Before starting work, you need to understand the installation features of various types of structures.
Steel
Often people install durable steel products in the bathroom. Some people try to get them on the floor, but it's not worth it. Experts recommend placing steel structures on a special podium. To make it yourself, you will need to make brick walls, on the surface of which the bath will be installed.
The main drawback of such an installation is considered to be a large amount of noise that appears when filling with water.
Melting
Some people prefer to use cast iron tubs.This metallic material has several advantages, including:
- Sustainability. Cast iron products do not deteriorate in high humidity conditions and therefore can last for decades.
- Keep warm. The water collected in the cast iron bath cools slowly due to the fact that the material retains heat well.
To install such a structure, it is necessary to make a strong concrete screed in the bathroom. Cast iron product should be mounted on brick studs.
Acrylic
Acrylic products are the least durable and therefore are not installed very often. The surface of acrylic structures is so thin that it begins to bend under light load. Therefore, before installing such a bath, you will need to install a lot of supports to reduce the load level. The highest quality stand is a four-legged metal frame.
Tools and materials
There are several materials and tools that need to be prepared for the job.
Screwdriver or screwdriver
It's no secret that when installing the bath you will need to screw in special fasteners. Most often, conventional Phillips or straight-type screwdrivers are used for this. However, some people do not wish to manually turn the screws. In this case, you can use a battery-powered screwdriver. This tool is ideal for driving screws and screws.

Key
A wrench is a hand tool that has been used for many years to screw in or unscrew threaded fasteners. Most often it is used in workshops and in production. However, a wrench is also useful when installing a bathroom structure. Experts advise using open-ended wrenches.
Building level
No repair work should take place without a special construction level. This tool is used to determine deviations from horizontal and vertical surfaces. It is also used to offset the tilt angle. When installing the tub, a tool is needed to set the structure straight. Spirit levels are considered the most common and quality levels.
puncher
A hammer drill is a hand-held power tool that performs rotating and back-and-forth movements. This tool is used for the following purposes:
- create through holes in wall or floor surfaces;
- drilling of metallic materials;
- gouging surfaces.
When installing a tub, a puncher may be needed if you need to run sewer pipes into the bathroom.
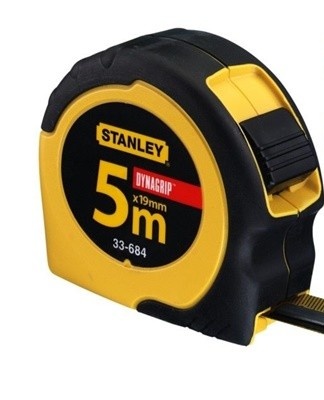
Roulette
The construction tape is considered the most widely used measuring tool. When installing the bath, you will periodically have to take measurements, and therefore it will not be possible to do the job without a tape measure. It is necessary to use such models of measuring tapes, in which the length of the tape reaches three meters.
Marker pen
In the construction industry, special markers are often used, which are used to mark various surfaces. They are suitable for marking concrete, glass, asphalt, metal and textile surfaces.
It is necessary to use special waterproof markers, the traces of which are not erased from the surface even in high humidity.
building square
Some people use a building square when installing a bathroom structure. Such a tool is used to outline the corners, as well as to check their sharpness. Sometimes a square is used when you need to draw vertical lines on walls or floors.In the construction industry, models with a length of about one meter are popular.

Installation steps
There are ten stages of the installation of baths, which should be familiarized with in advance.
brick podium
First of all, you need to make a podium in the bathroom, on which the structure will be installed. They are made from various building materials, but most often they are made from durable red bricks. The masonry is not very high, 3-5 rows are enough. The podium must be reliable in order to support heavy loads.
Leg height adjustment
Many models of structures are installed on special legs, the height of which a person can independently adjust. It is recommended to set them in advance and set the optimal height. They need to be adjusted so that the height is at least ten centimeters.
markup
Experts advise to do the marking in advance, so that in the future the product will be easier to install. Before marking, you need to put the bath in place. This will help determine the main features of its horizontal regulation. Then marks are made on the structure where the fasteners will be installed.
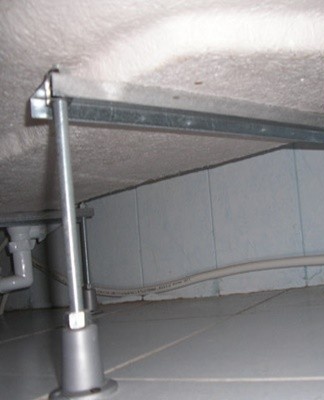
Installation on a chassis
Many people advise against laying it on the ground and suggest placing it on a sturdy frame. The created frame is pre-installed on an inverted bathtub, after which the height of the structure is adjusted. After screwing all the racks, the legs are installed, and the frame, together with the tub, is installed on the floor.
Sewer connection
After fixing the frame and installing the structure, they are connected to the sewage system. First, a siphon is connected to the product drain.Then it is connected to a protective grid and a receiving pipe. All joints are additionally treated with a sealant. After that, the pipe leading from the siphon is connected to the sewer.
Level adjustment
To keep the bathroom level, it will need to be adjusted using a building level. It is necessary to make the adjustment even when installing the frame so that it is installed without tilting. Also, the level will be necessary when the structure is installed on the legs.
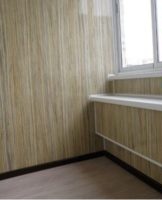
Masking tape for sides and walls
Joints formed between the side and the wall should be treated with silicone sealant. It is used so that the structure adapts better to the wall. However, sometimes the sealant is not enough and you have to use tape. It is installed on the silicone and attached to the surface of the cord and the wall.
Filling the gap with polyurethane foam
Some people decide to seal gaps and crevices not with putty, but with construction foam. Before using it, you must thoroughly clean the joints from debris and dust. Then they are degreased with an alcoholic liquid and treated with foam. It must be applied carefully so that it does not exceed the cracks.
Fixing on the legs
It is necessary to pre-fix the legs to the structure of the bathroom before installing it on a brick niche. To fix the legs, the bath is turned over, after which special fasteners are installed on it. Then the legs are screwed to the fasteners on which the product will stand.
Review
After the installation is completed, the stability of the structure can be checked. First you need to make sure it is level and not tilted. Then the strength of the podium is checked.To do this, you need to get into the bathroom and lie there for 10-15 minutes. You should also draw water from it and drain it in order to check the performance of the drain system.
Popular bugs
Inexperienced people who decide to repair the bathtub themselves often make the following mistakes:
- uneven installation of the product;
- the use of poor quality corrugations;
- overtighten the mounting screws;
- using a cheap sealant that leaks quickly.
Conclusion
People who have purchased a new bathtub will have to install it themselves. Before installing the structure, you will need to determine in advance the installation features and how to properly perform such work.