Causes of bubbles on the wallpaper after gluing, what to do and how to fix the problem
After wallpapering, air bubbles may remain under the wallpaper. A defect arises as a result of improper performance of the work or under the influence of third-party factors. Asking the question of what to do if bubbles appear on the wallpaper after gluing, you need to study the options for eliminating the problem.
The main causes of bubbles
There are several common situations that lead to wallpaper swelling. Most of the reasons are associated with non-compliance with the technology of gluing wallpaper and violation of general rules for performing repair work.
Drafts
Ventilation of the room during drying leads to deformation of the wallpaper. After the work is completed, you need to make sure that all the windows in the room are tightly closed and there is no risk of accidentally opening them.
Improper installation and preparation of the substrate
Before you start gluing the room, it is recommended to level the surface of the walls, eliminate all major defects and perform a primer.The application of a primer provides an adhesive effect, reinforces the support and increases the level of adhesion.
Also, air pockets may appear due to improper installation technology. When gluing, it is important to firmly press the coating to the walls and constantly remove accumulated air.
Application on wet wall
If you paste the wallpaper on a damp wall, the moisture will gradually evaporate and swelling will be noticeable on the coating in many places. After finishing the priming of the walls, you need to wait some time so that the base has time to dry.
Uneven mixing layer
An unevenly applied layer of adhesive solution also leads to the penetration of air under the wallpaper. This happens due to poor absorption of the composition in certain areas, which leads to the accumulation of air with subsequent swelling.
Insufficient drying of the glue
Providing improper curing conditions for the adhesive often leads to the formation of air pockets. For the moisture to completely evaporate, standard wallpaper paste takes about two days. During this time, a stable temperature regime should be observed without significant changes. Also, in order to dry the adhesive, it is necessary to exclude direct exposure to sunlight.
How can you solve the problem
There are several ways to remove air bubbles from glued down wallpaper. You need to choose the appropriate solution to the problem, taking into account the specific situation.
Smoothing
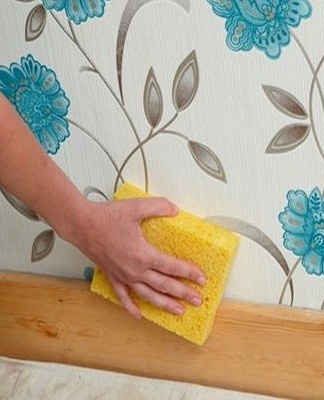
It is better to apply the smoothing technology immediately after gluing the canvases to the walls.To remove air pockets, you need to prepare a roller with a rubberized surface, a clean, dry cloth or a wallpaper spatula. A dry cloth and roller are best for wallpapering, and it's handy to use a spatula to handle vinyl and non-woven coverings.
Having prepared the necessary appliances, they gently smooth the swollen areas, making movements from the center to the edges and from top to bottom. When using a spatula, special care should be taken if the wallpaper is glued end to end. Careless smoothing can lead to a violation of the uniformity of the seam at the points of contact of the canvases, because of which one will rely on the adjacent one.
Piercing
If smoothing the webs does not give the desired result, you can try to fix the problem using a needle. To remove air bubbles, it is enough to carefully pierce the surface of the areas where the defect is noticeable. When the air comes out through the hole, you need to pass over the wallpaper with the devices used in the previous method.
It is better to resort to this technology a few hours after the end of gluing, when the applied composition has not yet had time to dry completely.
Due to the drilling, it is very likely that some of the adhesive solution is on the surface of the wallpaper. In such a situation, you need to remove the building mixture with a dry cloth or sponge.
Cutting and syringe
Before smoothing the wallpaper, you need to make sure that the glue remains in the area of the bulge, which has not lost its ability to adhere to the surface. If all of the adhesive has dried, smoothing the surface will not help solve the problem.
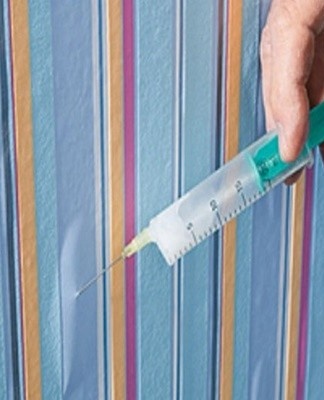
In this situation, the only solution is to use a syringe filled with glue. The procedure is as follows:
- A small slit is made in the swollen area for the syringe tip to slip through.
- A small amount of adhesive is pressed under the cut area.
- Using a spatula or other improvised devices, distribute the glue over the entire internal area occupied by the resulting air cavity.
- Simultaneously with the distribution, the surface is smoothed, therefore it is necessary to assess the visual component of the coating.
- Residues of glue that have fallen on the surface of the wallpaper are wiped off with a dry cloth.
The complete list of works must be carried out accurately. Otherwise, there is a risk of damaging the wallpaper, which is especially true for paper materials.
General gluing rules
It is possible to avoid the appearance of air bubbles on the wallpaper if the standard rules of gluing are observed. Each stage of the work has a number of features that are better to know before the direct decoration of the premises.
Preparation of the wall
The process of preparing the foundation consists of several stages that must be carried out in a specific order. These steps include:
- Primer. Coating the wall with a primer makes the surface layer adhere, deprives the substrate of its intensive moisture absorption properties and prevents dust from adhering. The primer is applied with a large brush or with a brush, rubbing into the composition until a white foam forms.
- Elimination of potholes and cracks. Defects should be specially widened to a centimeter wide, then opened with a primer and treated with cement mortar. As an alternative to cement, you can use tile adhesive as it has the desired characteristics.
- Putty.At this stage, the roughness of the base decreases and the bonding area widens. When preparing the walls, it is impossible to do without putty, and you need to apply at least a thin layer.
- Restart. To complete the preparation of the base, another layer of primer is applied, which will serve as the finishing surface for gluing the wallpaper.
Materials choice
It is better to select the adhesive composition taking into account the technical parameters of the wallpaper. The best option is to use a fast-dissolving adhesive with a high adhesion rate to the wallcovering.
Padding
Applying the primer is an important part of the wall preparation process. Without a primer, the base is susceptible to destruction even with the slightest external influence.
To stick on
Initially, the prepared adhesive is applied to the base or the inner side of the wallpaper. The recommended amount of glue and the optimal application site are usually given in the manufacturer's instructions. It is important to evenly distribute the composition and make sure that there are no lumps, after which you can proceed to fixing the wallpaper. The canvas is applied in a vertical position, trying to ensure the most accurate placement.
Paper wallpapers have time to soak in a short time, which does not always leave the possibility of their correction.
Alignment
To ensure a flat, blister-free surface, the wallpaper should be properly smoothed. After attaching the canvas, first remove the accumulated remnants of glue and air, starting from the top and working down. The surface can be leveled with a spatula or roller. The movements of the instruments are carried out from the middle in different directions.In the process of alignment, you can adjust the position of the canvas in case of displacement.
Additional tips and tricks
It is possible to simplify the process of gluing the premises, provided that all the rules of finishing are observed. Doing it correctly will eliminate the need to fix the bloating problem. Before starting work, it is recommended to create suitable conditions, prepare the necessary devices and study the instructions for gluing the wallpaper.