How to change the plug of the socket on the wire with your own hands
A large number of electrical appliances are used in apartments, offices and other premises. For the operation of the equipment, it is necessary to connect it to the mains, so the question of how to correctly change the plug on the wire does not lose its relevance.
Kinds
If you need to install a new socket, you must first study their classification. In terms of constructive nuances, they practically do not differ, and you need to pay attention to the external design. The most common are disassembled options due to their increased functionality and ease of disassembly. Non-folding models have an integral body and it is impossible to untwist it, so you will have to cut the cord next to the base.
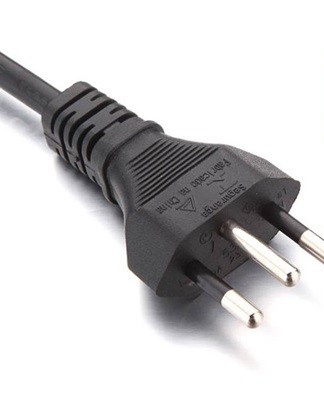
In the Russian market, plugs of two varieties are produced with type C cords, according to the established standard. The main parameters are indicated on the body of the products, including the maximum network voltage level and the magnitude of the current.
C5
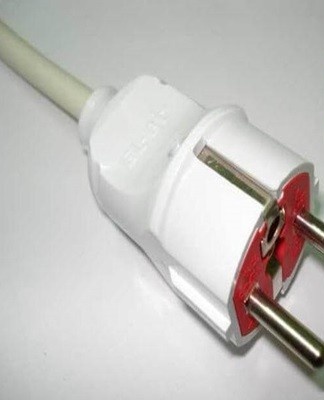
A socket marked C5 is an alternative to the European CEE 7-16 model and is designed for electric current with a load of up to 6A. The C5 variety has a rounded stem with a diameter of 4 mm. This plug has no earthing element and has an insulation length of 10 mm from the start of the housing.
C6
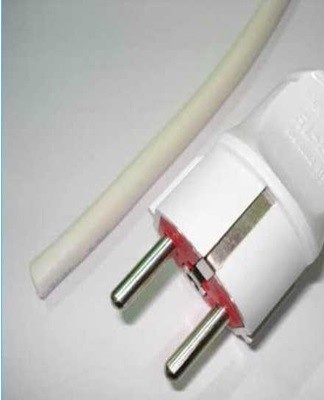
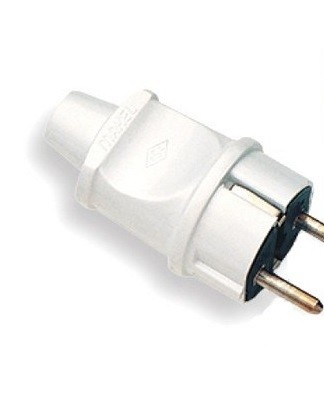
The C6 model is used as an alternative to European CEE 7-17 sockets. The diameter of the round pin is 4.8 mm. Variations are made with and without a grounding element. This type is designed for amperage up to 10A.
Design and device
The device of electrical outlets is classified into a number of categories. You should familiarize yourself in detail with the technical parameters, characteristics, advantages and negative properties of each variety.
Unbreakable
The drawings of the non-separable models are always identical. The pins are fixed at 19 mm pitch in a plastic strip. Conductive parts are placed inside the tape. The bar has two protrusions, the purpose of which is to bypass the thread. The contour is of great importance because it avoids the risk of the grip cord breaking with great force.
As added protection, the prongs and cord are sealed with re-melted plastic. This makes the case one-piece sealed and securely holds the power cord inside.
Three collapsible poles
Modern household appliances are equipped with disassembled three-pole plugs. Such models are ideal for situations when it is necessary to replace a complete mechanism in which a malfunction is detected. The main advantage of this type of fork is its good repairability and the possibility of reuse once the fault has been repaired.
The structure can be disassembled independently and without much effort and fixed on another network wire.
Removable C1-b
The C1-b model has a simple design, which greatly simplifies disassembly. The fork consists of two parts of a plastic body, brass axles, fixing parts and a clamping bar.

C6 foldable
The design of the C6 variety is also distinguished by its simplicity of execution, but it should be borne in mind that there are modifications with and without a grounding element. These plugs are designed for use in appliances rated up to 220W. The brass pins have contact pads with a special thread for mounting wires. The pins themselves are attached to the bottom of the plug. An additional grounding element in the form of a brass strip can be installed inside the case. In addition, the foldable design of C6 is equipped with a bar to firmly fix the wire with a plastic stopper.
Major malfunctions
If the electrical device has stopped working properly, you need to carry out a full diagnosis and understand the causes of the breakdown. The list of common faults includes:
- Weak fixation of body parts. If the fixing bolt is not tightened to the stop, the contact will be broken.
- Wiring burnt. The problem may be associated with a short circuit, and in this situation it is necessary to cut off the damaged section and make a new fastener. For this purpose, the insulation is removed, the wire is stripped and connected with a bolt.
- Contact oxidation. To eliminate the effects of oxidation, the contacts are cleaned with a knife or fine-grained sandpaper. You can also cut the defective area and assemble a new contact.
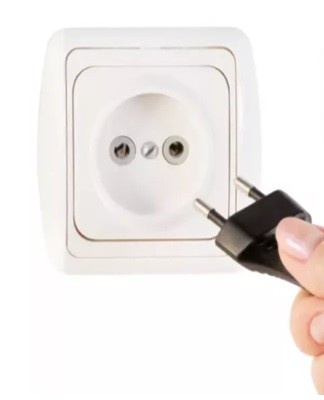
- Loss of contact between plug and socket. The connection should be secure and free of gaps.It is also important to ensure that the diameters of the plug legs and socket holes match. To make sure there is no play, you need to insert the plug into the socket and shake it lightly.
- Fork overload. The problem arises when using adapters that are not designed for the load received. When using high power devices, it is not recommended to use adapters.
How to change correctly
The procedure for replacing the plug depends on the specific type. Having found out about the model and design features, you need to study the corresponding instructions.
It is important to follow standard safety precautions during operation to avoid the risk of injury.
C1-b
Before replacing the C1-b model, you must prepare the ends of the wires well. First, cut the cord at an interval of no more than 5 cm from the beginning of the plug body. If, as a result of a bad connection, the plug overheats, the insulation next to the case will become rigid and will have to be replaced. Rings are formed at the ends of the wires, then spring cultivators and flat surface washers are mounted on the screws. This structure is connected by screws.
It is important to tighten the screws in the pins to the limit, after which you can connect the wire to the next pin. Installation is carried out using protrusions in the case, placing them in special recesses. A bar is applied to the wire and fixed to the case with fixing screws. If the insulation is thin, it is recommended to fix a rubber or alternative tube on top to avoid abrasion. In the end, it remains to fix the parts of the case and tighten the screw.

C6
Preparation of wires when replacing the C6 socket is carried out by analogy with the previous model. To replace a part, it is also necessary to disassemble and then assemble a new body. If the base configuration does not include crop forks, you will need to purchase them separately. The yellow wire can only be connected to a grounding element. Typically, it is located between the contact pads of the pins. In the bipolar version of the wire, the grounding element is not assumed, so there will be free space for it inside the case.
C5 or C6 by extension
Situations often arise when the power outlet is faulty and there is an urgent need to use an electrical device. To solve the problem, you can take any other defective device and use its AC outlet. The wire of the old device is cut to its maximum length. A cord of 15 cm is sufficient for the extension. The sheath of the cords is carefully cut to a length of 10 cm and the wires are removed, leaving the sheath in place.
At the next stage, the length of the conductors is adjusted so as to shift the locations of future rings from the ends of the wires. It is important to consider when mounting that only wires of the same color can be connected to each other. The insulation is removed from it to a length of about 15 mm and twisted. For a strong contact, three turns of entanglement are enough.
The bonded wires are placed in the cut sheath of one of the cables. There is no need to insulate the connections, because due to the displacement of the twists, there is no risk of contact between the bare sections of the wires. Then it remains only to rewind the cable junction with insulating tape.
Comparative analysis of cast and split forks
The main difference between cast and foldable forks is the body design.In the cast model, the case is in the form of a non-separable one-piece element, inside which the power cord and contacts are securely fixed. A collapsible socket is more convenient when it needs to be replaced and is installed in most modern electrical appliances. The body consists of two halves connected by one or more bolts.
Lawn Mower Fork Repair Features
Frequent use of the mower may cause the fuse in the socket to malfunction. Since most lawn mower models have non-separable plugs that are difficult to repair, you will need to replace them along with the power cord.
To unplug the cord, insert and twist a hex into each hole under the plastic cover where the conductors are.
A new cord is connected to the previous position and all the wires of each core are twisted together. Then the twisted ends are connected to the terminals and pulled lightly to check the connection. It then remains to fix in place the clamping bar, the cable gland and the plastic cover.
Adaptation of non-standard 3-pole plugs
Some electrical devices use non-standard outlets. For a correct replacement, you need to familiarize yourself with their features.
IEC 60906-1
Household appliances imported from overseas are often equipped with an electrical outlet manufactured in accordance with the IEC 60906-1 standard. This model meets the technical parameters of the network, but does not fit the standard power outlet. An adapter can be used if a grounding cord is used, but since it can be hard to find, you can cut off the plug and replace it with a bendable plug.It is important to take into account that the adapters for laptops and smartphones have pins located inside the case and it cannot be replaced by a folding design.
For IEC 60906-1 plugs, the gap between the first and the second pin is 19 mm and their diameter is 4 mm. There is a grounding lug in the center, which does not allow the design of a standard outlet. To solve the problem, you can clamp the plug in a vice and cut off the unnecessary ground pin with a hacksaw.
BS1363
British Standard BS 1363 plugs are used in a wide range of countries. To use the technology with such a socket, you need to use an adapter or unscrew the case and resolder the contacts in a new design.
How to assemble a ground plug
To correctly assemble a variety with ground contact, you must follow the step-by-step instructions. In particular, you will need to do the following:
- Disconnect the device from the mains. Dismantling a plug inserted into an outlet is inconvenient and dangerous.
- Remove the defective plug. In this case, you need to inspect the traces of the effect of current in order to understand the reason for the malfunction. In most situations, replacement is carried out due to overheating of the case and loss of mechanical characteristics.
- Unscrew the screw and disassemble the housing for replacement. An ordinary screwdriver is suitable for these purposes.
- Strip the wires. First you need to cut the insulating layer and strip it by 2-3 cm.
- Solder the wires. For convenience, the ends of the wires are twisted into rings.
- Secure the cord with the clip. After fixing the power cord, it remains to assemble the case and check the operation.
Common Mistakes
The plug replacement process isn't difficult, but if you're inexperienced, you could be wrong. Common errors include incorrect connection of contacts and using a model with inappropriate specifications. In order to avoid these errors, you must first study the replacement instructions and check the product parameters.
Expert tips and tricks
Handling power cords and plugs that do not meet standard guidelines can create a hazardous situation. Before starting the replacement, it is important to make sure that there is no voltage and do not connect the electrical device to the network until the replacement of the structure is completed. If you are unsure of your own capabilities, it is recommended to contact the service center for assistance.