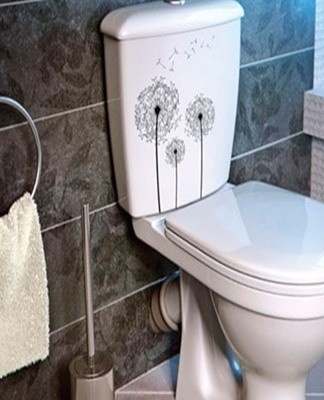
Do-it-yourself step-by-step instructions and rules for installing a toilet bowl
In the life of each person, a situation may arise when the plumbing equipment breaks down and it is impossible to call a master to replace it. If you have a similar incident, don't get angry. You can change the plumbing yourself if you strictly follow basic rules and regulations. Let's see how to install a ceramic toilet with your own hands and what tools need to be prepared for this.
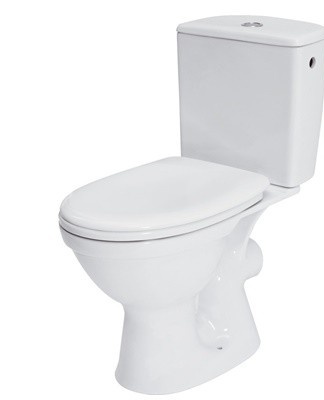
Types and standards
The plumbing equipment market is changing with the times and constantly offering customers new toilet bowl configurations. This should not be scared off, because, despite the wide variety, all equipment is made on the basis of certain norms and standards. When dividing toilets into general groups, there are:
- funnel-shaped design;
- toilet with shelf;
- toilet with sloping rear wall;
- horizontal discharge equipment;
- circular discharge equipment.
funnel shaped
Funnel-shaped structures are considered one of the most common in the market and they are in great demand due to their simple design and hygiene.
This name is derived from the particular design of the toilet bowl, which resembles a funnel. The disadvantages of the product include the high probability of splashing during operation.
With shelf
Toilets with shelves are classified as old structures that are being phased out. The shelf prevents the formation of splashes during operation, but has poor hygiene. Waste is discharged only under the influence of high water pressure.
With a sloping rear wall
Toilets with a sloping rear wall replace similar products with a shelf thanks to a well-chosen balance between hygiene and splash protection. These designs are recommended for professional plumbers and ordinary citizens.
horizontal drain
Flush toilets belong to the budget category of plumbing. Water in this modification washes only one wall, which reduces hygiene. Advantages are :
- sustainability;
- at low price.
Disadvantages include:
- noisy when emptying;
- strong splashes of water.
Circular drain
In circular flush toilets, water is directed in multiple directions from the bowl, allowing nearly the entire area to be treated. The design is quieter and more practical for horizontal models.
To note! Knowing the type of toilet is necessary so as not to interfere with the sewage system during replacement. Each type has its own design features, which may be completely absent from other products.
Tool required
After the owners have decided on the type of old plumbing, it is necessary to prepare tools for its replacement. Most of them are available in all families, but some items will have to be purchased from specialty stores.
Hammer drill or impact drill
An important tool when replacing a toilet, but in some cases you can do without it. The main role of the rock drill is to dismantle the old rotten structure on which the old equipment was located. If its destruction is not necessary, you can do without a drill.
Flat and Phillips screwdriver set
You will need screwdrivers to remove the tank from the old toilet and install it on a new one. Any tool set sold at a hardware store will do, since you will need to work with generally accepted sized fasteners.
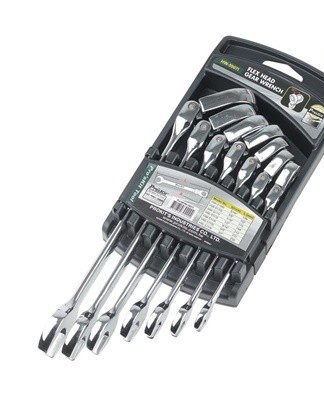
set of keys
An indispensable tool, without which you simply cannot remove the toilet. If a suitable set is not at home, you will have to buy it at the store or borrow it from your neighbors. You will need:
- adjustable wrenches;
- open keys.

Building level
The main prerequisite for the correct installation of plumbing is the creation of a flat surface at the mounting site.
To level out height differences and evenly adjust the toilet, use a building level.
Simple pencil or marker
No construction site is complete without a pencil or marker. Of course, you can measure the dimensions and required attachment points with the naked eye, but you shouldn't even stutter about the quality and durability of such work. If you want to do everything correctly and neatly, take care of the marking tools.
stationery knife
This will help when working with foil tape and plastic wrap. In the absence of this tool, an ordinary sharp knife will do. It is less convenient to use, but performs similar functions no less effectively.
Roulette
The roulette wheel is an important piece of equipment; it is worth buying or borrowing from friends. It will come in handy in the future, helping you to accurately measure the required building material or determine the distance to the object, with an accuracy of one millimeter.
Chisel
The chisel is useful for the following operations:
- elimination of the cement coating, used in old buildings when installing drains on the sewers;
- as an economical substitute for a hammer drill, if an expensive tool is not available.
Hammer
Used in combination with a chisel to break off the base on which the toilet has been installed. It is not recommended to use a hammer for direct work with ceramics, as it will quickly split the toilet bowl.
To note! Be careful when removing and installing new equipment.
Excessive physical impact will split the toilet bowl causing additional costs to the family budget.

besides
In addition to the basic tools, you will need to prepare consumables, which include:
- metallic tape;
- silicone sealant;
- FUM ribbon;
- polyethylene film;
- moisture-wicking fabric lining;
- container to collect the liquid.
Metallic ribbon
It is used as an aid to ensure tightness at the joints of the connection. You should not save on this procedure, because in the event of a leak, apartment owners will have to spend much more money on re-equipment premises and repairs.
silicone sealant
The corrugation is treated with silicone sealant, with the help of which the toilet bowl is connected to the sewer. Both ends of the hose are lubricated to prevent any risk of leakage. All joints, for greater reliability, are covered with metal tape.
Tape
FUM tape is a sealing material with the help of which a tight connection of pipes with a threaded joint is ensured. The tape is wound in a dense layer on the thread of the pipe, after which it is connected to other elements of the plumbing system.
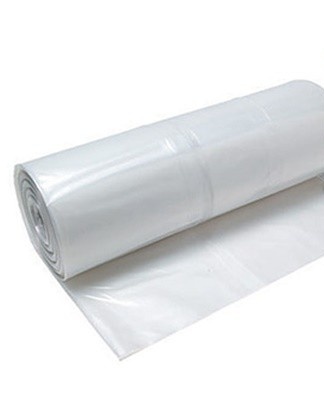
Polyethylene film
It is used when erecting the base of the toilet, providing additional sealing. A budget option that is used in extreme cases. Experienced builders do not recommend using plastic wrap, as it quickly tears, losing its protective properties.
Edge in absorbent fabric
An unnecessary old rag will come in handy when dismantling the plumbing, since it will not be possible to completely pump out the water from the toilet, and part of the liquid will spill on the floor. It is not fatal, but no one needs excessive humidity in the room, it is advisable to wipe off the water as soon as possible. In addition, a rag will come in handy in case of leaks, if part of the structure is installed incorrectly.
Container to collect the liquid
Any dish that can be wrung out with a damp cloth will do. It could be :
- old basin;
- bucket;
- large plastic bowl;
- a bottle with a cut neck.
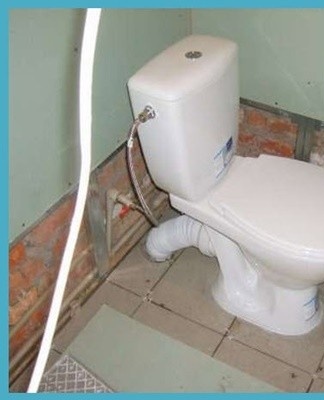
Dismantling the old
Dismantling an old toilet is a laborious process. When properly organized, the effort involved is minimized and the replacement process is greatly accelerated. Try not to deviate from the planned plan and everything will be fine, without incident.
It is necessary to turn off the water and drain the liquid from the tank
The main action to start when dismantling any type of toilet bowl. If you don't, the water will flood the toilet, damaging you and your neighbors. Before dismantling, prepare a rag and a bucket in which the liquid remaining in the pipes will drain.
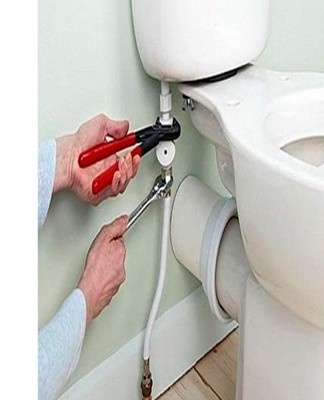
Unscrew the hose between the tank and the water supply
The pipe is unscrewed using an ordinary key, which you must have prepared in advance. If the hose is not disconnected, you will not be able to remove the toilet from the toilet and connect new equipment. The process is simple and does not require any specific skills.
How to unscrew the fasteners
Problems can arise when working with the clips that hold the tank to the toilet. Due to high humidity, rust forms, which complicates the process of dismantling.In order not to spend unnecessary efforts, we wet the fasteners with kerosene. After a while, we unscrew them with a screwdriver and a spanner.
Removing fasteners
Clips secure the toilet to a concrete base, preventing it from swinging and shifting during operation. An open-end wrench is required to remove the brackets. You need to act carefully, otherwise cracks will form on the surface of the ceramic.

Disconnect the drain from the sewer
Actions when disconnecting the drain from the sewer depend on the material from which it is made:
- melting;
- flexible drain;
- a plastic drain.
The least problems arise when removing the flexible drain, and the most difficult is working with cast iron. The main thing when disconnecting the drain is to do everything carefully. Harsh exposure will damage the material, which will affect the final cost of the repair.
Destruction of cement paste
To replace the toilet in an old house, you will have to work with a chisel and a hammer, destroying the cement coating.It serves to fix the drain and will not allow dismantling the old bathroom.
Preparing for the installation of a new toilet
Preparing for the installation of a new toilet consists of:
- removal of debris left after the dismantling of the old structure;
- check the level of the base on which the new toilet will be installed.
If the base is uneven or with defects, it is necessary to destroy it and make a new screed.
Tile
For the beauty of the room, the concrete base of the toilet is finished with tiles. You can use any design and color, as long as it blends harmoniously with the surrounding interior.
Tile
If there is no money for tiles, use finishing tiles. In most cases it is cheaper than tiles and not that expensive. In extreme cases, you can do without finishing, since, in addition to the decorative function, it does not carry a special functional load.
If you plan to replace the tile
If you plan to replace the old tile with a new one, it must be dismantled before installing a "fresh" toilet bowl.After the plumbing is installed in its place, subsequent facing work will become significantly more complicated. To avoid this, make repairs after disassembly and build a new toilet last.

If the finish is missing
In the event that there is no finishing, the preparatory work is minimized. Enough:
- level the ground;
- remove superfluous debris left after dismantling old equipment.
If both conditions are met, do not hesitate to proceed with the installation.
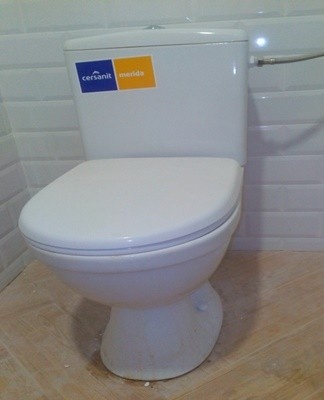
How to install
Installing the toilet is very simple - just repeat all the dismantling steps in the reverse order:
- we recover the cistern and the toilets;
- put in place;
- we connect to the sewer;
- fix;
- we connect to the water supply.
How to tag
The markup for the repair of new equipment is done as follows:
- we install the toilets in their place;
- put on a cuff connecting the plumbing to the sewer;
- we check the tank and the toilet on the level;
- through the holes in the walls of the tank and the toilet bowl, we outline the attachment points;
- put the toilet aside.
Drilling mounting holes
Mounting holes are drilled using:
- drill bits for concrete;
- puncher.
First we drill holes for the tank, then - for the toilet. We install dowels in the drilled holes.
Connecting the pegs
When installing the plugs and screws that secure the plumbing in place, remember the following rules:
- do all actions carefully, otherwise the ceramic will crack;
- there must be washers between the screws and the ceramic to reduce the pressure on the brittle material;
- do not overtighten the fasteners.
The dowels are driven in with a conventional hammer.
How to install the bowl
To prevent the toilet bowl from wobbling during operation, it is necessary to properly install its bowl. For that:
- mark with a pencil the limits of contact of the bowl with the ground;
- apply a coat of sealer to the markings;
- tighten the screws firmly but carefully.
Cover and seat assembly
The toilet seat and seat are assembled last, fixing in special fasteners. The hole under the seat is made in such a way that the owner can customize its location according to his own needs. Adjusting the toilet lid is extremely simple and requires little effort.
Sewer connection
The sewer connection procedure depends on the toilet outlet. It happens:
- in the wall;
- on the ground;
- oblique.
outlet
Algorithm of actions:
- We check the coincidence of the side outlet of the toilet bowl with the sewer pipe.
- We connect them with a cuff.
- If displacement is present, instead of a cuff we use a ripple.
- We process the joints with silicone sealant.
- We connect to the sewer.
- We fix it to the ground.
Release to the ground
If the exit passes through a hole in the ground, then:
- we install a screw flange equipped with a retainer in the hole;
- we insert the sewer pipe into its center;
- install the seal;
- we install the toilet;
- we turn the cuff.
To note! The flange collar should line up with the plumbing fixture outlet and fit snugly into it.
Oblique
The most convenient way to release, allowing you to complete the installation process quickly and smoothly. There are three ways to connect:
- directly;
- using a corrugated pipe;
- using the cuff.
We choose any suitable method and connect the toilet to the sewer.

How to install the tank
To install the tank on the toilet, you must:
- we recover the device;
- we treat the junction with the toilet with a sealant;
- we install the structure;
- tighten the fasteners;
- install the cover.
Water connection
The final step when installing new plumbing fixtures is to connect to the water supply and verify functionality. To do this, we do the following:
- we connect one end of the hose to the water pipe;
- the other goes to the toilet tank.
The threads at the joints are treated with FUM tape.
Installation of a toilet with a hidden cistern
This option is used in modern design solutions, when decorating a bathroom and bathrooms. The installation process for devices with a hidden tank is different from the usual one and requires separate consideration before installation.
Installing the frame
Installation of built-in equipment begins with the construction of a frame in which the drain mechanism will be hidden. The frame consists of a metal frame, which is equipped with fasteners.
We hang the tank
After the frame is assembled, the tank is fixed. It is necessary to do everything carefully, slowly, carefully checking the attachment points. Cistern frames are made according to a single universal scheme and are suitable for cisterns of any design.
We mount the finished installation
To mount a ready-to-use installation, you will need:
- check the wall with a plumb line;
- we try the installation at the place of installation and mark the holes for the fasteners;
- make holes;
- we fix the frame;
- align;
- fix.
Plumb Line Alignment
To level the frame using a plumb line, you must:
- attach the plumb line to the wall so that its height is 1.5 meters;
- where the plumb line touches the ground, draw a line. It must be parallel to the wall;
- we measure from this line the distance necessary to accommodate the frame, and we draw another line.
markup
Marking is carried out using an ordinary marker or pencil, which should be at hand when installing complex equipment. The tagging algorithm is described above.
Drilling holes for fixings
To drill holes you will need:
- concrete drill;
- drill or hammer drill.
Screwing to the base frame
The base frame is screwed to the base with dowels, which are inserted into the holes made by the puncher.
Frame leveling
To align the frame under the wall-mounted toilet, you need to use the building level. We apply it to the pre-installed structure, after which we adjust it to the required position.
How to fix the installation on the wall yourself
To fix the installation on the wall yourself, it is enough to follow the correct sequence of actions indicated above. If everything is done the same way, there should be no installation problems.
To note! The design of a toilet bowl with a cistern built into the wall is rather complicated; if you are not confident in your own abilities, entrust the installation to professionals.
How to properly install the tank
To properly assemble and install the tank, you must follow the manufacturer's instructions.The only nuance that must be considered when assembling tanks of any configuration is to connect the tank using plastic pipes. Flexible hoses have a shorter lifespan, and if they break, you'll have to disassemble the entire section.
Coating
Waterproof plasterboards are used for cladding. The thickness of the sheet should be 1 centimeter, while the sheets are stacked in two layers. Fastening is carried out using specially designed self-tapping screws.
Installation of toilets
At the end of the lining of the built-in tank, it remains only to install the toilet itself. For that:
- fix the knee;
- we treat joints;
- make the markup;
- install and secure the bowl;
- we connect the equipment to the drain;
- we display the drain button.
Knee fixation
The knee is secured with metal clips that come with the plumbing hardware.
Treatment of release with technical ointment
It is carried out before the temporary installation of the toilets in their place. If this is not done, the equipment will not work properly.
markup
Once the toilet is in place, take a pencil and trace around it. We also mark the hole locations for the fasteners.
Installation of mounting angles
As soon as the marking is completed, the toilet is removed and the fasteners included in the kit are installed along the edge of the marking. With their help, in the future we will fix the toilet bowl to the floor.
How to place and secure the bowl
To put on and fix the bowl, you must:
- insert its outlet into the fan pipe;
- secure the toilet to the floor with clips.
Connecting the tank to the drain
This process is no different from connecting a conventional tank. The main thing is to take your time and do everything carefully.
Drain button output
The drain button is led into a hole in the wall, prepared in advance during the installation of the coating. You just need to connect the button and check the system performance.