Top 6 Spray Applications and Painting Techniques You'll Need
The original spray technique is recommended for children who are tired of painting in the usual way, and for adults engaged in visual and decorative arts. The method allows you to diversify, make the simplest and most primitive drawings more interesting and memorable. It does not require artistic skills and expensive materials; even those who can't draw can handle paint splatters.
General technical information
Spray painting is a simple but fun drawing method that involves sprinkling paint in small and large drops onto the surface of the paper. In young children, the spray is not obtained on the first try, it takes practice. But the technique is so original and exciting that it brings pleasure to the child, arouses interest in creative activity, awakens the imagination and the desire to experiment. With the acquisition of sufficient skills, beautiful drawings are obtained even by a child who previously refused to draw due to his inability.
The spray technique is useful in that:
- develops fine motor skills, improves tactile sensitivity;
- improves the eye;
- develops the ability to build correct compositions on paper, to perceive the represented holistically;
- improves artistic skills;
- makes the artist more attentive, scrupulous, diligent, observant;
- gives the ability to feel style and harmony, to respond emotionally to beauty.
Advantages and disadvantages
The good thing about the spray technique is that:
- does not require artistic skills, is easy to master;
- helps to cope with the execution of the drawing, even with complete inability to draw;
- develops creativity;
- does not require a lot of time, complex and expensive materials;
- suitable for combining with other artistic techniques.
The only downside to spraying is the inevitable contamination of the workspace. In the process of work, the splashes fly in different directions, so the table, clothes and surrounding objects turn out to be stained. You need to paint using the spray method in old clothes, which you are not afraid to throw away, and in an oilcloth apron.
To make the painting process less messy, you can spread a wide oilcloth on the table, spray it over the sink, or put a sheet of paper with a picture in a box with high sides.

What you need to work
To paint using the spray technique, you need to prepare:
- painting (watercolor, gouache, acrylic, any other);
- landscape paper or decorative cardboard;
- a glass of clean water;
- brushes or toothbrush;
- scissors or paper cutter;
- paper stencils or dried leaves, flowers, twigs;
- simple pencil;
- rule;
- flat stick (e.g. ice cream).
The main stages of the work
Before working in the spray technique, the paint is diluted with water in a separate glass so that it acquires a creamy consistency.
To make splatters with paints on paper, proceed in stages:
- Dampen the brush with water. Excess liquid is squeezed out to prevent staining.
- A small amount of diluted paint is taken with a brush.
- The brush is taken with the fingers of the left hand, the stick is taken with the right.
- Holding the brush on the sheet of paper with the nap away from you, quickly run the stick along the villi in your direction. This will spray on the paper.
The spray technique allows you to change the size and shape of the drops on the paper by changing the distance between the hand and the drawing, by increasing and decreasing the angle of inclination of the brush in relation to the desk, by increasing or decreasing decreasing the sharpness of the movements with a paste.
How to make drops of the desired size and shape:
- rounded dots are obtained when the droplets fly perpendicular to the work surface;
- elongated projections in the form of parallel lines are made by spraying at an acute angle;
- elongated, chaotically directed stripes are obtained by striking the wooden base of the brush on a stick on the paper;
- small droplets are formed by tapping a small amount of paint on the brush, moving the stick along the villi gently, calmly, smoothly;
- large splashes are obtained if you take a lot of paint on the brush, move the stick along the villi intensively and strongly.
Application methods
Thanks to the ease of learning and the interesting result, spraying is used in addition to a variety of fine arts and crafts techniques.The spray technique is suitable not only for giving originality to children's drawings, but also for serious creativity: creating decoupage, accessories and wardrobe items, interior items.
With stencils
The splatter technique most often involves the use of stencils to create a design. They are put on paper, paint is sprayed on top. When the paint dries, carefully remove the stencil.
There are two types of stencils:
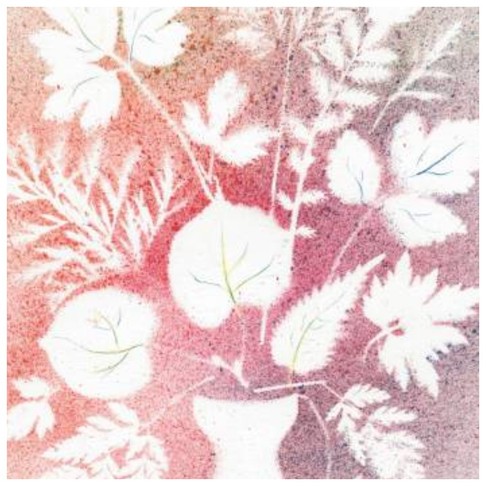
- empty, cut inside, then a figure with sharp edges, made of many drops, remains on the sheet of paper;
- filled, cut along the contour of the paper, the figure on the paper remains empty, and a background is created from the splashes around it.
Stencils are best cut from sturdy cardboard so they last longer. You can create a multi-layered stencil spray. Filled stencils are placed on the sheet first, they are only removed after the drawing is finished, so that the figures remain clean. The first layer of the background is sprayed with paint of the lightest color. After the background has dried, stencils are added, darker paint is sprayed. Then put on the third batch of stencils, sprinkle with the darkest color. When everything is dry, the stencils are removed.
Get the snow effect
The splash technique allows you to create the effect of falling snowflakes, for this, filled stencils are used, leaving a background that is a winter sky. A painted winter landscape is covered with small dots of white paint.
Refinement of other designs
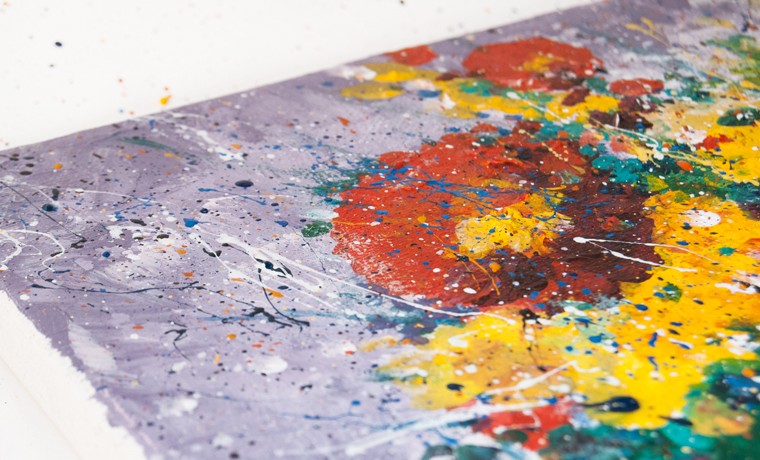
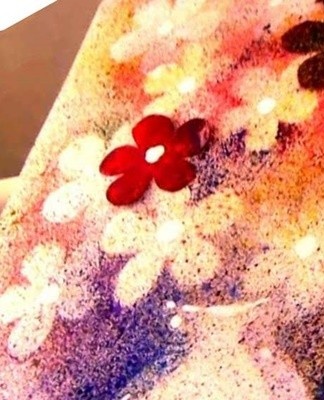
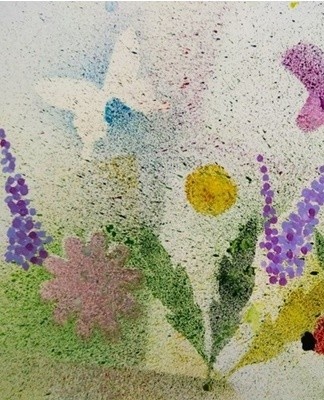
If the still life or landscape turns out to be uninteresting, faded, it can be spiced up using the spray technique.Especially beautiful and juicy are watercolors, supplemented with carelessly splashed drops. The spray is used to make, for example, dew drops on a bouquet of flowers or falling leaves on an autumn landscape.
Background creation
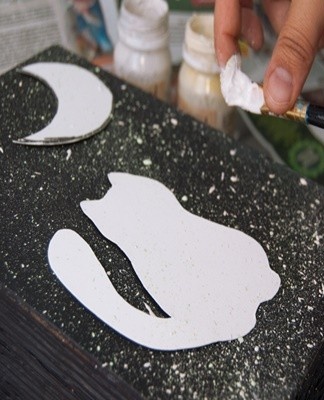
In the professional manufacture of decorative products, the spray is often used to create a background for silhouettes of various shapes. The technique is popular when creating decoupage, when dried parts of plants, keys, coins, hearts cut from cardboard, etc. are applied to the surface of the product and then sprayed with paint. The elements used must be small and not too domed, otherwise the sprayed paint will run down and stains will form.
Application dye
Single-color decorative paper can be tinted or marbled.At the same time combine a variety of shades. Tinted sheets are suitable for creating appliqué elements.
Other Options
The combination of free spray and stencil is impressive. Moreover, this technique is popular not only in classical painting, but also when creating computer graphic images.
Craftsmen often use the dusting technique to give the decorative items made the effect of old age, antiques. The result is beautiful vintage and retro style pieces. It looks like the product got splashed with something a long time ago. With a splash it is easy to create a gradient - a smooth transition from one color to another.
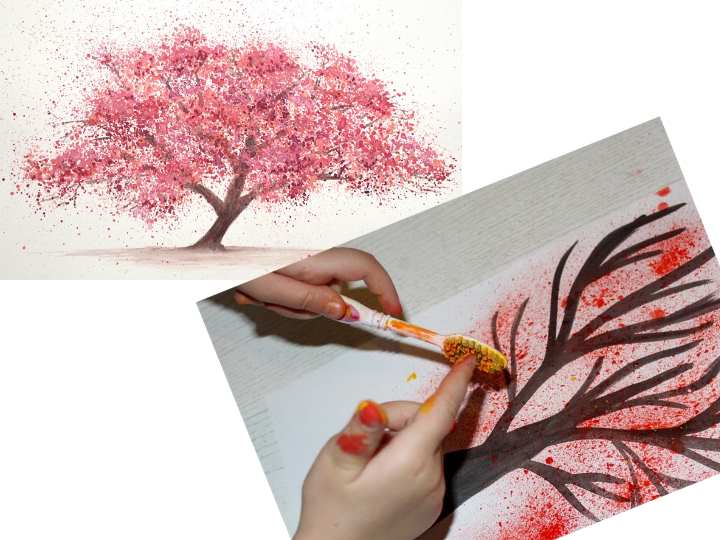
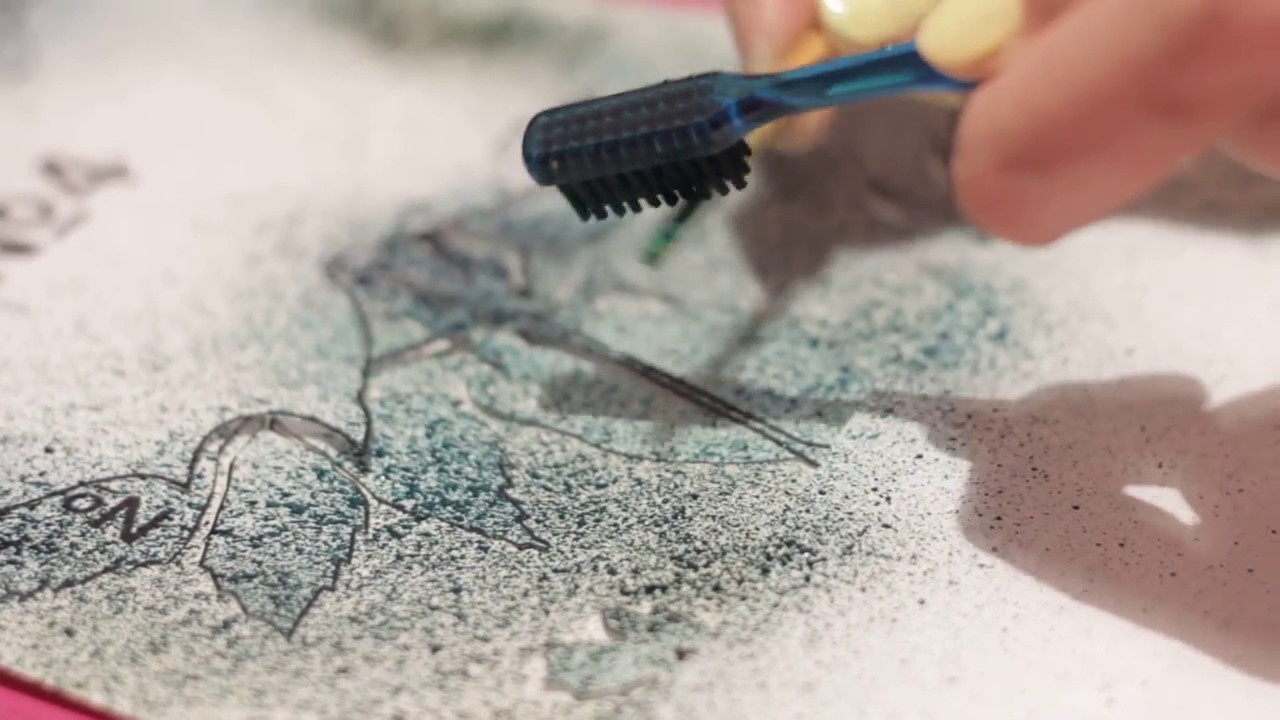
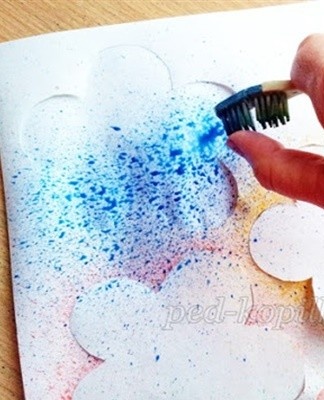
How to use a toothbrush to spray
If you don't have a brush with elastic bristles, you can use an unnecessary toothbrush.With its help, neat and even drops are obtained, the spraying process is carried out quickly, and thick, liquid paint is beautifully applied, without mixing dark and light tones.
Easy and comfortable drawing is ensured by densely adhering stiff and resilient bristles. Therefore, the technique of drawing with a toothbrush is in demand in kindergarten to teach children to work with watercolors and gouache paints.
For children, the brushing technique is fun, they will gladly stage:
- animals, insects, birds, trees, bouquets, objects (using stencils);
- starry, rainy, snowy or abstract background for future composition;
- sea, forest or mountain landscape, the sky in the clouds.
An interesting twist on the spray technique is to grease the brush with two colors of paint. Then, when spraying, a two-color background is obtained, suitable for creating landscapes and still lifes. The brushed design is visually three-dimensional. The technique allows not only to make classic splashes, but also to give a “fluffy” or “prickly” image.
Tips for beginners
If there is no experience in spraying, it is better to practice with light paint on a sheet of dark paper before creating a picture. The technique is simple, the skill will appear quickly.
To do decent creative work without messing it up, you should adhere to the following recommendations:
- It is advisable to use several brushes or brushes in complex works. If there is only one tool, then before applying paint of a different color, the bristles should be thoroughly washed.
- In order not to spoil the product decorated with splashes, you should immediately apply acrylic varnish to the finished surface. This will prevent accidental finger movements and smudges from spoiling the job. Stains can be easily removed from the lacquered surface with a towel.
- You must constantly keep in mind which direction to move the stick along the bristles. Otherwise, the splashes will end up not on the paper, but on the artist's face.
- You can not overdo it with the thickness of the coloring solution, otherwise it will not be sprayed well, and the drops on the paper will become convex, they will take a long time to dry. And excessively diluted paint will not stick, after spraying it will begin to spread on the sheet of paper, merging into spots.
- For spray application, bright colors are used. To prevent the image from looking gloomy and dull, it is advisable to add a little white paint to the main color.
Learning the spray method is useful for both a child and an adult keen on fine and decorative arts. A simple technique that requires minimal training and low cost, allows you to create an original interior and gift decoration.