Step-by-step instructions on how to make a pond with your own hands in the country
Arrangement of an artificial reservoir in a summer cottage allows you to transform the landscape design and create a beautiful place. You can make a pond in the country with your own hands, performing simple step-by-step steps. When creating a tank, it is important not to deviate from the instructions in order to avoid mistakes.
Content
- 1 How to choose the location and size of a decorative tank
- 2 Selection and preparation of consumables
- 3 How to properly dig a pit
- 4 The procedure for laying the film step by step
- 5 Layout and decoration
- 6 Plants
- 7 Brick and concrete construction
- 8 Make a tank with a bowl yourself
- 9 Common Mistakes
- 10 Tips & Tricks
- 11 Use in landscaping
- 12 Rules of care
How to choose the location and size of a decorative tank
When choosing a suitable place to place a tank in a garden, several factors must be taken into account. Including:
- Relief. The shape of the pond and the ability to provide a smooth water surface depends on the relief.
- Free space on the site.To make the pond look harmonious on the ground, you can surround it with greenery to keep it minimal and not take up much space.
- Lighting. It is recommended to place the pond in a shaded or semi-shaded place.
- Groundwater occurrence and soil composition. These factors affect the depth of the reservoir and the complexity of work on its arrangement.
There is no optimal size for a decorative pond and it cannot be said that a large pond will look better than a small one. The length and width are determined taking into account the dimensions of the site itself and your own wishes. The depth depends on the destination of the structure and the level of the water table.
Selection and preparation of consumables
Before starting work on the construction of a tank, you need to prepare consumables and tools. The list of necessary equipment is standard and does not change depending on the size of the tank.
PVC-film
The use of a polymer film opens up considerable possibilities in terms of choosing the shape of a tank. PVC film is considered the most suitable material because it can be purchased at a large number of building supply stores at an affordable price.
roofing material
The roofing material is used as an insulating material. It is recommended to purchase strong sheets of material in order to simplify the work and not to connect the parts with a blowtorch.
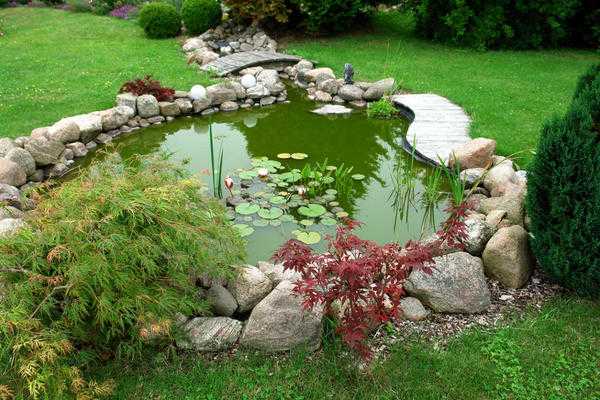
round stones
Round stones arranged along the perimeter of the reservoir form the shore. The stones also enhance the decorative features of the pond and create a visual accent.
Rope
With the help of a fishing line or rope, they mark out the future reservoir. This allows you to adjust the dimensions and determine the exact location for digging the pit.

stone slabs
Stone slabs are used to frame the whole tank or individual sections. It is important that the tiles are combined with the general style of the design of the garden and do not stand out from the rest of the elements.
Shovel
A pit for a small tank can be dug by yourself using a shovel. The manual method is convenient because you do not need to attract specialized equipment and spend a lot.
Sand
Compacted sand is used as one of the base layers. To avoid damaging the insulating film that is placed on the sand, the thickness of the sand layer should be at least 10 cm.
Bricks
Bricks can be used to build the interior walls and the top. Most often, with the help of bricks, they build a round type of decorative tank.
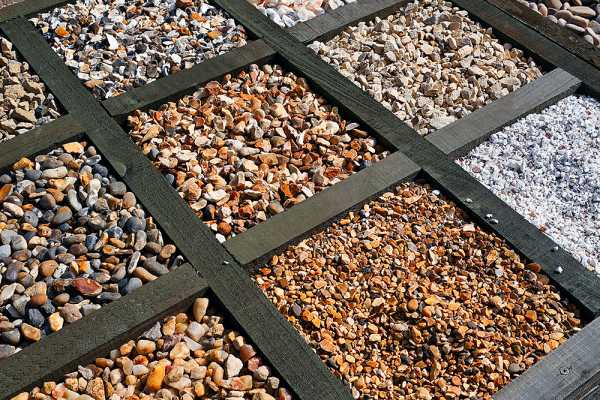
Fine gravel
A layer of gravel is poured over an insulating film. The material makes the bottom of the pond more attractive and provides additional protection.
Form
The finished form makes it possible to simplify the work of arranging the tank. Using a purchased bowl, you will need to dig a pit, place a mold inside it, fill it with sand and liquid.
A common option is the plastic bowl, which is lightweight and easy to install.
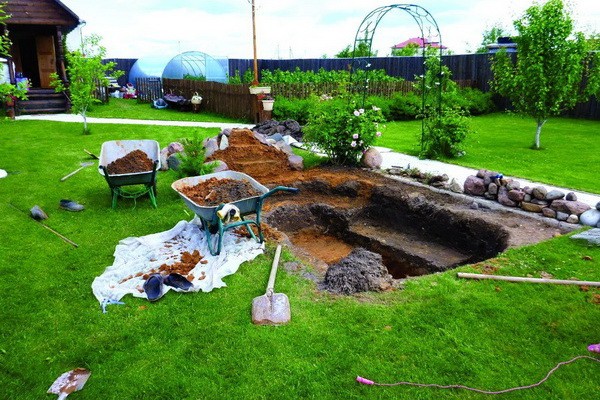
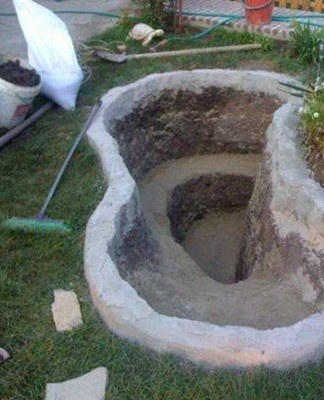
How to properly dig a pit
The digging of the foundation pit follows standard instructions. First, the turf layer is removed, then they dig in from the edge to the central part, gradually deepening. To avoid damaging the insulation film, stones, plant roots and debris are removed along with the soil. When building a pit, you need to make sure that the banks are on the same line. If you plan to make a stunt, you will need to dig a pit with a corresponding difference in height.
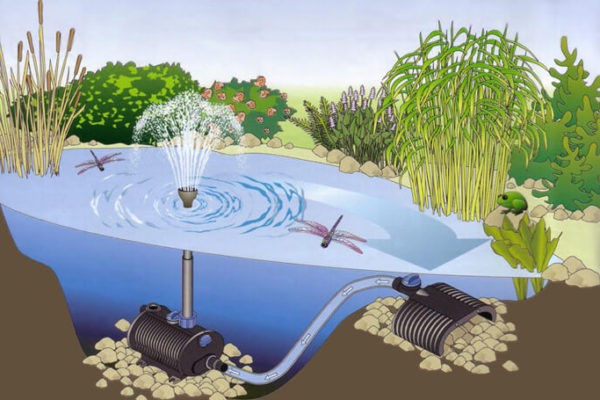
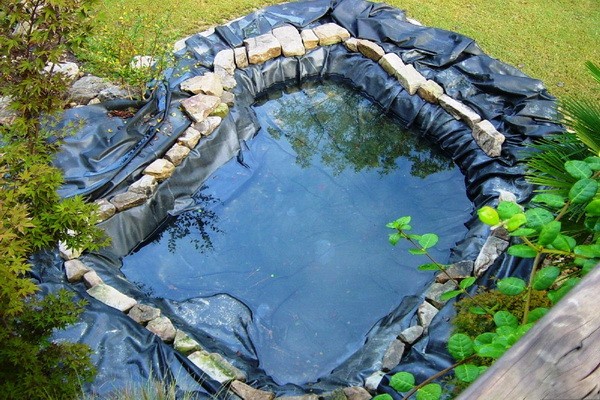
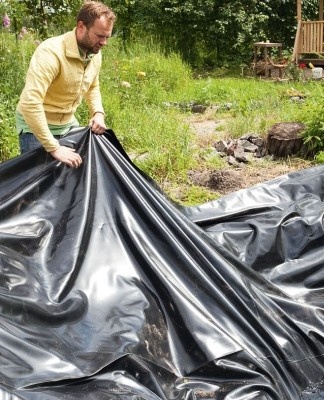
The procedure for laying the film step by step
When laying the insulation film in the pit, it is enough to follow the step-by-step instructions. Failure to install the product may result in property damage and liquid leakage. To install the film you will need:
- mark the shape of the reservoir and dig a pit;
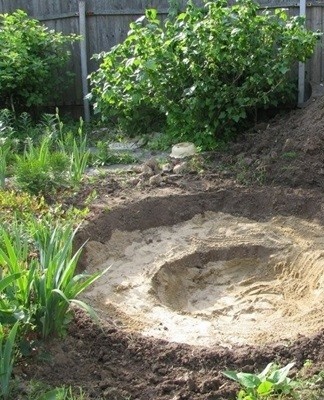
- clean the bottom of foreign bodies, fill and compact the sand;
- align the embankments and spread the waterproofing film over the entire surface;
- fill the pond with gravel and pour water;
- fix the edges of the film;
- equip decorative design.
Sides flush with the ground
One of the options for arranging a decorative pond is to place it at the same level as the ground. This solution does not imply high perimeter framing and the construction of a waterfall.
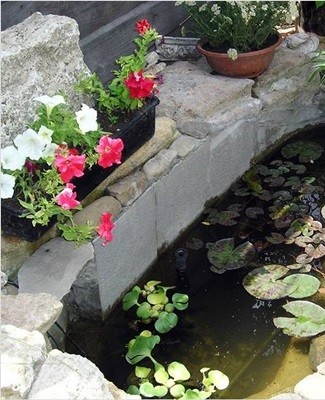
The sides are raised
The second version of the pond is built according to the standard scheme. The difference lies in the laying of bricks or stones on the edges of the tank to raise the level of the walls.
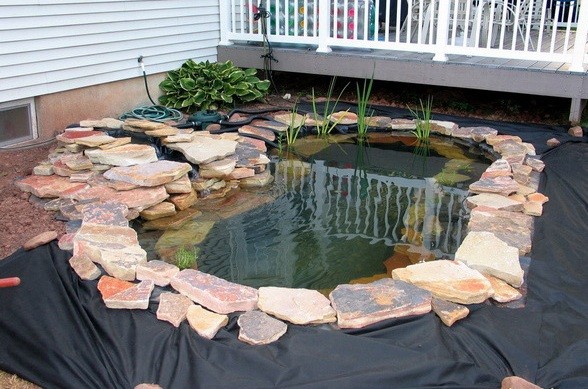
Layout and decoration
The process of building and decorating a tank depends on its type. There are several design options, among which you need to choose the one that suits you, taking into account your own preferences.
Chinese
The Chinese reservoir is distinguished by the presence of bright and lush vegetation. You can arrange trees around the perimeter and build a classic Chinese convex bridge. In addition to the design, it is allowed to use various decorative elements.
French
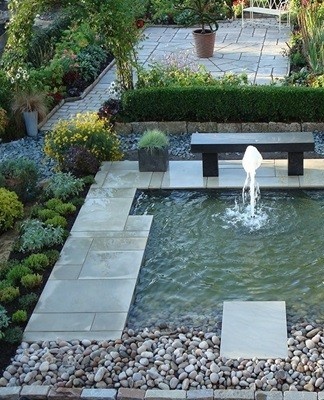
The French style pond has sophistication and elegance. It is distinguished by its neat shape and well-defined borders. Laconic geometry gives the pond the graceful look that is characteristic of France.
Also, when landscape designing, it should be noted that this style is characterized by fountains, waterfalls and decorative plaster sculptures.
Italian
Symmetry is a characteristic feature of the Italian style. The reservoir has the correct geometric shape and is complemented by a fountain or a waterfall. You can make the pond multi-tiered and decorate the perimeter of the plant with terracotta pots.
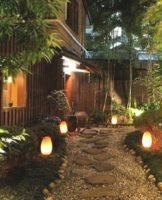
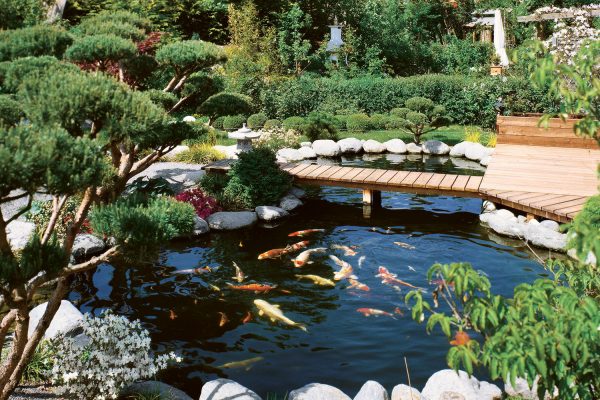
Japanese
When choosing a Japanese style, it is important to preserve the natural look of the pond. When decorating, only real miniature plants are used. Often Japanese ponds are decorated with figures of dragons, which will be reflected in the water.
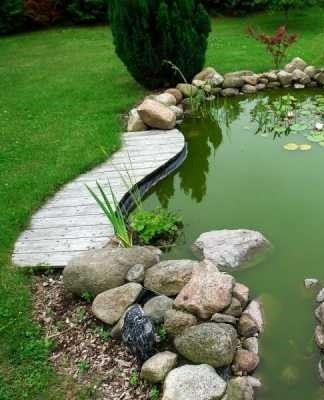
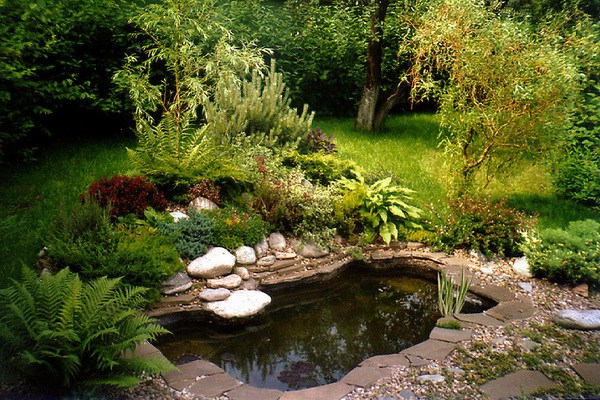
English
An English pond is the easiest to design, as there is no need to set clear boundaries. Lines can be smooth. The sides are decorated with an abundance of shrubs and trees.
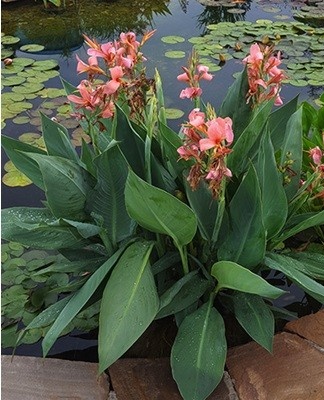
Plants
Plants are an important part of pond decoration. All plantings used in landscaping can be classified into several categories. The choice of suitable plants is made taking into account the given style, climatic conditions and personal preferences.
Shallow
The most hygrophilous plants live in the shallow zone of an artificial reservoir. Plantings in shallow water include perennials, which are valued for their picturesque beauty, thickening and original appearance. Various plantings are suitable for decorating a shallow area - from large plants to textured miniature specimens.
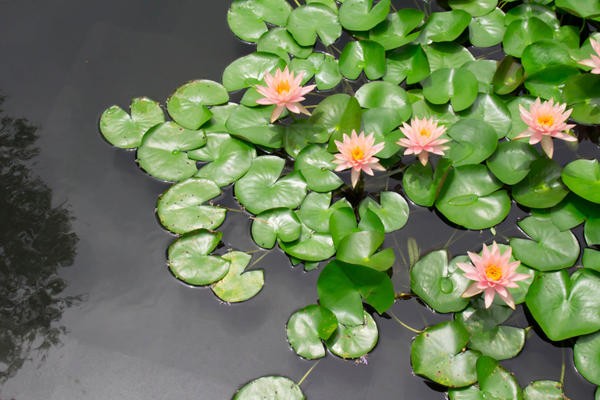
deep sea
Deep water plantings take root at the bottom of the pond and their leaves reach the surface of the water. The advantage of underwater plants with floating leaves is their ability to absorb organic components that dissolve in liquid and negatively affect the ecosystem.The large leaves of deep-water plantings create shade and prevent strong heating of the liquid, thereby preventing the active reproduction of algae. Most deep water plantings flower beautifully.
Coastal
The role of coastal plantations is purely decorative. Such plants give the reservoir a complete look and harmoniously fit it into one style. It is recommended to plant coastal plantings in baskets and drip along the perimeter. Since the plants grow quickly, you should not plant several specimens in one container so that they do not crowd each other.
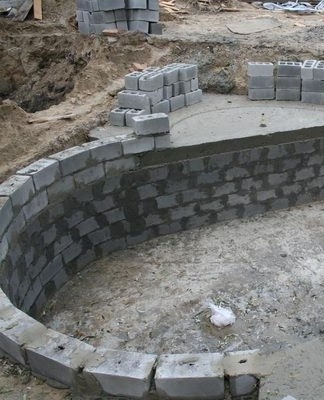
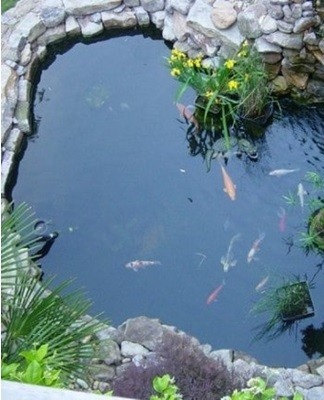
Brick and concrete construction
When you plan to make a concrete and brick reservoir in the garden, you must first dig a pit and pour a concrete bowl. Insulating material is laid over the dried concrete, and a brick is mounted on top, connecting the blocks to the concrete. A reliable concrete container prevents water from absorbing into the ground, so the artificial reservoir will not empty. To keep the water inside clean, it is recommended to additionally install a filter system.

Make a tank with a bowl yourself
During the independent construction of a pond in a summer cottage, it is allowed to use improvised objects. It will help find a use for old bathtubs, rubber tires and other materials.
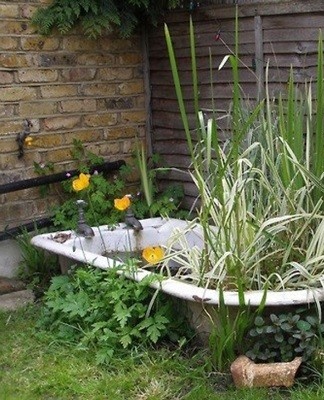
From the old bathroom
Due to its strength and large volume, the cast-iron bath is suitable for arranging a pond. The building instructions include the following steps:
- The site is marked out taking into account the dimensions of the bath, adding 10 cm to each side, after which they dig a pit.Its depth should be 20 cm deeper than that of the container.
- At the location of the drainage hole, an additional hole is made 50 cm deep and 30 cm wide.
- A steel sheet rolled into a cylinder is inserted into the second pit and filled with gravel or crushed stone. This is necessary for the arrangement of the drainage drainage.
- Layers of rubble and sand are poured into the bottom of the main pit, the base is tamped and the steel sheet is removed.
- A bath is placed inside the pit so that the upper edges are level with the floor. The drain hole should be above the drain.
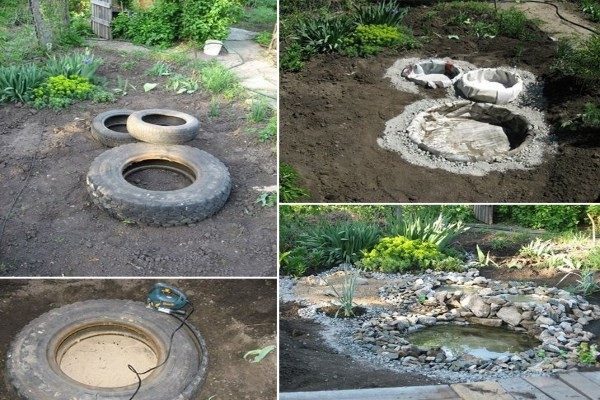
From a tire or other improvised means
A pond from car tires and alternative materials is made by analogy with the previous method. The only difference is in the shape and dimensions of the artificial reservoir.
Common Mistakes
Not having enough experience, building a makeshift pond, many make mistakes. The main error during installation is the lack of drainage.If a concrete base is used, the structure can be made without drainage, but with a filter.
It is also a common mistake to leave foreign objects in the pit, which damages the insulating film.
Tips & Tricks
To build a high-quality pond on a summer cottage, it is important to follow the instructions exactly. Installing the plastic bowl will facilitate the work due to the low weight of the material.
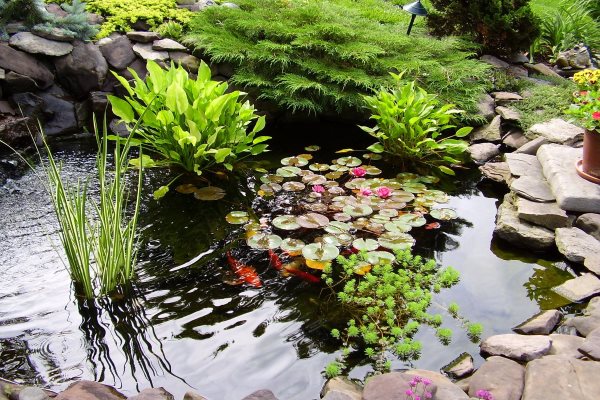
Use in landscaping
Just like a natural reservoir, a homemade pond makes the summer cottage original and harmoniously complements the design style. You can decorate the pond with various decorative elements, including plants, sculptures and more. It is recommended to design the location of the pond at the stage of development of landscape design so that it does not go out of the specified style.
Rules of care
To make the created pond pleasing to the eye, you need to regularly care for it. The basic rules of care are as follows:
- Timely cleaning helps prevent water buildup. Remove dead plant leaves and fish food residue from the water.
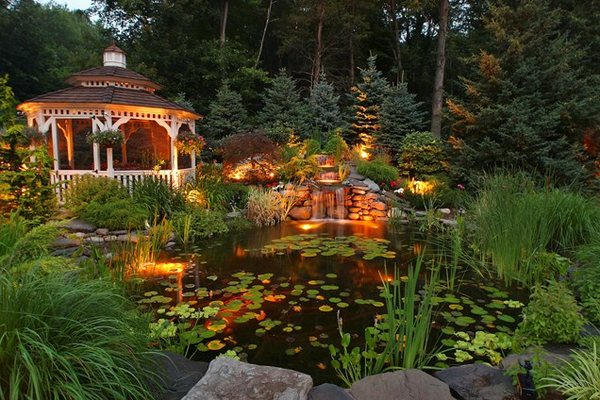
- The surface of the water should not be exposed to the sun's rays for more than 6 hours a day. To create shade, a gazebo is erected on the south side of the pond or shade plants are planted.
- The plastic base is periodically cleaned of dirt accumulation. A simple mop can be used for this purpose. Then the floating sludge is captured with a net.
- It is necessary to monitor the water level and, if necessary, add liquid to replenish the evaporated volume.