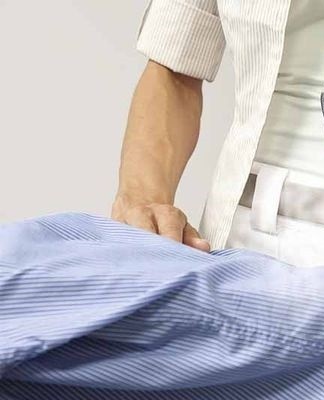
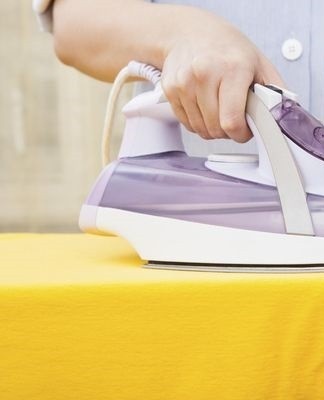
How to iron a shirt quickly and correctly, an overview of devices
Shirts are an indispensable attribute of the wardrobe of businessmen and elegant women. Only well-ironed shirts without ugly creases and creases can make an image look attractive and neat. Ironing a shirt is a meticulous job that requires experience and patience. Let's see how to iron a shirt correctly in order to achieve a perfect result and not waste a lot of time and effort.
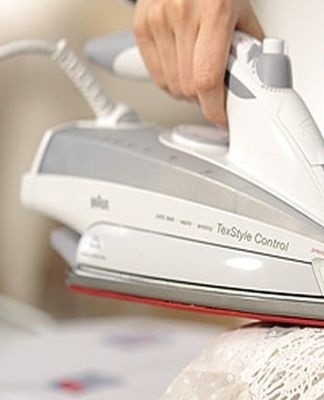
Before lighting the iron
Before you start ironing, you need to stock up on the necessary accessories that will facilitate the process and know what material you will have to work with. For ironing you will need:
- ironing board with a special attachment for smoothing the sleeves (can be replaced with folded fabric);
- water sprayer;
- the iron.
Important steps in preparing for ironing:
- Compulsory washing.Only washed shirts are ironed; if the shirt was already on the body, it is refreshed with a light wash. The iron will set any dirt invisible to the eye on the fabric - do not iron worn shirts.
- Before washing, you need to identify the composition of the fabric and the conditions under which the shirt is washed and ironed in order to select the appropriate mode of the washing machine and iron.
- It is best to iron clothes immediately after washing, when they are slightly damp. If the shirts are dry, they are moistened with a spray bottle, carefully folded for a few minutes to evenly saturate the fabric with moisture.
When washing, it is worth using the "Easy ironing" mode, if it is available in the washing machine.
Mode selection
Manufacturers indicate on the labels sewn into the seams of the shirt which modes are recommended for washing and ironing. Better follow these tips. As a rule, temperature regimes for ironing are represented by dots, which indicate:
- 1 point - the iron is heated to 110 °;
- 2 points - up to 150 °;
- 3 points - 200°.
The iron regulator should be set according to these recommendations. If there is no label with a pointer on the shirt, you will need to select the ironing mode depending on the composition of the fabric.
100% Cotton
Cotton fabric should be well moistened before ironing. The recommended soleplate temperature is 150-170°, which corresponds to 3 points on the regulator and the steam symbol. The cotton is ironed with steam, the pressure on the iron can be maximum.
Crumpled cotton
For crumpled cotton, 110° is sufficient; the product should not be sprayed, so as not to damage the structure of the fabric. With good drying and careful smoothing of the pieces, ironing can be avoided.
Cotton+Polyester
The choice of temperature largely depends on the percentage of materials. The maximum temperature is 110°, steam is used selectively. Don't put too much pressure on the iron.
Linen
Linen shirts are best ironed damp, with strong steam. Temperature - 180-200 °. The pressure on the iron is maximum. To prevent the fabric from shining, it is best to iron it from the inside out.
cotton + linen
Both materials need to be moisturized when ironing, use a spray bottle, spray. Temperature - 180°. You can put too much pressure on the iron.
Viscose
Moisture stains may remain on viscose, steam is not used. Iron at a temperature of 110-120°. Better to use an iron protective sole or fabric.
Chiffon
Iron at the minimum temperature - 60-80 °, with light tangential movements. Do not use water. A damp protective cloth may leave marks on the product, it is better to iron with a dry iron.
Wool
Wool shirts are ironed at a temperature of 110-120°. Iron pressure is minimal. It is convenient to use a steamer, put a soleplate on the iron or iron through a damp cloth.
Jersey
Knit shirts are ironed through the sole or sewn side. The temperature is selected depending on the composition of the fabric - 100-140°. It is important to choose the right direction - along the loops. The best way to iron is to steam the hanging product.
Silk
Silk is ironed with a non-hot iron (60-80°), without using humidity. Better to iron on the wrong side, do not use a protective cloth, because the marks remain on the silk.
Important: if the composition of the fabric is unknown, the label is lost, ironing begins in the softest mode, from the bottom of the shelf or the back, tucked into the pants, to determine the required temperature of the iron iron.
Increase the heating if necessary.
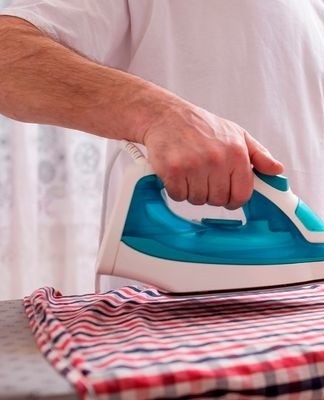
Step by step instructions
When ironing, it is important to follow the sequence so that the already finished parts of the shirt do not wrinkle again. They always start with the hardest and smallest details, they are the ones that cause the most trouble, but require the highest quality ironing.
Necklace
The collar is ironed from the bottom side (sewn), after removing the clips from the corners. Before starting work, the cervix is stretched, they try to remove all the influxes and folds from the material with their hands.
Having spread on the board, they lead with a fully heated iron from the corners to the center of the collar with the beak of the iron. They try to avoid small folds, fabric clips. If necessary, steamed. Carefully smooth the grid, carefully circle the button, iron the location of the loop.
Turn the collar over and iron the front. After ironing, the collar should be dry. Do not fix the collar fold with an iron.
Handcuffs
The cuffs are ironed from the inside out, after having unbuttoned all the buttons. When ironing, it is important not to touch them, it is good to iron in the place of curls. The iron is driven from the edge to the center. Then the cuffs are steamed from the front.
Sleeves
The most difficult part is to smooth the main part of the sleeve without a deflection in the center.
The sleeve should be folded, securing the seam and aligning the center. The sleeve is ironed by moving the iron from the collar to the wrist. The iron is not brought closer to the crease in the center so as not to smooth the arrow.After ironing the sleeve on both sides, proceed to ironing the middle part in one of 2 ways:
- place the sleeve on a small board or roll of fabric;
- unfold, placing the seam not on the side, but below.
The middle part of the sleeve is ironed on a board or roller, then returned to its original position with a seam on the side, and any wrinkles and errors are removed.
If the sleeves are wide enough, the center piece can be easily ironed without an arrow directly on the board. It is better not to iron the fabric at the bottom of the seam, so as not to have new wrinkles due to thickening.
Shelves
Shelves are ironed by putting them over the edge of the ironing board to the shoulder and side seams. The ironing sequence does not matter. It is important to iron the edge of the shelf where the buttons are sewn, carefully passing between them with the nose of the iron. The pocket is ironed from bottom to top, you also have to go inside with the spout so that the fabric does not swell and there are no wrinkles.
The bar is ironed first from the wrong side, and then from the front. When ironing, all seams should be slightly stretched so that the product does not wrinkle.
Feedback
The back is ironed over the front. When ironing the back, only the yoke can cause difficulties. If available, the shirt is laid over the edge of the board and ironed, smoothing the bottom and shoulder seams.
After the ironing is completed, the shirt is immediately hung on a hanger, giving the collar a natural shape, straightening the shoulders and shelves. It must cool completely, only then can the shirt be put away or put on.
Important nuances
Let's note a few more things you need to pay attention to:
- After washing, the shirts are carefully shaken out, straightened, dried on a hanger, laying the collar in a natural position and stretching the sleeves without wrinkles.
- If ironing doesn't work right away, shirts are neatly folded so that the collar and cuffs don't wrinkle - these are the hardest to iron.
- The ironing of the sleeves is the longest and the most difficult. If the shirt is worn only under the jacket, you can leave the arrows. In all cases, the cuffs are restored to perfect condition.
- It's best to iron dark shirts on the wrong side so they don't stay shiny and greasy.
Embroidery, the labels are carefully ironed, through the fabric, on the seam side. It is better not to touch them with a strongly heated iron.
What to do if there is no iron
In the absence of an iron, there are simple ways to improve the appearance of a creased shirt.
If the product is not too wrinkled
Using a spray bottle or wet hands, distribute water over the folds of the fabric. Carefully smooth the shirt, lay it out on a flat surface and wait for it to dry completely.
What to do with a badly wrinkled shirt
If your shirt is unironed or badly wrinkled, you can improve its appearance in the bathroom. In the bathroom, create a buildup of hot steam by turning on the shower or the faucet. The door is closed, the shirt hangs on a hanger, leaving the product in bath conditions. Steam wrinkles and wrinkles will be smoothed out.
Using the ironing machine
An ironing machine is a dummy onto which products (trousers, shirts) are threaded and then heated air is injected.
How to use a dummy
The work is carried out in the following order:
- the shirt is put on a mannequin and fastened with clasps;
- turn on the blower and wait for the straightening of all the parts, repair it additionally;
- turn on the heater, a signal will signal the end of the process;
- cool the product with cold air.
Then the finished product is detached and removed from the mannequin.
Advantages of fixing
Owners of household ironing appliances point out the following advantages of the device:
- speed and safety;
- no damage to equipment and decorative elements;
- the products can be ironed on a mannequin, avoiding drying, immediately after washing.
We also note the minuses - high price (70-200 thousand rubles), high power consumption.
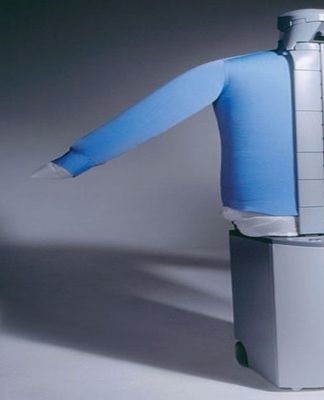
Important features
Here are the main features of most household appliances:
- ironing time - 6-8 minutes;
- mains voltage - 220 V;
- power - 1.5 kilowatts;
- weight - more than 10 kilograms;
- height - about 1.5 meters.

The set usually includes steam generators, neck and wrist stretching devices.
How to stroke as quickly as possible
A few simple tips can help you iron your shirts quickly:
- Wash the shirts on the delicate cycle without spinning.
- Dry only on a hanger, carefully stretching all parts and seams.
- For ironing slightly damp, not overdried products - steam is not needed in this case. Excessive humidity will also lengthen the ironing process.
- Use the steamer only stepping on crumpled places.
The best advice for fast ironing of men's shirts is to equip yourself with a comfortable ironing board, a quality iron with a protective soleplate, gain good experience and play good music. The ironing time will pass quickly.
Features of the iron-on polo shirt
Polo shirts are sewn from knitwear; before ironing, you should familiarize yourself with the composition of the material in order to correctly set the temperature of the iron. The product is returned so as not to spoil the color.
It is convenient to iron the polo shirt on the ironing board by simply pulling it up and gradually twisting it to the desired area. For ironing short sleeves, use a small board or folded cloth. The collar and closure are ironed first on the wrong side, then gently on the front.
When ironing on the table, the polo shirt is folded in 2 layers, it is important not to iron the fabric, under which the seam is located, so that it does not imprint on the canvas.
Reference: Modern polo shirts are made in low-wrinkle fabrics; if properly dried on a hanger, ironing is not necessary.
How to refresh with a steamer
The garment steamer cannot completely replace the iron. It is convenient for them to smooth out the wrinkles in the shirts that appeared during long-term storage, refresh and remove extraneous odors.
During steaming, the shirt is held upright on a hanger. Distilled or boiled water is poured into the device. Waiting for steam to appear.
The fabric is stretched with a gloved hand, pressing the iron against the product. When spraying collars, cuffs and pockets, use a special board, usually available in the kit.

Clean and maintain your iron
To make the shirt perfect after ironing, you need to take care of the iron, avoiding clogging of the water tank and the soleplate.
We clean the iron:
- Free the soles of carbon deposits. To clean the work surface, traditional methods are used - wiping with a cotton swab moistened with hydrogen peroxide or table vinegar. Also use toothpaste. You can easily remove buildup with a special iron cleaning pencil.
- Cleaning the water tank. When using a steam generator and filling with poor quality water, dirt accumulates in the tank. When ironing, instead of a suspension of pure moisture, dirty yellow-brown drops fly on the laundry. For cleaning, special solutions are poured into the tank (Anti-limestone, Topper, Top House). The use of folk remedies (vinegar, citric acid) can ruin the heating elements of expensive irons.
In some models there is an automatic notification by special indicators about the need for cleaning. When using fluids, the manufacturer's recommended regimen should be followed.
Modern irons do not give perfect results. Most housewives think that a shirt can only be beautiful after an iron. Therefore, mastering shirt ironing means providing you and your loved ones with an impeccable look, showing expensive things neat and in full shine.