How to make phosphorescent slime with your own hands at home
Glow in the dark slime, or slime as the toy is also called, is wonderful entertainment for a child. It is not difficult to make a mace with your own hands, but this process will allow you to get an idea of the basics of chemistry, set up a science experiment and just have fun together for children and parents . In addition, a homemade version saves budget.
Description and characteristics
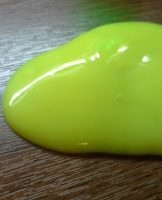
The toy is an elastic mass that glows in the dark. Slime is sold in the store ready to use, there are creativity kits with all the components and detailed instructions on sale, or you can pick up the components separately. The last option is the most economical and allows you to vary the composition and properties of the final product as you wish.
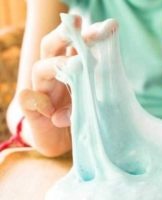
Interesting properties of the material, characteristics of the so-called non-Newtonian fluid. If you put the slime on a table or other flat surface, it will spread like spilled water. If you collect the mass in a ball and hit with a hammer, the mud will fly to pieces.
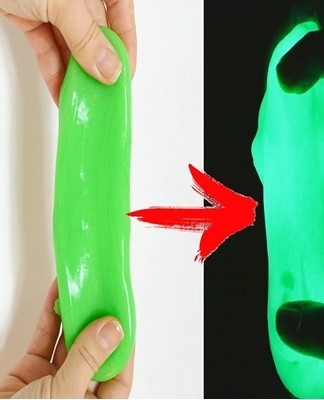
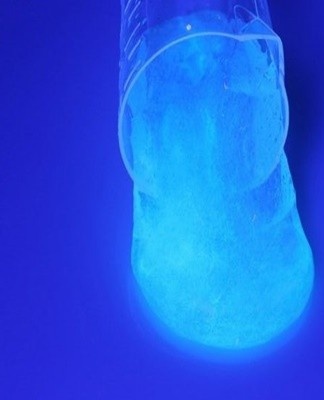
By adding fluorescent ingredients during cooking, you get additional possibilities for games and experiences. It will be interesting for children to observe the toy, creating drawings with light.
How to choose and prepare the right ingredients
The components that make up the base of slime are glue and activator. The activator is usually sodium tetraborate (sold in pharmacies), lens fluid (sometimes mixed with baking soda), borax (a solution of borax and glycerin). A glueless version is also prepared on the basis of dishwashing detergent or starch.
The easiest way to add sparkle to a toy is to use a fluorescent marker. To do this, the felt is disassembled, the luminous central part is removed and immersed in water. When the liquid is completely colored, it is ready to use.
Basic recipes
Before making a toy, you need to prepare the components and materials: a container in which the components will be mixed, a stirring stick, rubber gloves and a container for later storage of mud. The ingredients are combined in a bowl and kneaded to the final elastic state. The basic recipe is diversified by adding bright food colors or glitter to the slime, so it will be even more interesting for the child to play.
Rainbow
To make rainbow slime, you need different colors of food coloring. In several bowls, separate for each color, mix the components and bring the mass to the desired consistency. Ready-made slimes of different colors are combined into one, the resulting toy will be multi-colored.
The classic version of glowing slime
To make popping slime, you need to take:
- glue (ordinary stationery or PVA, homemade glue for slime is also suitable);
- activator - sodium tetraborate (you can replace it with lens fluid, brown or borax);
- fluorescent marker.
Step-by-step instructions for making popping slime are shown below:
- A luminous liquid is prepared from the core of a felt pen and water.
- Glue is added to the resulting solution.
- The mixture is supplemented with any activator from the list.
- The resulting composition is mixed first with a stick, and then, as it thickens, with hands protected with gloves.
Solve problems with your own hands
The big advantage of a DIY slime is that it can be easily brought to the desired consistency. It's also easy to fix the toy if something goes wrong or you don't really like the result. What problems are most often encountered in the manufacture of slime and how to solve them:
- How to soften a slime if it is dry? The easiest way is to add a little water. For this, slime is placed in a jar, a spoonful of liquid is poured in and thoroughly kneaded.
- Water also helps restore the volume of drool that diminishes over time, which loses some of the liquid by playing with it. A pinch of salt is added with water and stirred well. The procedure can be repeated every few days.
- The hardened slime is softened with hand cream, baby oil, glycerin or placed in the microwave for a few seconds.
- If the mass is too liquid and sticks to your hands, you need to add an activator. Care must be taken to inject the substance literally drop by drop and to mix well each time, otherwise there is a risk of overdoing it.
- If the slime isn't shiny enough, you can add a little food coloring for a richer color. Colors should be mixed carefully so as not to get a mass of an ugly gray-brown shade.
Home storage and use
When using the slime, care must be taken not to fall on the carpet, where the sticky toy will pick up all the sand and dust. It is impossible to get rid of such contamination.
After the game, purchased and homemade slimes should be placed in tightly sealed containers. A thick plastic bag is also suitable, which must be tied with a rubber band.
The properties are best preserved at a cool temperature, so the toy is stored in the refrigerator, but not in the freezer. If you leave the slime at a temperature above 20 degrees Celsius, it dries out.
Tips & Tricks
Playing with a slimer was interesting, safe and brought joy, not sorrow, you should follow the advice of experienced slimers:
- To prolong the life of the slime, the toy should be handled and maintained with care.
- You have to play with the slime after washing your hands.
- Hairs and large crumbs adhering to the surface can be removed with tweezers.
- You can try to get rid of small dirt sludge by bathing it in a jar of water. Do not wash the toy under the tap, it could slip out of your hands under the pressure of the water and fall into the drain.
- Sodium tetraborate can cause allergies. In this case, the toy made on its basis must be removed immediately. As a replacement, a slime made from other components is suitable.
Slime is an interesting and useful toy, especially if you make it yourself. The glowing slime will add variety to the game, allowing the child to set up elementary science experiments.