3 recipes for making slime from regular nail polish
Only 30 years after its accidental birth, the alien slime (slime) appeared in Russia, where it received a new name "slime" in honor of the then popular pet of the Ghostbusters team. The toy became famous, loved by adults and children, but perishable. It attracts dust, dirt, dries, rots, mold. And although the stores have a very diverse assortment, the inquisitive minds of our fellow citizens have long found a solution to the problem - how to make a slime from ordinary means, for example, from nail polish.
Characteristics of nail polish slimes
Toys are made with one goal in mind: to save money. However, the products are very cheap and affordable for any family. In addition, many teenagers collect a whole collection of ready-made slimes, but at the same time try to create them themselves.
Teenage fantasy knows no boundaries, glue, soap, shaving foam, gelatin, flour, starch, salt, sugar, shampoo, air freshener and even paper toilet are used. And that's not the whole list.
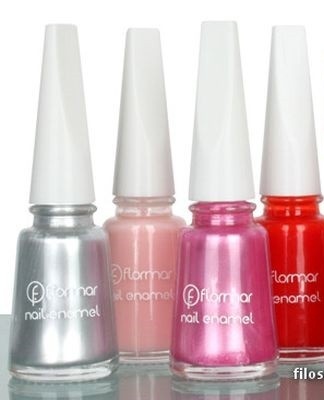
Nail polish allows you to get products of the most fun and whimsical colors.
How to choose ingredients
To find the ingredients, you need to understand the ultimate goal: what kind of slime is needed? According to the properties, they are the following:
| Name | Features |
| Inflatable | Tight, resilient, bounces off the surface. Retains its shape. |
| Liquid | It spreads on a puddle-like plane, does not hold its shape, stretches well. |
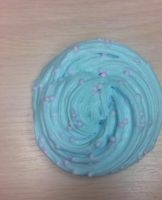
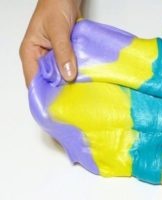
| Airy, foamy, plush hand eraser | Soft texture, good stretch, tear. Informed. |
Basic recipes
There are only 3 recipes with varnish on the Internet: with sunflower oil, silicate and PVA glue.
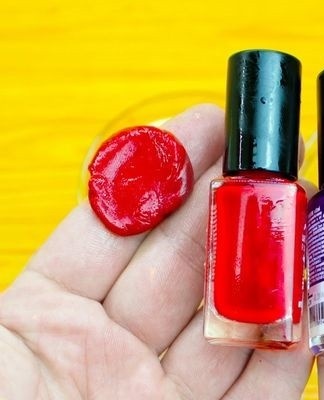
With sunflower oil
This is a recipe based on just two ingredients:
- sunflower (olive) oil;
- nail polish.
The manufacture is extremely simple, as they say, "by eye". We take small dishes. It can be anything - porcelain, plastic, metal.
In addition, you need to choose a mixing agent. It can be an ordinary teaspoon, a wooden or plastic stick.
Next, pour some oil into a bowl, about 3 tbsp. Then we add varnish. It must be fresh, liquid, otherwise a significant amount will remain in the bottle. We begin to mix the mass. Very quickly, the nail polish thickens, bumps into sticky clumps on a spoon/stick. It remains to see the result:
- Benefits :
- turned out a small piece weighing about 5 grams;
- the mass first stretches, then breaks.
- Defaults:
- strong unpleasant odor;
- the substance leaves greasy traces of oil and stained varnish on the fingers.
With silicate glue
We prepare dishes, a spoon.
Ingredients:
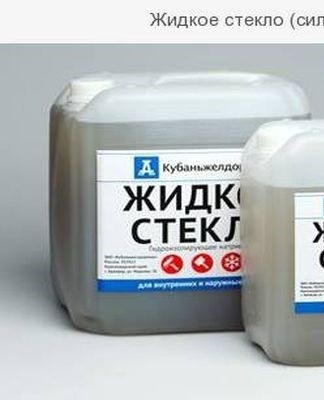
- silicate glue (sold in the stationery section);
- nail polish;
- sodium tetraborate solution (borax, borax, bought in pharmacies).
Pour the bottle of glue into a bowl.The bottle, as a rule, is made of plastic. Therefore, when the composition is squeezed into the container, it is filled with air bubbles. Using a spoon, the amount of gaseous substance is reduced.
Then the varnish is added.Its amount can be different: the more the ingredient is poured, the richer the color. The mass is thoroughly mixed until it is evenly colored. Then sodium tetraborate is used as a thickener. To begin with, you can add it at the rate of 1 teaspoon. If during the mixing process the mass did not compact to the desired state, you can apply more.
- Benefits :
- it turned out to be a dense mud;
- elastically stretches;
- retains its shape;
- bounces off the surface when thrown, like a ball.
- Defaults:
- strong and unpleasant smell.
With PVA glue
Ingredients:
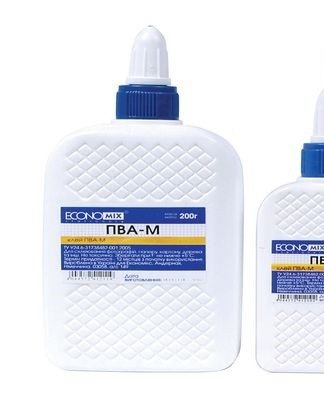
- PVA glue;
- varnish;
- Hot water;
- sodium tetraborate.
First, glue and varnish are mixed until smooth. The order in which these components are added is not important. You can add the 1st to the 2nd, or vice versa. Then hot water is poured into a volume equal to the volume of PVA. Stir vigorously again.
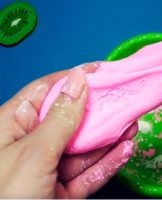
Now comes the crucial moment - adding a thickener. The first portion is 1 teaspoon, the next if necessary. The result is a handmade gum slime. It can be infused with shaving foam. The downside is the same - an unpleasant smell.
Storage and Usage Rules
In fact, only oil baking can be considered a varnish composition, but it is far from the most attractive product that gets your hands dirty. It can be tried as a first experience for teenagers.
In other recipes, nail polish is used as a colorant. He is able to paint slime in any color and shade (matte, glossy, metallic), add sparkles and fluorescent particles. By the way, perfumes, essential oils and toilet waters are often used to eliminate unpleasant odors.
It should be noted that the ingredients used are not the most beneficial for health:
- 5% phenol in silicate glue irritates mucous membranes when it enters the mouth and eyes;
- chlorine compounds in PVA glue;
- nail polish may contain toluene, formaldehyde, dibutyl phthalate, which can cause poisoning, allergic reactions.
That's why you shouldn't hold the toy in your hands for a long time. And after interacting with it, hands should be washed with soap and water.
The rules for storing homemade slimes are the same as those in the store:
- keep away from dirt, dust, cobwebs;
- keep closed in a container;
- add a few drops of water when dryness appears.
Tips & Tricks
Modern teenagers on the Internet are experimenting with different substances and generously sharing recipes with friends. At the same time, no one thinks about protection and health risks.
Homemade slimes should not be given to young children. Dangerous contact with mouth, eyes.
And the most important: today, polymer processing technologies are not yet used in the world. Nature can not cope with this either, and burning leads to the formation of toxic substances. Should we dirty the environment?