How to glue liquid wallpaper with your own hands, rules and step-by-step instructions for beginners
The usual paper or vinyl wallpaper in rolls can be exchanged for liquid wallpaper, but you have to know how to glue it. Wall sticking problems usually do not arise. Liquid wallpaper is a dry finishing mixture, which is diluted with water, the solution is applied to the surface and immediately smoothed. It is much easier to work with such material than with usual wallpaper: you do not need to mess with glue, measure the area, cut the roll into sheets of equal length.
Distinctive features
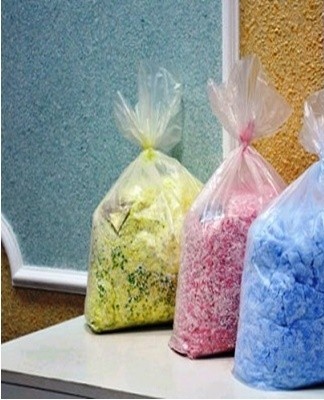
Not so long ago, liquid wallpaper appeared on the construction market. They are easy to apply and look beautiful and presentable. Liquid wallpaper is a kind of decorative plaster. They are produced in the form of a dry mixture and just before applying them to the wall, you need to add a little water to the contents of the package.These wallpapers are not sold in rolls, but in transparent plastic bags weighing from 1 kilogram. Usually such a package is enough for a wall equal to 4 square meters.
The composition of the wallpaper mixture includes:
- natural filler (cellulose, cotton, linen, silk fibers);
- adhesive base for mass polymerization;
- pigments that color the solution in the desired color;
- binders (acrylic, latex), with the help of which the mixture becomes elastic, then - solid;
- decorative elements (sparkles, golden threads);
- antifungal supplements.
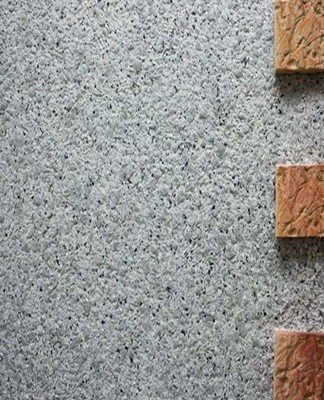
Such a package costs from $5. In hardware stores, wallpaper from various manufacturers is sold. The composition and characteristics of the mixture are the same for everyone. Some manufacturers sell ready-to-use solutions. Liquid wallpaper is versatile. They are suitable for any room with any wall. Admittedly, they cannot be washed: the wallpaper is washed with water. A solution is previously prepared from the mixture and water. After drying, it turns into a warm and velvety material, reminiscent of polystyrene.
It is very simple to glue such wallpaper: a solution like plaster is applied to a wall with defects and turns it into an absolutely smooth surface.
Advantages and disadvantages of sticker
Pasting walls with liquid wallpaper has its advantages:
- the mixture contains only natural ingredients;
- liquid material hides all defects in the wall - small cracks, cracks;
- after application, no seams are visible on the wall surface;
- the wall covered with liquid wallpaper looks perfectly flat;
- these wallpapers are durable, they can be restored by applying a new coat to the abrasion;
- the prepared solution can be supplemented with any decorative element;
- the finish does not deform, does not shrink, can be used for repairs in new buildings;
- can be stuck to any surface;
- the finishing material is breathable, has good sound insulation;
- does not emit unpleasant odors during application and drying;
- antistatic properties prevent dust from settling on the wall;
- meets fire standards, does not ignite, does not sustain combustion.
Disadvantages:
- liquid wallpapers quickly wash off with water, they can not be washed, they are maintained with a vacuum cleaner;
- the finishing mixture can not be used in rooms with high humidity;
- varnish can be used to protect the surface from moisture, but such material does not allow air to pass;
- when applying the wallpaper mixture on a poorly cleaned surface, streaks and stains may appear.
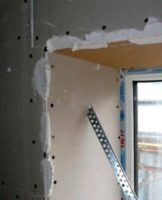
Surface preparation
Liquid wallpaper is versatile. They can be used to stick on any surface: concrete, plaster, metal, wood. True, it is advisable to remove the old finish: remove the dilapidated wallpaper, clean the wall from peeling plaster.
The concrete surface must first be coated and painted with white paint, and for a coated surface, one paint is enough.
Liquid wallpaper fits well on a surface painted with oil, alkyd or acrylic paint. If the wall has a color that is radically different from the tone of the wallpaper mixture, then the surface should first be painted with white enamel, oil or water-based paint in 2 layers. Then the wall is impregnated with a primer 2 times.
It is not necessary to perfectly level the surface before applying the wallpaper solution. Roughness and slight imperfections are welcome: they will facilitate the application of the mixture and will accelerate the adhesion of the materials.However, before gluing, the wall surface should be even, without deep potholes, impregnated with a primer treated with a water-repellent and antifungal composition. The background color of liquid wallpaper should be white. Depressions of more than 3 millimeters must be leveled with a starting putty.
Work with old or plaster walls
Old chipped plaster must be removed before applying the wallpaper mixture. The surface should be solid, light and strong. You can plaster the wall with starting plaster putty. Then soak with a primer (2-3 times) and paint with white water-based paint with the addition of PVA glue.
Remove the decorative coating
Before gluing, remove the remaining finish from the wall. The old decorative coating can peel off and crumble, the applied wallpaper mixture will subsequently fall off. The cleaned wall should be putty with any gypsum mixture, then primed and painted with white water-based paint.
Checking the quality of plaster or putty
A wall plastered and painted with white paint should be even, smooth and light. There should be no metal nails on the surface, as rust can cause yellow spots to appear on the wallpaper. If the iron pipe cannot be removed, it must be repaired with a thick layer of putty or painted with white oil paint.
Impregnation with primer
The prepared wall should be impregnated with a primer 2-3 times. It will strengthen the surface, protect against fungus and increase the adhesion of materials. A colorless or white deep penetrating acrylic primer can be used. Colored primers should not be used, as they will appear as multicolored spots.The primer is applied 2-3 times, taking a short break before each application.
GKL
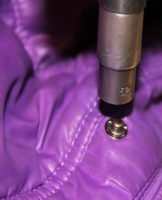
The plasterboards must be completely puttyed. If the putty is applied only to the joints, then after the wallpaper solution dries, white streaks will appear in the places of the putty. After applying putty, the wall should be painted with water-based paint so that the surface does not get wet when applying liquid wallpaper. Metal screw caps should be coated with white oil paint.
Wood, plywood or OSB
The wooden surface quickly absorbs moisture. Before applying the wallpaper mixture, the wood, plywood or OSB is either painted with white oil paint or primed and repainted with water-based paint.
How to register
Liquid wallpaper is applied to previously cleaned, painted and primed walls. To prepare the wallpaper solution, you need a basin, a dry mix and water. The air temperature in the room should be above 15 degrees Celsius. If the weather is dry and sunny outside, a draft is welcome. The solution applied to the wall is leveled, then it dries for about 3 days, after which the surface is covered with acrylic varnish.
Tool required
To glue the walls, you will need the following tools:
- a plastic bowl with a capacity of 10 liters, to prepare a solution;
- trowel or spatula for applying the mixture to the wall;
- roller for leveling the mass;
- spray gun for coating the surface with a solution;
- a knurled roller with textured relief to give the surface the desired texture;
- a transparent plastic grater to smooth the mixture on the wall;
- colorless finishing varnish.
Preparation of the solution
To prepare the solution, you need to take a wide plastic bowl with a capacity of 10 liters and pour water at room temperature into it. The required amount of liquid is indicated in the instructions for the wallpaper. Usually 6 liters of liquid are consumed per 1 packet. Pour the dry mixture into the water in small portions, stirring well. You must use the whole package at once. It is undesirable to mix the contents of two packages in one bowl.
You cannot leave some of the dry mix in a bag for later.
The solution can be mixed by hand, wearing rubber gloves or, according to the instructions, with a mixing drill. The prepared mixture should resemble thick sour cream. The solution should have a homogeneous texture, all large lumps should be kneaded. After kneading, the mixture is left alone for some time so that it is infused. Usually manufacturers write on the package how long it takes to soften the glue.
How to calculate consumption per square meter
A package weighing 1 kilogram should be enough for a wall with an area of 4 square meters. Mr. It is advisable to prepare the mixture in advance for application on a wall or the whole room.
Home cooking technology
The solution for gluing the walls is prepared in advance. The mixture should be infused for some time. It is advisable to swell the dry components before adding them to the water. Decorative glitter is poured into the liquid at the very beginning, then the wallpaper base is added. In advance, you need to prepare a sufficient amount of mortar so that it is enough for the entire wall.
Step by step instructions
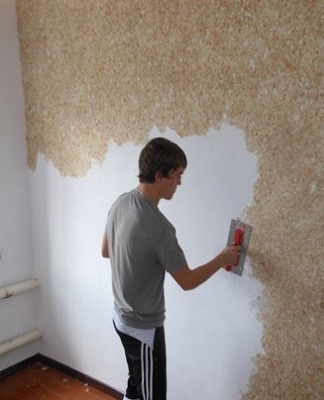
The prepared solution is applied to the wall by hand, using a trowel or spatula. Too thick a mixture, which does not adhere well to the wall, is diluted with water. A spray gun can be purchased or rented to automatically apply mortar to surfaces.
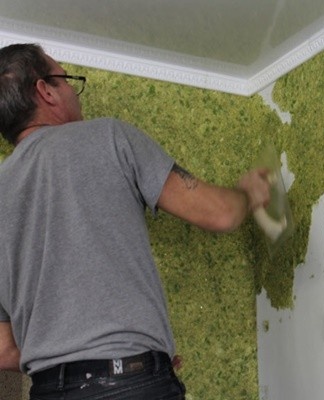
Manually
Instructions for applying liquid wallpaper on the wall:
- collect the mixture with a trowel or spatula;
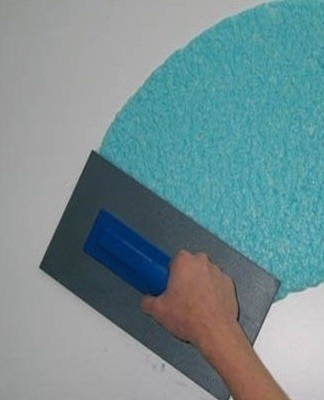
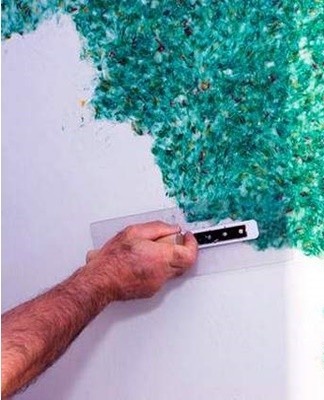
- gruel is applied to the wall and rubbed with a float over the surface;
- a new portion of the mixture is applied close to the layer applied to the wall;
- there should be no borders between adjacent areas, the layers should flow smoothly into each other;
- it is better to distribute the mixture along the wall with a grater;
- the thickness of the layer should be at least 2-3 millimeters;
- the solution is leveled in different directions;
- the wall surface should be evenly covered with a wallpaper mixture;
- when the wallpaper covers 1 square meter of the surface, you need to level the surface with a trowel moistened with water;
- use the prepared solution all at once to finish the entire area.
With a gun
Liquid wallpaper can be applied to the wall with a hopper gun. This device will allow you to make repairs in minutes. True, such a gun is expensive. It is best to rent it, together with a compressor, for a day.
Roll
The prepared mixture can be picked up by hand, applied to the wall and leveled with a roller. The surface must be flat, completely covered with the liquid compound.
Subsequent finishing
The liquid wallpaper applied to the surface dries for 3 days. After the walls are completely dry, they can be coated with a clear water-based acrylic lacquer. The result is a washable wallpaper.However, such a finishing material does not have a very high level of moisture resistance, so it is undesirable to use it near a bath or sink.
Repair of the damaged area
Do not discard any residual solution immediately. They can still be helpful in repairing damaged areas. To do this, moisten the damaged area with water and remove the old topcoat. Then paste a new part of the wallpaper mixture and smooth it carefully.
How to properly store leftovers
The solution remaining after the repair cannot be discarded. It should be placed in a plastic bag and frozen, and when the need arises, replace the old coating, removing the damaged layer from the wall and rolling up a new one.
Common Beginner Mistakes
Working with liquid wallpaper for the first time, you can make a number of mistakes. It is advisable to read the instructions on the manufacturer's packaging in advance and follow certain rules.
Instructions for beginners:
- decorative elements are first poured with water, then the wallpaper mixture is added in portions;
- a certain amount of water is needed for each brand of wallpaper;
- the package usually contains instructions for preparing the solution;
- the solution is prepared from the entire contents of one package;
- some mixtures should be mixed only with hands, otherwise long fibers and decorative elements will break;
- the remaining mixture is added to the finished solution, which will be used for gluing on the next surface;
- if the solution does not hold well on the wall and falls off, you need to add a little water (but no more than 1 liter per pack).
Rules of care
Liquid wallpaper has a number of positive qualities: it looks beautiful, it is easy to apply to the wall, and in case of damage it can be easily repaired. Thanks to the textile fibers included in the composition, this coating has a good antistatic effect, that is, it hardly attracts dust. The only problem is the heavy pollution.
This material does not belong to the class of washable wallpapers. A very dirty area will need to be moistened with water to soften the layer, cleaned from the surface with a metal object and replaced with a new portion of wallpaper. After such a local repair, there will be no seams on the wall.
This finishing material cannot be washed. When moisture penetrates the surface, the wallpaper softens. But the wall covered with such a finishing material can be vacuumed. The vacuum cleaner is used every six months. Use only a soft brush. If varnish has been applied to the wall, stubborn dirt can be removed with a damp cloth. True, after varnishing, the wallpaper significantly changes color, so this coating is rarely used.
Do-it-yourself application master class
Liquid wallpaper is a modern material for interior decoration. This top coat transforms an unrecognizable room in minutes. Liquid wallpaper can be applied to any surface, it must first be prepared or impregnated with a primer in 2-3 layers. Such a finishing material consists exclusively of natural ingredients. The bonding adhesive is CMC wood glue. The solution can be prepared independently at home.
To do this, you only need a packet of dry mix, a spacious container and water. One package is sufficient for 4 square meters of surface.Stir the mixture with your hands, so it is possible to keep all decorative components and long fibers intact.
Master class on applying wallpaper mixture on the wall:
- Prepare a solution from water and dry components.
- First, water at room temperature is poured into the basin, then the wallpaper mixture is poured in a thin stream.
- The mass is carefully mixed by hand.
- The resulting substance is left to swell for several hours.
- Swollen and pasty soils are mixed again.
- The mass is taken up with a trowel and applied to the wall.
- Using a trowel, spread the solution evenly over the entire surface.
- The minimum layer should be 2-3 millimeters.
- Wallpaper application starts from corner to corner.
- The mixture is applied to small areas, each time increasing the coverage area.
- The entire surface must be completely sealed.
- After applying the solution to part of the wall from above, the surface should be passed with a float soaked in water.
Tips & Tricks
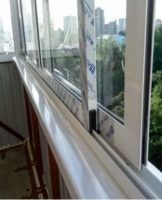
Manufacturers of liquid wallpaper claim that it is easier than ever to apply such a finishing material to the wall. However, this is not entirely true. When you start a renovation, you need to have at least some basics and building skills. The technique of applying the wallpaper mixture is similar to working with decorative plaster. Before you cover the living room wall with a liquid pasty mass, you need to practice a little, for example, glue the wall of the loggia or the pantry.
Liquid wallpaper is usually used to decorate a living room or bedroom. The wall is prepared before gluing, deep potholes are putty.The surface must be primed in order to fix the plaster and increase the adhesion of materials of different characteristics to each other. The gruel is applied with a spatula to the wall and leveled with a float. The thicker the layer, the more material will be consumed. Careful filling of all holes, cracks and grooves with putty will help reduce the consumption of the solution.
The wall prepared for gluing should be not only even, but also white, otherwise stained spots from the old finish will appear over time.
It is best to paint the surface with white water-based paint with the addition of PVA glue. Before applying the wallpaper mixture to the wall, the surface is impregnated with a primer 2-3 times. You need to prepare a solution for pasting the wall in the morning. The fact is that the mixture, after adding all the ingredients, must stand for some time and swell. The glue must completely soften, otherwise the oatmeal will not stick to the wall.
On the wall, using compounds of different colors, but homogeneous in texture, you can create any pattern. First you need to make a sketch on the surface, and then paint it, as with paint, with wallpaper glue of the desired color. The mixture can be collected by hand and carefully, without going beyond the contours, spread along the wall with a roller. Residues can be removed with a spatula.
All works of applying liquid wallpaper on the wall are done by hand. This is a fairly laborious activity that requires not only knowledge, but also physical training. Apply the mixture to the wall in small portions. The new coating is joined to the layer already present on the wall. Each area is immediately leveled with a roller or float.
There should be no lumps or bumps on the wall.The mixture is leveled in different directions, you can make circular movements when leveling. On a fully glued wall, they carry out a trowel soaked in water in order to level the finish and eliminate defects.
One bag is enough for a wall with an area of 4 square meters. 3-4 of these packets should be enough for the whole room. In a container, a solution is prepared from a bag with a mixture of dry wallpaper. In the morning, you can prepare the right amount of solution to finish the whole room. Porridge swells for several hours. After using one mixture, you can use another. The rest of the solution should be collected in a plastic bucket and frozen in the freezer.