What kind of roller for painting the ceiling with your own hands with water-based paint
The easiest option for decorating the ceiling on your own is to paint with water-based paint. It may seem to some that this work is easy and does not require special skills. However, in order for the ceilings to come out evenly, you need to know many subtleties: how to prepare the surface for work, what roller to paint the ceiling, what kind of water-based paint to use.
Advantages and disadvantages of whitewashing
Whitewashing ceilings with whitewash with paint based on water emulsion has both positive and negative points. Benefits include:
- lack of odor and rapid removal of moisture;
- non-toxic materials;
- ease of use, ability to use without special skills;
- at low price;
- combination with any type of interior, giving the ceiling the desired color when adding color;
- easy rinsing of clothes and skin.
The disadvantages are:
- significant labor costs to prepare the surface for painting;
- relatively rapid loss of the original appearance by the ceiling;
- intolerance to low temperatures.
How to prepare to paint
In order for the whitewash to lay down evenly, it is necessary to prepare the ceiling before starting work. Before getting down to business, all surfaces are dusted with a film. The ceiling is stripped of the existing coating. An exception is the old, but still high-quality water-based coating, which simply needs to be updated (for example, due to the fact that it has changed color). In this case, it is enough to brush off dust and cobwebs with a damp cloth, then dry the ceiling.
If the previous water-based coating has cracks or other defects, it must be cleaned.It is recommended to do this in one of two ways:
- Use an angle grinder or sandpaper, or rinse off the old coating with hot water.
- The second way: the ceiling is moistened with water (70C), after ten minutes the procedure is repeated, then after five more the paint is removed with a spatula. This procedure is carried out until the previous coating is completely removed. The remains are sanded, the ceiling is washed, dried and primed.
If none of the methods work, puttying is recommended. In this case, the surface is pre-roughened with sandpaper, after which putty is applied.
If other materials were used to whitewash the ceiling, be sure to thoroughly clean everything down to the floor.
This is done using a damp cloth and a spatula. It is recommended to wash, prime and putty the prepared ceiling.
Tools and materials
To paint the ceiling surface you will need:
- primer, brush for her;
- putty (if necessary) and putty knife;
- brushes, rollers or spray gun;
- water color;
- ability for her;
- mixer (screwdriver, electric drill);
- masking tape and construction tape, film for covering surfaces;
- a stepladder or a long handle for a roller;
- clothes, scarf, glasses.
How to choose and prepare paint
There are different water-based formulations. Each of them has features that will need to be considered when choosing a paint:
- Acrylic. This aqueous emulsion is good in that it allows you to obtain a smooth surface, hiding small defects, such as small bumps or cracks. It serves for a long time and has low consumption when painting. Acrylic paints are only suitable for dry rooms, but they are resistant to wet cleaning. The disadvantage of acrylic is its high price, as well as the inability to paint a poorly dried surface.
- Silicates. This coating resists humidity and is suitable for outdoor use, to whiten the ceiling of balconies and verandas.
- Mineral water emulsions. Such compositions easily adhere to any surface, but they are also easily washable. Therefore, wet cleaning is not available for a surface painted with mineral emulsion. These paints are the cheapest.
- Silicone. Such paints are attractive because they allow you to get a smooth ceiling even without careful preparation. The silicone emulsion can hide gaps up to 2 mm. It is suitable for ceilings in bathrooms and other damp rooms. The downside is the high cost.
Based on the features of the listed compositions, you can choose exactly the one that is most suitable for painting the ceiling in a particular room. You can choose matt, semi-matt, gloss or semi-gloss aqueous emulsions by color. There is an instruction on the container with paint, which describes the order of work.Some paints need to be diluted with water, others just need to be mixed.
If the emulsion is diluted with water, this happens gradually. After adding water, everything is mixed, then the resulting composition is tested on a small area of the surface.
The emulsion is ready to use if it lies flat.
How to prepare the surface for painting
Except when the painting is carried out on an old high-quality water-based plaster, a preliminary preparation of the ceiling is necessary. It goes like this:
- The cleaned surface is primed to remove dust.
- Then put a layer of putty, which, after drying, is smoothed with sandpaper.
- After sanding, the ceiling is primed again. Do not neglect the primer to improve the adhesion of the water emulsion to the surface of the ceiling. The primer helps prevent blistering after drying and prevents cracking.
The basis of the composition of the primer should be similar to that of paint, that is, for a water-based acrylic emulsion, an acrylic primer is used, for a silicone - silicone. The quality of the primer determines how smooth the paint looks on the surface. After completing the primer, the ceiling is allowed to dry.
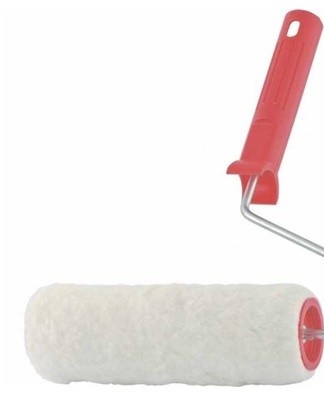
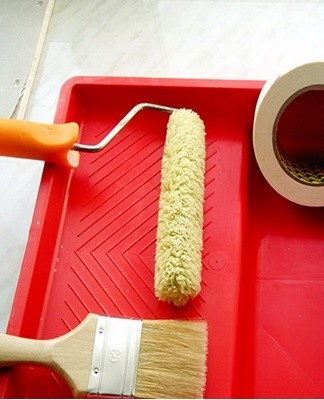
Preparation of tools and materials
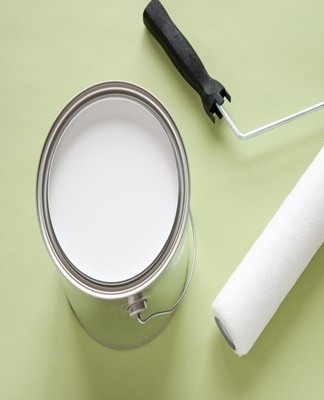
If a roller or brush is used for work, it is more convenient to pour paint into a specialized container, which is a bath with a ribbed platform. The best would be to choose a roll made of faux fur, which has a short nap and an inconspicuous seam. The quality of the painting will largely depend on the tool chosen. When a stepladder is not used for work, a special roller is placed on a long handle. The brush should be taken wide enough.A narrower brush is useful for painting the corners. The paint is opened and stirred (or, if necessary, thinned) just before starting work.
Step-by-step coloring technology
Ceiling painting can be done using a variety of tools. However, when choosing one or another of them, it is necessary to take into account some peculiarities.
Roll
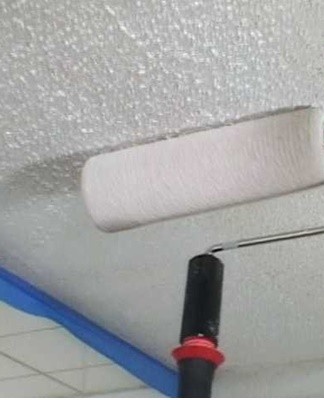
With a roller, the ceiling is painted like this. The prepared aqueous emulsion is poured into a container and the roller is dipped into it. The wet tool is rolled along the ribbed area until the composition is evenly distributed over the entire surface of the roller, after which the paint begin.
First, the corners are painted, then the main surface is painted. They are painted in two layers: the first is applied parallel to the window opening, the second - perpendicular to it. To control the uniformity of the emulsion, you must stand at an angle to the place to be painted. The second layer is applied after the first is completely dry.
The composition is applied systematically, so that the stripes are next to each other. You need to spread the paint in both directions. Once distributed, the roll is again immersed in the bath and the procedure is repeated. If necessary, the ceiling can be painted in three layers. However, if any scratches or streaks remain after the last time, the job will need to be redone.
Spray gun
When using this device, the water emulsion is diluted with a thinner only when roller bleaching. Then the paint is filtered. Before starting work, the supply of emulsion is regulated by painting an unnecessary object for 20 seconds.
After that, they proceed to the main stage of work: holding the nozzle at a distance of 50 cm from the ceiling, move at a speed of 20 cm per second, maintaining a constant inclination (preferably perpendicular to the ceiling). They paint in sections, applying paint with strokes first along and then across an imaginary square. Then they start painting the next section. It is absolutely imperative to maintain a steady pace when painting, otherwise the layers of paint will be uneven. Apply 3 coats.
Brush
The brush is dipped in the paint by a third, then pressed against the edge of the container to remove the excess. Then the painting is done in strips across or along the ceiling. This method is considered the longest.
How to avoid streaks
To achieve a streak-free ceiling surface, it is necessary to work quickly, since water-based compositions dry quickly, and streaks may appear at the junction of new and dried paint.The room should not be too hot, drafts should not be allowed. In addition, it is important that the lighting is sufficient.
Common Mistakes
The most common errors leading to defects when painting the ceiling are:
- using paint that is too thick;
- insufficient preliminary preparation;
- painting a damp ceiling;
- refusal to use a primer;
- uneven pressure on the brush or roller when painting;
- apply the next coat before the previous one dries.
Tips & Tricks
Experienced painters recommend diluting the water emulsion for the first coat of paint a little stronger than indicated in the instructions. It is best to mix the paint with a mixer. If grains appear in the paint, it is recommended to filter it.