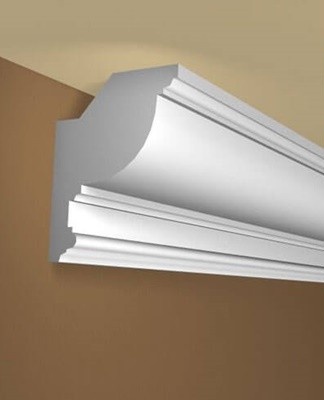
How to properly glue a plinth to a stretch ceiling, the best methods of fastening
Stretch ceilings are a practical and beautiful part of the decor, which facilitates repairs in the interior. Every year they are only gaining popularity, appearing in more and more apartments. However, their use has its own nuances, misunderstanding of which will complicate the life of inexperienced builders. Such things include the technology of gluing the ceiling plinth, which differs from the usual. How to properly glue the plinth to the stretch ceiling, we will find out below.
Features of work with a stretch ceiling
The main feature that distinguishes the work with a false ceiling from the usual are the rules for fixing the plinth. If in a normal situation it is attached to both the wall and the ceiling, in the case of mounted models it is attached only to the surface of the wall. It is because of:
- False ceiling flexibility.It is made of a thin film which deforms at the slightest pressure on it. Due to this, folds and unevenness will form on the surface of the ceiling, which will not please any apartment owner.
- The fragility of the structure. The ceiling material is not only flexible but also fragile. Its structure is damaged by physical and chemical effects. Due to the fact that most adhesives contain active chemical components, their contact with the ceiling film will lead to sad consequences.
- In case of repeated repairs, the baseboards will not be able to come off cleanly from the ceiling surface and will also have to be redone.
Varieties of materials
The construction market offers a wide range of skirting boards that differ from each other in the material of manufacture. Some of the most common varieties include:
- polystyrene nets;
- polyurethane models;
- plastic products;
- duropolymer;
- rubber products;
- extruded plinth.
polystyrene
A widespread material in production with the following advantages:
- low product cost;
- the products are light;
- foam fillets are easy to work with.
Defaults:
- Not suitable for rooms in which an abundance of complex curved lines prevails. The material is extremely brittle and breaks quickly when bent.
- It is necessary to carefully select the glue, since some compounds destroy the structure of the material.
Polyurethane
Polyurethane skirting boards are very different from foam skirting boards and have the following qualities:
- flexibility;
- strength;
- resistance to chemical solvents.
Among the disadvantages are:
- heavy weight, which does not allow fixing the mesh to the wallpaper, especially if the fixing is carried out only on the wall of the room.
Plastic
A popular and affordable type of material, the products of which have the following advantages:
- A wide range, thanks to the possibility of imitating other more expensive materials.
- It is convenient to work with plastic, it goes well with wallpaper.
Duropolymer
Duroplimer is obtained by processing expanded polystyrene under high pressure. Products made from such materials are several times stronger than other analogues sold on the construction market. The disadvantages of duropolymer, according to ordinary people, include the excessive weight of the parts.
Rubber
It is used for the improvement of premises in which a high level of humidity is recorded. Moreover, its attractive appearance and ease of fixing make it very popular among buyers.
Extruded
An excellent choice for rooms where an abundance of intricate curves and lines reign. Thanks to the increased flexibility, the extruded skirting will easily cover any area, even the most non-standard. As a reliable fastener, glue on a water-soluble basis is most often used.
How to paste after finishing finishing
Many knowledgeable people in the construction industry still argue about how best to glue the baseboard - before or after finishing. We will consider both options, and which of them to choose is up to you.
To note! If you're not an experienced builder with the proper skills and equipment, try gluing the baseboard after finishing. This will reduce the risk of incorrectly calculating the location of the fillet attachment, and you won't have to redo all the work.
The choice of adhesive
When choosing an adhesive, it is necessary to take into account the material from which the baseboard is made and the characteristics of the part to be repaired.For those who do not want to bother buying glue, we advise you to pay attention to the following products:
- Moment;
- liquid Nails;
- Adefix;
Moment
An adhesive in high demand by buyers due to its versatility and practicality. Benefits :
- Suitable for most building materials used in renovation.
- Fixes the part securely.
- Dries quickly.
Liquid Nails
The best choice for models with thick threads that require glue to be more secure when attaching. The glue does not disintegrate when exposed to water, which allows it to be used in rooms with high humidity.
Adefix
Acrylic glue suitable for skirting boards in:
- polyurethane;
- mousse;
- extruded polystyrene.
After hardening, the glue does not lose its elasticity, which significantly expands the scope of its application.
Instrument preparation
Correct and early tool preparation speeds up and simplifies repair work. To glue the ceiling plinth after finishing the finishing, you will need:
- ladder;
- stationery knife;
- ruler or tape measure;
- handsaw;
- a tray for cutting profiled wood;
- clean cloth;
- pencil.
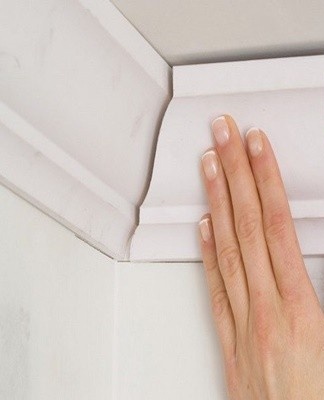
Markup execution
The markup is carried out using a pencil and a tape measure, while it is noted:
- the lower edge of the ceiling plinth location;
- joints.
Applying glue
Glue is applied to the back of the net, after which it must be given a few seconds for the substance to begin to set.
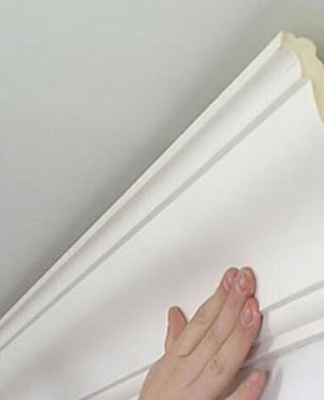
Remember to pre-attach the skirting to the intended fixing point to ensure it is cut correctly.
Size
The cutting is done using a saw and a profile cutting board. It has standard slots at different angles for easy marking and trimming.
To note! Do not forget that you need to cut the skirting board, focusing on the angle that you want to get in the end - internal or external.
How to install before finishing finishing
The algorithm for installing the plinth before finishing the finishing is very different from the usual, and among the key points are:
- preparation of glue and mastic;
- moisten the work surface;
- preparation of a working solution based on putty;
- net sticker.
Preparation of glue and putty
The choice of gluing before finishing the finish involves two modes of implementation:
- with glue;
- with putty.
The use of glue is implemented in the same way as in the previous version, and you will have to tinker with the putty. It is necessary to achieve such a state of the solution, which will be slightly thicker than when processing the walls.
Moisten the surface
After the skirting board is laid and ready to be glued, the surface of the wall is moistened for better adhesion of the putty. In addition to the wall, be sure to wet the inside of the baseboard itself.
Preparing a working putty solution
Algorithm of actions required to prepare a working solution for working with a ceiling plinth:
- We take a mixing container.
- We fill it with water.
- Gradually we add the dry mixture to it until the solution becomes the necessary consistency for work.
- We stir the mixture with a construction mixer for 2-3 minutes.
If the solution is made by hand, then the mixture is poured first, after which we pour water.
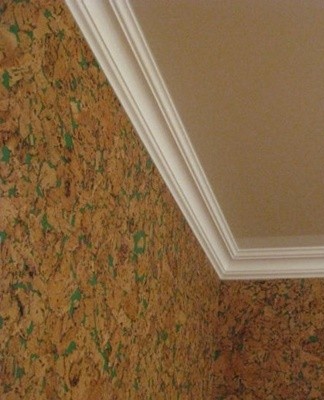
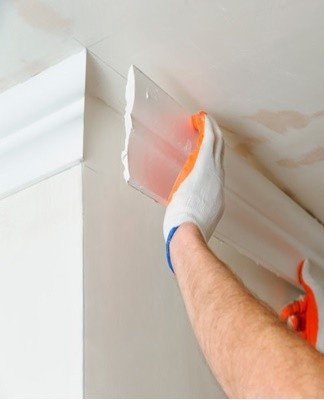
How to glue nets
When gluing the plinth, it is necessary to press it strongly against the wall so that part of the applied solution is squeezed out from below, filling in the irregularities of the wall. The excess solution is then removed using a conventional spatula and a clean cloth.
Difficult cases of installing a ceiling plinth
Difficult cases of ceiling plinth bonding include:
- work with foam products;
- glue polyurethane baseboards;
- fixing heavy skirting boards.
Foam mesh bonding
The bonding of the foam nets requires the greatest care. The products are extremely fragile, and if you overdo it, the baseboard will easily crack.
How to properly glue a polyurethane skirting board
When gluing a polyurethane baseboard, follow these guidelines:
- To eliminate the gaps between the wall and the plinth, use an acrylic-based putty.
- Pasting starts from one corner of the room, after which you need to move in one direction until you have passed all the walls in a circle.
- As an adhesive, it is advisable to take special grades developed to work with this material.
How to tie a thick net
Heavy plinths have additional holes for self-tapping screws, with which they are fixed to the walls. If this is not taken into account, the glue will not withstand the load and the fillet will fall off.
Common Mistakes
Some common errors include:
- Incorrect selection of glue - without taking into account the material from which the ceiling plinth is made.
- Owners of small rooms acquire dimensional fillets that do not fit properly into the interior of the room after installation.
- During the renovation, the room is too airy or not at all. In the first case, drafts quickly dry out the glue, and the mesh does not have time to reliably stick to the wall.In the second case, poisoning by fumes emanating from the glue is possible.
Tips & Tricks
Experts recommend:
- While working with the plinth, cover the walls and floor with cling film. This will eliminate the possibility of staining the already repaired surface.
- Practice cutting on an unnecessary board before working with the baseboard. By habit, it is easy to cut the building material incorrectly, which will take a serious toll on your pocket.