Planting and caring for gladioli outdoors and how to keep them in winter
Gladioli have long been cultivated by flower growers around the world. For the first time, the ancient Romans began to use them as ornamental plants. Although they were originally considered a weed. In order for gladiolus to bloom beautifully, you need to know the features of planting in the open field and take care of it.
Description and characteristics of the plant
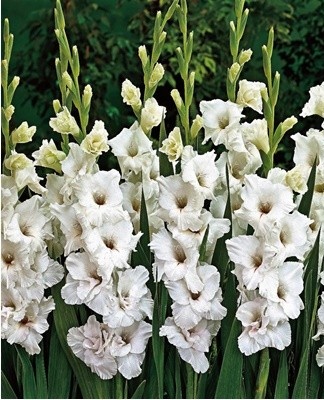
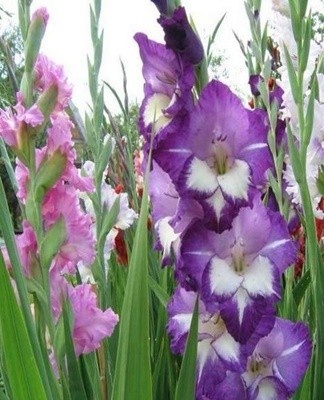
Gladiolus are perennial flowering plants in the Iris family. The flower stem is straight, depending on the variety, the height may vary. The maximum length can reach 1.5 m. Inflorescences are located on long, spike-shaped peduncles. The flowers are large, of various shades. They can be either simple, consisting of several petals, or complex.
The leaves are long, xiphoid. The veins are straight and clearly visible. The root rosette of the leaves is absent. The bulbs are round or elliptical in shape.For the winter, bulbs of gladioli are dug up.
how to plant
Planting gladioli is similar to planting any other bulbous crop. Before planting, you need to choose the right place and prepare planting material.
Seat selection
Gladioli should be grown in open sunny areas, protected from strong winds. Water should not stagnate in the ground. Partial shade is also fine, as long as the bushes are in the sun for most of the day. Plants grow poorly in the shade. It is not recommended to plant bulbs in the same place for two consecutive years. It is advisable to choose a new location each year. Soil for gladioli should be well-drained; coarse sand can be poured into the bottom of the holes so that the bulbs do not rot.
Acidic soils are not suitable for planting. In gladioli, the tips of the leaves begin to turn yellow, the opening of flowers slows down. Also, the bush can be infected with fusarium. The optimum soil acidity for gladioli is 5.6-5.8.
Selection and preparation of planting material
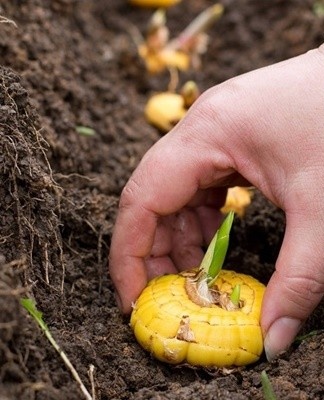
Suitable for planting healthy bulbs without signs of damage. It is best to choose bulbs that are cultivated and adapted to the local climate.They begin to prepare planting material in 30 days. First of all, you need to carefully peel off the dry scales from the bulb so as not to damage it and delicate sprouts. Sick and affected tubers are discarded. If there are no severely affected bulbs, they can be cut off. Places of cuts are treated with brilliant green. They are suitable for planting.
Then the gladiolus bulbs are laid out in the sun, grow so that they grow tall. Immediately before planting, the bulbs are soaked for 1 hour in a weak solution of potassium permanganate.
It is not necessary to rinse afterwards with water.
optimal time
It is difficult to name the optimal time for landing gladioli. It all depends on the weather conditions. When choosing a planting date, it is better to focus not on the calendar, but on the weather and soil temperature. If the soil has warmed up by 10-12 cm to +8 - +10 degrees, you can start planting.
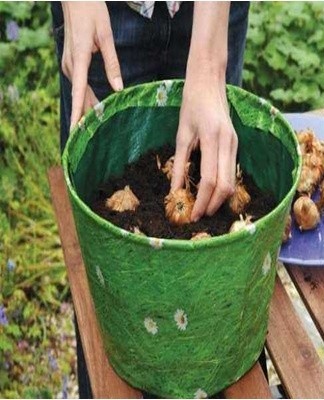
Landing scheme
During planting, medium-sized adult bulbs should be planted away from babies. Small bushes grow children, which will not have enough light and space if the bulbs are not divided. The distance between the seeds should be at least 10 cm. The larger the bulb, the greater the distance should be. Small onions can be planted next to each other.
Rules of care
In order for the flowering of gladiolus to be abundant and lush, you need to properly care for it. Without leaving, the bulbs will quickly wear out and stop growing altogether.
watering
Bushes need abundant watering, especially in hot summer weather. Water the flowerbed daily in the evening after sunset. When it rains, the bushes do not need to be watered until the soil is dry. Sun-heated water is used for irrigation. Watering with cold water often makes the bushes sick.
Fertilization and feeding
For abundant flowering, gladioli need regular feeding. Fertilizers are applied to the soil three times per season. You need to use mineral and organic fertilizers. Exceptions are fresh organic foods (such as fresh manure, chicken droppings). Their introduction often leads to rotting of the bulbs.
The first one
The first dressing is applied in early spring, when 1-2 full leaves appear. A solution of potassium sulfate and urea is introduced into the soil (1.5 tbsp. L. For 1 tbsp. L. For 10 l of water). When the 3-4th leaf appears, the gladioli are watered with potassium sulfate diluted in water. You can also add 2 g of boric acid to enlarge the bulbs.
The second
The second top dressing is applied after the complete formation of the 5th leaf. After the formation of the 6th leaf, the soil is watered with a solution of urea (15 g), potassium sulfate (30 g) and superphosphate (15 g), diluted in 10 liters of water. After the appearance of peduncles, the flower beds are watered with a mixture of nitrophoska and boric acid. During flowering it is undesirable to do nitrogen fertilizing. In July, 15 g of superphosphate and 35 g of potassium sulfate are diluted in 10 liters of water and watered with the resulting solution of the flower bed.
The third
The last dressings are done once the gladioli have faded. Mix 15 g of superphosphate and 30 g of potassium sulphate, then dilute in 10 liters of lukewarm water. The most recent top dressing is applied at the beginning of September. 5 g of potassium permanganate is diluted in 10 liters of water and the bushes are watered. After September 5-10, you can stop fertilizing the soil.
Loosening and weeding
It is important to take care not only of the bushes themselves, but also of the ground next to them. Once a week, the ground is weeded and the weeds are removed. It is advisable to weed the soil before watering, so that oxygen enters the soil along with the water.
Mulching
Mulching the soil improves aeration and prevents it from drying out. In addition, a layer of mulch prevents the growth of weeds.In regions with cold spring and autumn, mulch retains heat, which has a beneficial effect on the growth of bushes. As mulch, you can use sawdust, straw, humus mixed with peat or special agrofiber. The main thing is that the mulch layer is at least 15 cm.
Garter
Gladioli are tall and short. Low-growing varieties do not need to be tied up, unlike tall ones. Although tall bushes don't always need tying down, the flower stalks are strong and don't break from the weight of the flowers.
But if the stems start to bend and break, you can install a thin, sturdy tube next to each flower to attach the stem to.
How to spend the winter at home
Gladioli are planted in the ground in the spring, and dug up again in the fall, so that the planting material does not disappear in the winter, it must be properly stored. Store the bulbs in a dark, cool place. It could be a basement or a refrigerator. The main thing is that there is no humidity in the room, otherwise the bulbs can mold.
Cleaning and storage
Harvesting and storing the bulbs is a crucial moment, on which the life of the planting material depends. If the storage conditions are not correct, gladioli may die out during this time or may not emerge after planting.
Dig bulbs out of the ground
Planting material is dug up in late autumn, after the inflorescences have faded. Stems and leaves should be already dry. It is best to dig up planting material in hot, dry weather.
Cut the stems
The stems are cut off after digging the bushes with a sharp pruner. But you can prune them before digging.The stems are cut as close to the bulbs as possible.

Tuber drying and sorting
After the tubers are dug up, they must be sorted and dried. Large bulbs are separated from small ones. Old ones can be discarded. You can also sort planting material by varieties. The roots are pruned. After the bulbs are sorted, they are laid out in a single layer in a warm, well-ventilated room to dry out. Planting material is dried for 2-3 weeks.
Disinfection
It is not necessary to disinfect the bulbs before storing them, usually in the spring before planting. To prevent pathogenic microorganisms from entering the bulbs, the upper layer of scales can be removed. Disinfection is necessary if there were diseases among the bulbs. This must be done before drying the planting material. In this case, the seeds are soaked for 1 hour in a solution of potassium permanganate. Then they are dried.
Bulb storage
You need to store planting material in cool rooms at a temperature of +7-+9 degrees. Due to poor storage conditions, mold may appear on the bulbs.
In the basement
It is best to store your planting material in a basement. The main thing is that there is no high humidity there. Planting material is folded in a single layer in wooden or plastic boxes.
It is not recommended to store seeds in plastic bags; due to condensation, they begin to mold.
In the ground
In the fall, large bulbs have a large number of small babies, which often dry out if stored indoors. To prevent this from happening, very small young onions can be left to overwinter in the ground.According to the reviews of many gardeners, the bulbs germinate early in the spring and sprout in the fall. You can play it safe and cover the beds with bulbs for the winter.
In an apartment in town
It is not recommended to store bulbs of gladioli in a city apartment. In the cold season, the apartments are heated, and the planting material should be kept cold. If the seed boxes are left warm, they will begin to germinate.
On the loggia
You can store boxes with seeds on the loggia, but provided that it is not insulated and there is a low temperature above zero. Planting material can be kept not only in boxes. You can spread a cloth on the ground and arrange the bulbs in a single layer.
In the fridge
If there is no cellar or loggia, an ordinary refrigerator will be an excellent storage place. It's good if you can adjust the temperature inside so you can set the right one for the bulbs. Planting material is transferred to spacious boxes in 1-2 layers and placed on the bottom shelf. In some older refrigerators, water can pool on the bottom shelf causing the bulbs to mold. If this happens, it is best to move the boxes elsewhere.
Other premises
You can keep dug gladiolus bulbs until spring in any room. It is more important to create favorable conditions. The room should be cool, the temperature is from +7 to +9. Humidity and high humidity should not be. It is also desirable that the room is well ventilated. If all these conditions are met, it does not matter where the seeds will be stored.
Storage errors
What errors can be:
- Store planting material in rooms with high humidity.
- Fold the bulbs in several layers.
- Do not dry the seeds, otherwise they will mold during storage.
- Peel the bulbs completely.
- Do not cut stems immediately after digging.

If you don't make all these mistakes, the bulbs will stay healthy for a long time and bloom profusely.
Tips & Tricks
Tips and tricks for growing gladioli outdoors:
- On gladioli you can often find slugs, you can get rid of them by spraying the bushes with the preparations "Orage" and "Meta".
- Babies are recommended to be stored at temperatures up to +7 degrees, they can be folded in paper bags.
- Monthly, the planting material should be checked, if seeds with mold or other damage appear, they should be discarded immediately, the rest of the bulbs should be carefully examined and soaked in a solution of potassium permanganate for 30 minutes , then dried again.
If you follow all the tips for growing gladioli, the plants will delight you with their flowering for a long time.
Combinations with other colors
Best of all, gladioli are combined with peonies and hydrangeas. Of the annuals, ageratums, marigolds, undersized tobaccos, dahlias and gerberas are suitable. The bushes go well with peonies and daylilies. Low flowers or ground covers also blend harmoniously with bushes. The main thing is that the flowers should be in harmony with each other in the shade of the inflorescences.