How to change the bearing of the Indesit washing machine with your own hands
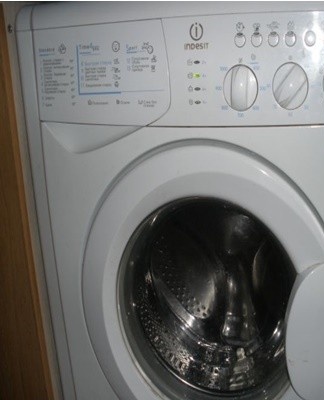
The smooth operation of the drum of the washing machine and its silence are ensured by bearings. Their failure is accompanied by buzzing and vibration during washing, and the replacement process is one of the most laborious and difficult. Let's see how to independently change a faulty bearing, using the example of a washing machine from the company Indesit.
Reasons for the need to replace
There are several reasons why a bearing fails:
- violation of the rules of operation of household appliances;
- depletion of working resource of oil seals.
Violation of operating rules
A violation of the operating rules is that the owners of the equipment overload the drum. This increases the rotating load, which leads to rapid wear of parts. By following the starting conditions, this problem can be avoided.
Stuffing box failure
The oil seal is a protective mechanism that prevents moisture from entering the bearing. It comes in the form of a rubber gasket that serves as a gasket.If the oil seal does not perform its functions, the water begins to corrode the bearing, covering it with rust.
Indesit non-separable tank design features
Unlike other washing machine manufacturers, Indesit makes its tanks non-separable. This greatly complicates the process of replacing faulty parts, forcing owners to resort to various tricks. If you are not ready to open the tank with a grinder, contact the specialists of the service center.
To note! Self-repair is recommended only in extreme cases.
Inexperienced actions will ruin the technique; the owner will have to spend much more money on the purchase of a new washing machine.
Preparing a do-it-yourself replacement
If you are confident in your own abilities and are determined to dismantle the tank yourself, get ready:
- choose a place for repair work;
- buy new parts to replace broken ones;
- prepare the tool.
Where to work
It is advisable to carry out repair work on the street or in the garage, since you will have to work with a grinder. During the work, it makes a lot of noise, and also gives off an unpleasant odor, which obviously will not please your household. The tank itself takes up a lot of space, and it will be extremely inconvenient to work in a cramped bathroom or on a balcony.
Preparation of new parts
The preparation of new parts is carried out in two ways:
- In advance, before dismantling. The diameter of bearings and seals for each model of washing machine can be found on the Internet.
- If there is no internet access, turn off the tank and bring the old parts back to the store so you can focus on them when buying.
Replace all parts at once, even if only one bearing fails.
Tool
The right tool, assembled before disassembly, will speed up the process considerably. To replace, you will need the following items.
A set of flat and Phillips screwdrivers
Without them, you will not be able to disassemble the body of the equipment to access the assembly of the failing mechanism. Any set will do, even the cheapest one.
Socket and open-end wrenches
With their help, the nuts will be unscrewed, the non-separable tank will be dismantled. Keys can be kept as simple as possible, without fancy bells and whistles. The parts are in accessible places for work, and you don't have to force too much.
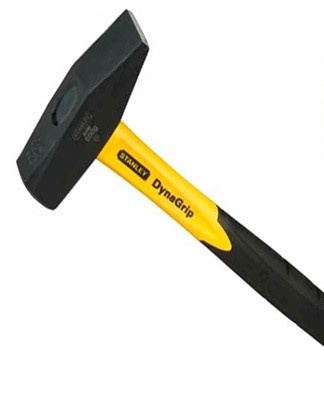
Hammer
The hammer is useful for carefully striking latches and tight parts that won't come loose with manual action. It is advisable to have a rubber mallet, as it interacts more delicately with fragile parts.
Bit
Carefully remove the bearings from the seat. There are no special requirements for this, and any tool that is comfortable to work with will do.
Hacksaw for metal
If there is no grinder at home or in the garage, a hacksaw will do. With its help, you will carefully cut the non-separable drum and get to the place of the breakage. It is advisable to provide a spare blade for the hacksaw, since one, most likely, will not be enough.
pliers
Used to work with small parts that are difficult to reach with the hands. They will help to carefully remove the clamp from the drain hose and attach the nuts if necessary.
Glue
Glue is needed to hold the sawn off tank halves together after you've finished repairing your washing machine.The seams treated with an adhesive will prevent moisture from entering when the drum vibrates strongly.
sealant
If there is no glue at home, replace it with a sealant. This formulation also inhibits moisture ingress, but does not hold up well to shaking. When choosing between adhesive and sealant, the first substance is preferred.
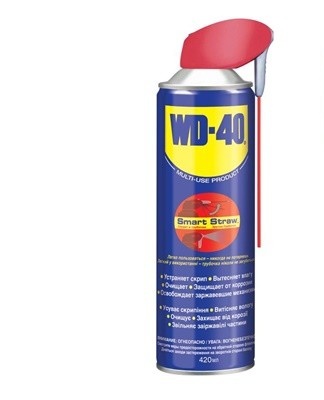
WD-40 tool
It is a lubricant that treats new bearings to keep them in good working order. In addition to a lubricant, it is used as a rust remover. If the typewriter nuts are rusty, they should be treated with WD-40 and wait a few minutes.
Replacement. Procedure
After all the tools are prepared, you can start dismantling household appliances and replacing bearings. The main thing here is not to rush and perform all actions in a certain order.
Disassembly of parts
To access the non-separable tank, you must remove:
- the top cover;
- dashboard;
- rear panel;
- front panel;
- lower part;
- Tank.
The top cover
When dismantling the top cover, there should be no problems, since it is enough to unscrew two self-tapping screws located on the back of the washing machine. As soon as the screws are unscrewed, slide the cover towards you and remove it.
To note! In some washing machines, the lid is attached with plastic clips. They are located at the front. Disconnect them carefully so as not to break them.
Dashboard
The dashboard is disassembled in the following order:
- take out the powder container;
- as soon as the container is removed, the bolts will become available to fix the dashboard to the machine;
- carefully disconnect the wires and set the panel aside.
Back panel
In most models, the back panel is held by 6 self-tapping screws, which you can easily remove by unscrewing it. It provides access to the motor and the drive belt, which must be removed later.
Machine top details
The top parts of the machine include:
- a bypass pipe connecting the powder compartment to the tank;
- counterweight;
- water inlet valve;
- pressure switch.
A branch pipe connecting the powder compartment to a tank
Made in the form of a corrugated pipe. To remove it, you need a screwdriver and pliers. It is necessary to remove the hose carefully, it is advisable to have a dry cloth or an empty container at hand, since water may remain in the room.
Counterweight
The counterweight is attached to the tank of the washing machine, acting as a shock absorber. It is fixed with bolts that unscrew with an ordinary screwdriver. Keep in mind that the counterweight is very heavy and must be held securely to avoid injury if it falls.
Water intake valve
Located at the top of the washing machine, near the rear cover. To access the room, you must:
- remove the back cover;
- remove the side cover;
- disassemble the part.
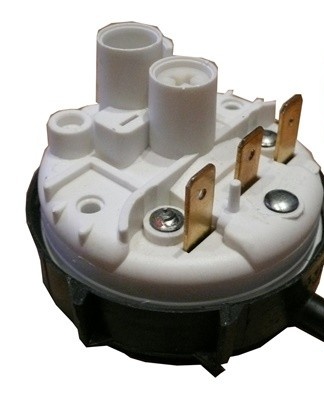
pressure switch
The pressure switch is a sensor responsible for monitoring the water level. Located on the side of the machine, closer to the rear. It is mounted on ordinary screws and is connected to the air supply tube with a clamp. When disconnecting the wires, be careful not to damage the pins.
Front panel
The front panel includes:
- hatch door;
- rubber compressor.
They must be removed to easily access the tank.
hatch door
To remove the hatch, you must:
- remove the clip tightening the cuff;
- unscrew the bolts securing the hinge to the body.
rubber compressor
After removing the hatch cover from the body, it is necessary to disconnect the clamp securing the cuff. Then we disconnect the gasket from the front wall of the hatch, carefully moving along the perimeter. As soon as the cuff has completely moved away from the wall, we remove it with the pliers.
Lower part
In addition to the upper part of the machine and the front panel, it is necessary to disconnect the lower part of the product, which includes parts such as:
- lower counterweight;
- Heating element;
- electric motor;
- drain hose;
- wiring.
electric motor
Algorithm of actions:
- detach the back panel;
- the engine is located under the tank and is attached to the body in four places;
- don't forget to disconnect the wires and the drive belt.
The motor may be too tight on the mounts and it may take some effort to remove.

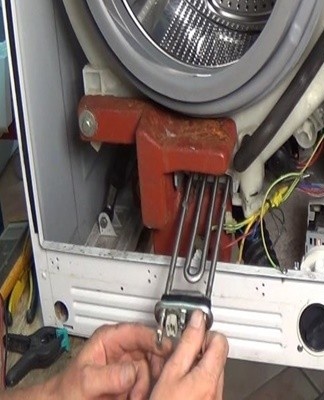
Heating element
Before dismantling the heating element located at the bottom of the device, take a photo of the procedure for connecting the wires to it. If you confuse them during the assembly process, the device will not start or even become unusable.
Counterweight
The counterweight at the bottom is attached to the tank in the same way as at the top. When removing it, you must be careful that the part does not fall and damage the ground or someone's limbs.
Drain connection
To remove the drain hose from the Indesit washing machine, you must:
- tilt the device so that the owner can crawl under the bottom;
- unscrew the drain pump, which is attached to the body with bolts;
- take it out, then remove the clamp connecting the hose to the pump;
- the other end of the nipple is attached to the body and detached without any problem.

Shock absorbers
The shock absorbers are removed after the engine, as it blocks access to them. Work carefully with a dry cloth at hand.
You will need it when you turn the machine on its side to get to the desired piece.
To note! Try to prevent moisture from getting on the wiring or circuit board responsible for controlling household appliances.
Heating element wiring
The wiring for the heating element comes off quite easily and does not require special skills. The only thing to do before disconnecting is to remember which wire is connected where. This will help with reassembly.
Reservoir
As soon as all the interfering parts are disconnected, it is the tank's turn. Depending on the washing machine model, the tub is:
- not separable;
- folding.
How to disassemble a foldable model
Procedure:
- fix the tank and unscrew the central pulley;
- then unscrew the bolts on the sides of the drum;
- remove the tank from the sleeve;
- we begin to replace the bearings.
How to cut a non-separable
A non-collapsible drum is carefully cut along the seam with a hacksaw or grinder. Before that, small holes should be made around the perimeter. They are needed in order to use bolts to bring the two sawn halves together when assembling. The distance between the holes does not exceed 5 millimeters.
Replacement of bearings
Once the tank is dismantled, it is the turn of the bearings. Changing them is not difficult, the main thing is to follow the correct procedure.
We remove the old oil seal
The oil seal is removed by hand, no additional devices are required for this. Do not discard the old part if you have not already purchased a replacement part.
How to knock off metal washers
Metal washers are knocked out with a conventional hammer.For convenience, place the tank on the side of the hatch.
Clean nests from dirt and rust
Bearing seats are cleaned of dirt and rust with WD-40. This substance will also serve as a lubricant for new parts.
Driving in new parts
New parts are driven to a stop using a conventional hammer. Beat carefully so as not to damage the body of the drum.
Reassembly
Once all the parts are in place, the reassembly is done. If the tank is hand-sawn, consider sealing the seam with glue or putty.
Review
We run the assembled equipment in idle wash mode and check for leaks. If they are not there, the machine is installed in its place and used for its intended purpose.
Features of repair products with top loading
When repairing top-loading products, keep in mind that the bearings are outside the tank. Knowing this, it will not be difficult to replace damaged parts. If you are not confident in your own abilities, do not change direction yourself. Entrust this business to experienced professionals.