Step-by-step instructions on how to make concrete garden paths in the country with your own hands
Paths in suburban and suburban areas have a decorative and functional purpose. They are used to connect buildings and facilitate movement on the territory. You can create paths from different materials, but most often do-it-yourself garden paths are made of concrete.
Content
- 1 Advantages and disadvantages of using
- 2 Tools and Materials Required
- 3 Steps to create step by step
- 4 How to correctly calculate the weight of building materials for concreting
- 5 Final work and decoration
- 6 Step by step master class
- 7 Examples of work with recommendations
- 8 Use a plasticizer
- 9 How to properly paint a concrete surface
- 10 Tips & Tricks
- 11 Operation and maintenance rules
Advantages and disadvantages of using
The use of concrete made on the basis of a cement-sand mixture has a number of advantages and disadvantages. The advantages of building concrete paths in the country are:
- the material is considered one of the most durable, so it does not crumble with prolonged use and constant load;
- due to its resistance to external influences, the concrete coating retains its original appearance and technical properties during frequent rainfall;
- cement paths can be arranged in any form, which makes it possible to implement any design ideas;
- with a limited budget, it will be possible to buy a large quantity of material at low cost;
- carrying out construction work with concrete does not require special skills.
The disadvantage of using a concrete mix on the site when installing the paths is not a very aesthetic appearance. To make the coating decoratively attractive, additional processing will be required.
Tools and Materials Required
Having planned the paving of the garden path, it is recommended to pre-arm yourself with the necessary raw materials and a set of tools. Before starting work, it is also worth calculating the exact amount of material, so as not to face unforeseen costs.
Cement
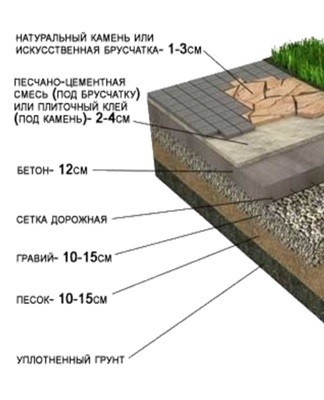
An important part of the garden path is the cement layer, which absorbs most of the load. It is recommended to choose M400 or M500 grade cement. The material should be dry and crumbly. When choosing a cement, you should pay attention to the shade of the material - the darker it is, the higher the grade.
Sand
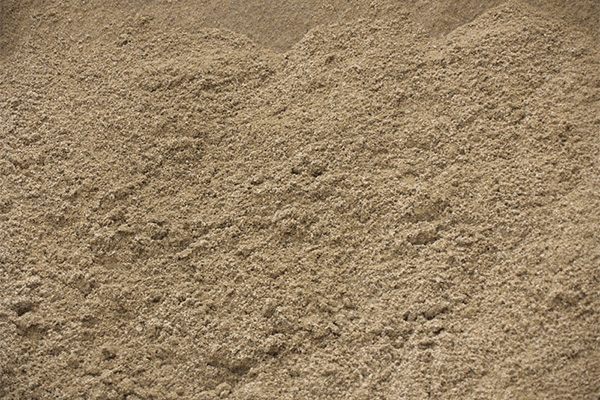
A cushion of sand is needed to distribute the weight evenly.In addition, sand is used as drainage, which provides protection against destruction when exposed to groundwater and precipitation.
crushed stone
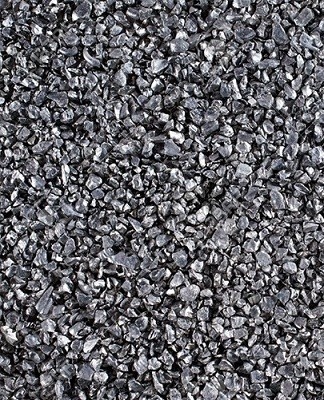
For work, dry crushed stone with a fraction of 5-10 is used. There are several varieties of crushed stone suitable for creating a road surface - gravel, granite and shale. It is necessary to choose crushed stone taking into account the peculiarities of the relief of the site, the type of soil and the purpose of the garden path. The most durable is crushed granite stone, as it contains hard rocks. In addition, it has increased resistance to low temperatures and humidity.
Waterproofing additives
To improve the characteristics of concrete, a special waterproofing additive is used. It significantly increases strength, water and frost resistance, adhesion. At the same time, the additive provides the mobility of the concrete mixture for several hours. A concrete solution with a waterproofing additive acquires the ability to self-eliminate through cracks that may occur during the operation of garden paths.
Elimination of defects occurs only if water flows through the cracks.
To create formwork
Using formwork allows you to create a form for the concrete pavement, providing it with increased strength and durability. To make the formwork, you can use wood-based materials or alternative accessories capable of shaping concrete. A modern formwork option is ready-made formwork for paving slabs, which are produced in different sizes and may differ in appearance.

Wooden or steel pegs
In the process of work, you will need to mark the territory.The easiest way to do this is to use wooden or steel dowels. The pegs are placed along the perimeter of the future path and wrapped around them with a rope.
Mace or hammer
These tools are needed to drive in the dowels, erect the formwork and seal the top decorative layer of the walkway. When arranging a small path, only a hammer will do.

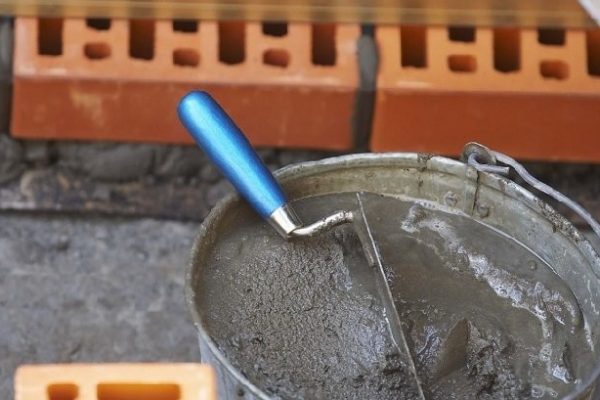
Container for mixing the solution
Based on the calculated amount of the cement-sand mixture, prepare a container of the appropriate volume. If possible, it is worth buying a specialized container for concrete solutions.
Shovels
It is more convenient to lay layers of building materials and level them with a shovel.
It is recommended to prepare a shovel and a bayonet.

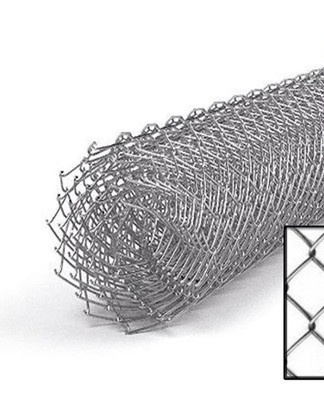
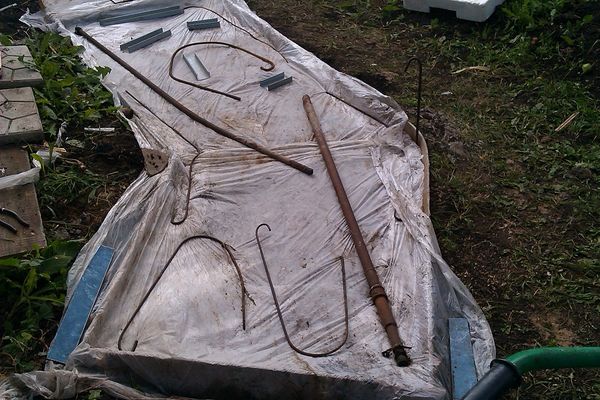
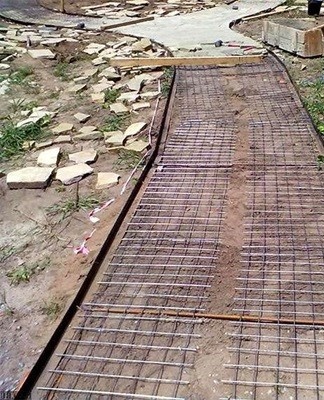
Metal construction mesh
The most common type of wire building mesh for paving garden paths is the chain link mesh. The strength of the braided chain link allows it to withstand high loads. The structure is easy to install, resistant to mechanical and weather influences, including strong temperature drops and frequent precipitation. An additional advantage is the affordable cost compared to alternatives.
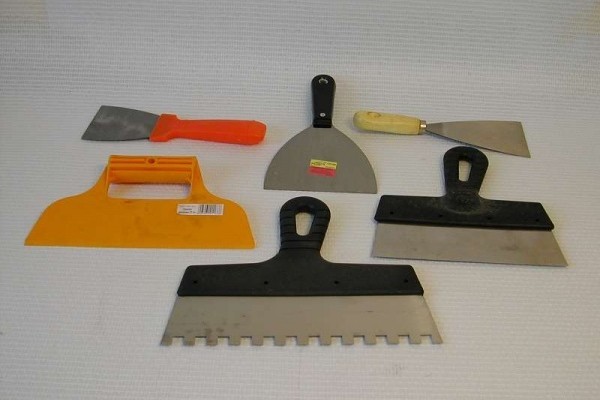
Surface leveling tool
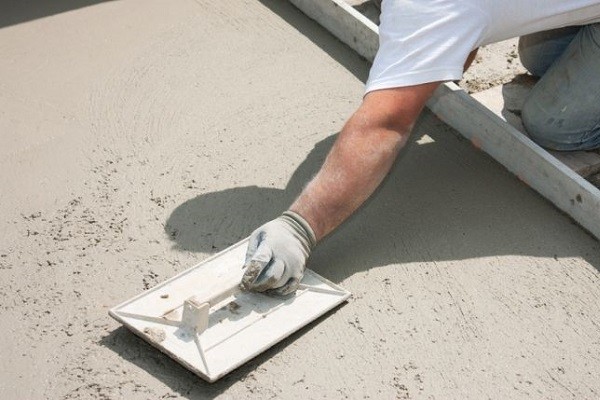
To give the path an aesthetic appearance, it is important to level the surface. Intermediate layers can be leveled with a shovel and a straight cut spade is used for final alignment.
For hard to reach and small areas, a spatula can be used.
Trowels and spatulas
When working with grout and concrete, you will need to use compact tools for finishing. The inventory allows you to level the top layer of the material and seal the joints when laying stone slabs.
Steps to create step by step
When installing the path in the garden, you need to follow the step-by-step instructions. Each stage of work has its own nuances, so it is important not to deviate from the instructions in order to avoid serious mistakes.
Design
When creating a track project, take into account not only the style of the cover, but also the terrain.On a flat surface, the device of the path is performed in any format. If the site is located on a slope, you will have to resort to a zigzag style and provide steps.
Soil preparation
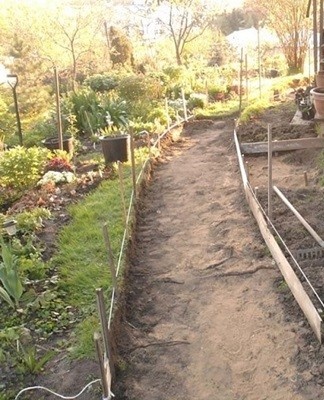
After preparing the project and marking the territory, a layer of fertile soil 15-20 cm thick is removed from the area, a trench is formed under a slight slope, and drainage is made from the side of a greater slope to drain precipitation.
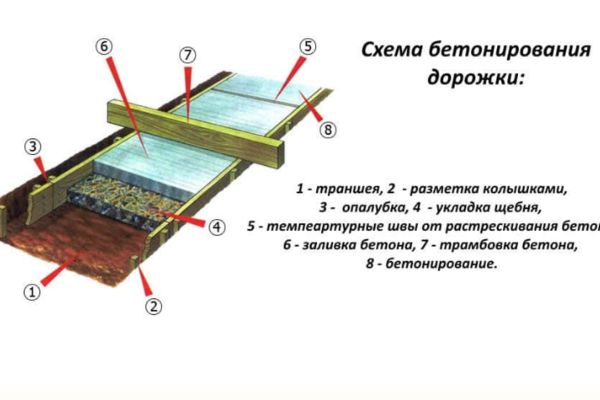
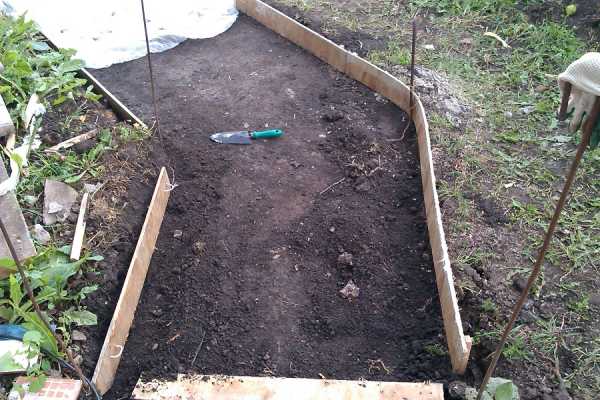
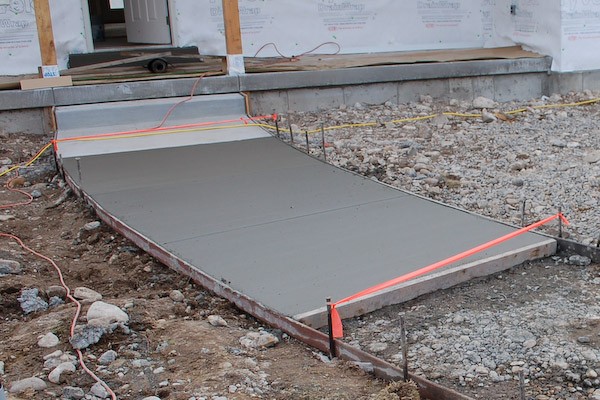
formwork installation
The boards selected for the formwork are attached to the edges of the trench. From below, the boards are fastened with dowels, and from above with transverse jumpers. This design prevents the formwork from expanding under external influences. A waterproofing polyethylene film is placed at the bottom of the formwork to prevent water absorption by the concrete solution. The presence of insulating material also improves the frost resistance of concrete and prolongs the service life.
Pillow training
To form a pillow, layers of sand and crushed stone are alternately poured, tamping them with a shovel. Each layer of the pillow has its own purpose, so don't neglect the use of materials.
Installation of reinforcing elements
In order to compensate for the load on the concrete base, reinforcing elements are installed.When using reinforcement, the thickness of the concrete layer is less than 15 cm. If the base is concreted with reinforcement in a single layer, there will be no full guarantee against defects. Since the period of operation of concrete garden paths is designed for several years, you should not save on strengthening the structure.
Pouring concrete
After preparing the mortar, the concrete must be poured into the formwork. The mortar is evenly distributed in the trench using a spatula. For a better seal, tap with a hammer on the edges of the formwork or on the reinforcement. After laying the solution, it is leveled and covered with plastic wrap to protect it from moisture and dryness.
How to correctly calculate the weight of building materials for concreting
So that during the work there are no unnecessary materials left, you need to correctly calculate the proportions. In the composition of concrete, cement, crushed stone, sand and water are used in a ratio of 1: 5: 3: 0.5.

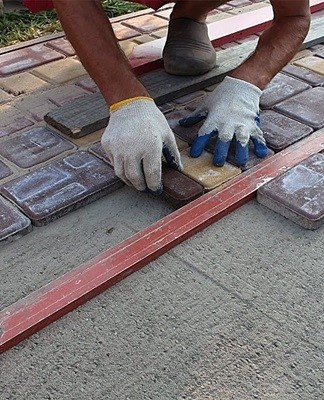
Final work and decoration
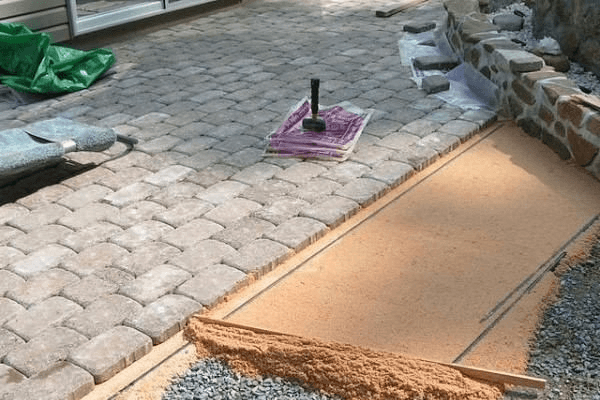
After creating the base, the top decorative layer is laid. Stone slabs and cobblestones are suitable as coatings. Tiles are placed on a concrete solution and excess material is removed. Various elements can be used as decor, including natural flowers, stones, mosaics and others.
Step by step master class
After completing the installation of the garden path and the decoration, you need to follow simple steps step by step:
- ensure that the paving slabs are firmly fixed;
- cover the joints between the tiles, if an incomplete coating is used;
- wipe the surface of traces of concrete and dirt;
- place decorative elements in a free order, embodying your own design ideas.
Examples of work with recommendations
At the summer cottage you can build many options for garden paths. When choosing a suitable variety, one should take into account the recommendations for the arrangement.
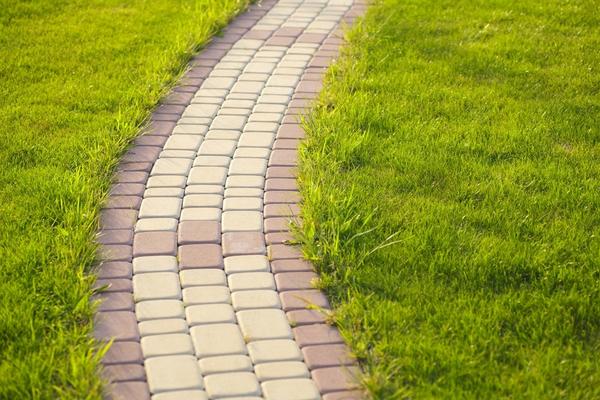
Simple
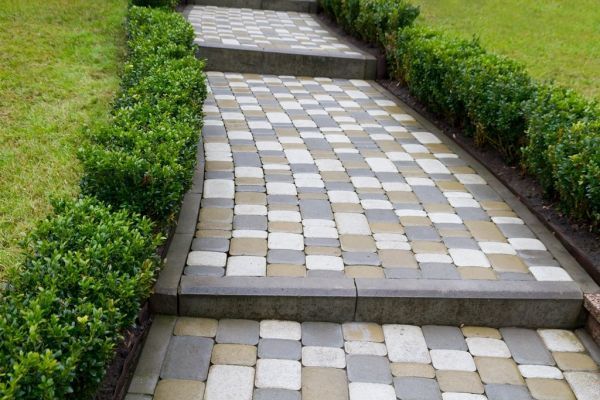
The classic version involves paving slabs. The material is easily laid on the base and does not require the use of additional devices.
Texture
You can create a textured path using tree cuts. They are distinguished by their original textured appearance and good compatibility with other materials.
Before laying, the saw cuts should be treated with an antifungal impregnation to protect them from the effects of high humidity.
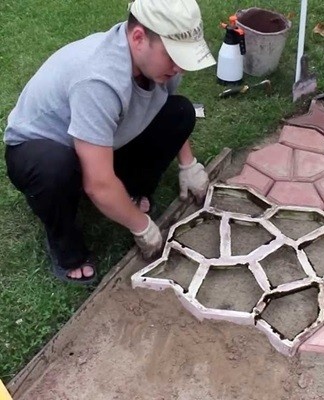
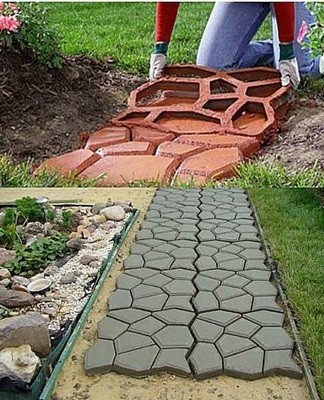
Using the form
The use of a plastic mold makes it possible to obtain a textured surface. The mold is placed on the base and the concrete is poured inside. To give an original look, it is allowed to paint the top layer.
With a chain link
The chain link is used as a reinforcing base. It is recommended to lay the net so that it is in the middle of the concrete slab.
From concrete blocks
The original solution is the use of lattice blocks. The structures are laid directly on the ground, after removing the sod layer, after which the voids are filled with soil and planted with lawn grass.
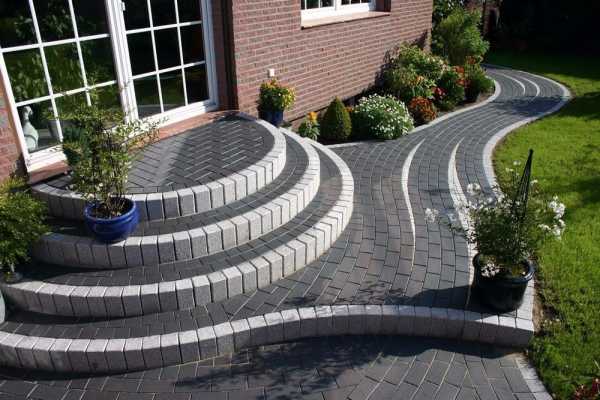
In the form of slabs
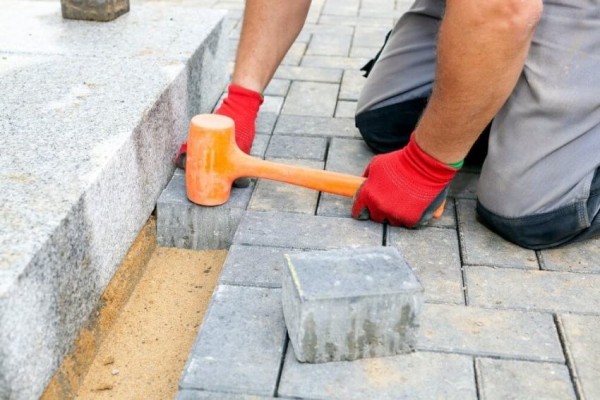
When paving the slabs, a layer of sand is placed on the concrete base. After each tile is placed, it is tapped with a rubber mallet to seal. The gaps between the slabs are covered with sand.
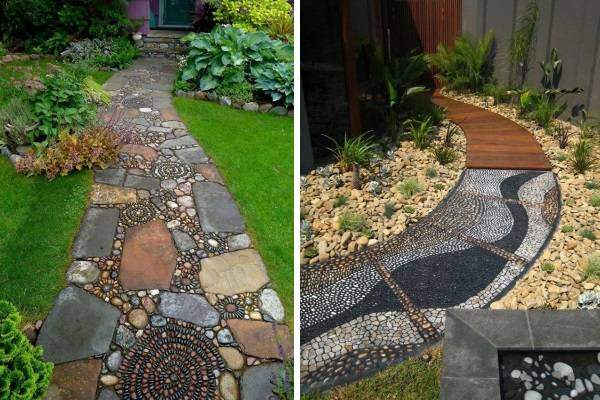
Mosaic
Creating a mosaic with a bright ornament decorates the territory and makes the path original.The process of laying the mosaic is laborious, so it is recommended to lay out only small sections of the path.
With stencil
Using a stencil, you can create any texture on the surface of the track. The stencil is applied to the base and poured with concrete.
slabs of lace
You can transform classic concrete slabs with a lace towel and paint. A towel is placed on the surface of the slabs and covered with paint to leave a pattern on the material.
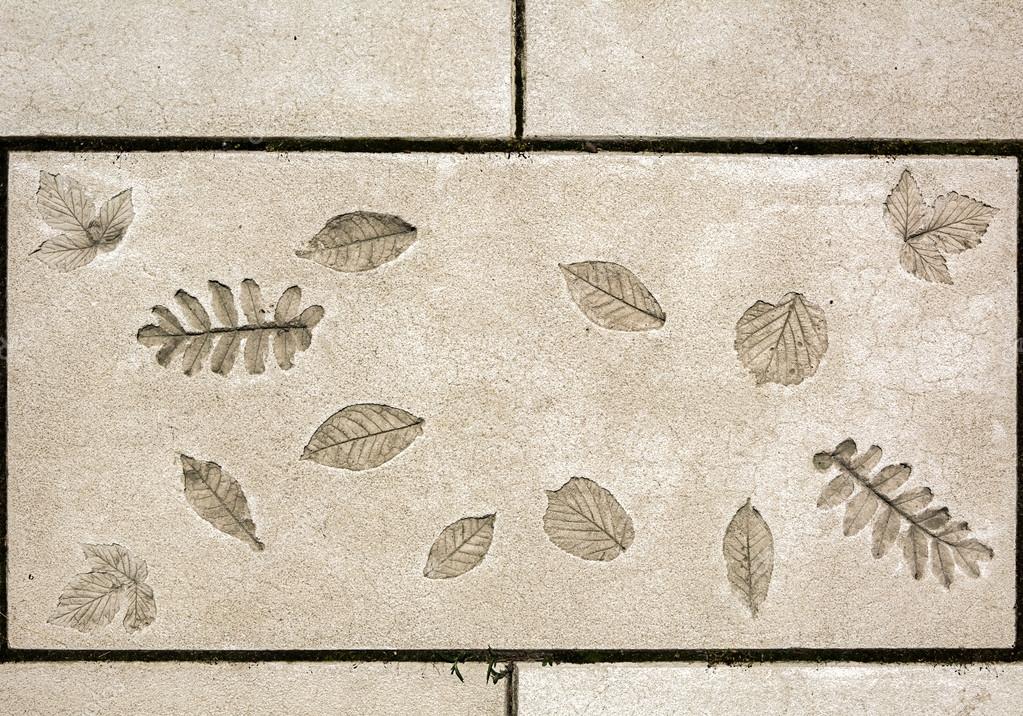
Concrete "leaves"
Leaf shaped paths are very popular. There are several ways to make such a track. The first option is to pour a concrete block on a large sheet of burdock so that the texture is printed with small details. It is important to put the burdock leaf with convex veins on top. The second method is to pour concrete at the location of the track, then print the sheet and draw the veins.
In the form of steps
In the presence of lowlands and hills on the site, it is necessary to build steps on the garden path. The best way is to arrange wooden frames at different heights with a concrete center. Metal brackets are used to connect wooden blocks, which provides a solid fixing and increases the strength of the rail.
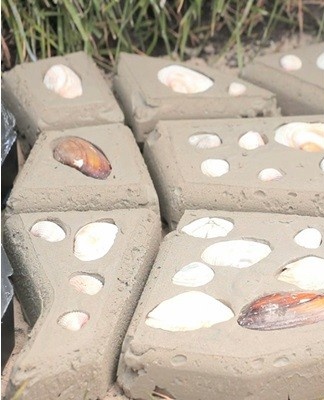
With shells
Watering the hulls on the concrete base transforms the standard look of the walkway. The shells are set on drying concrete and lightly compacted into the base.
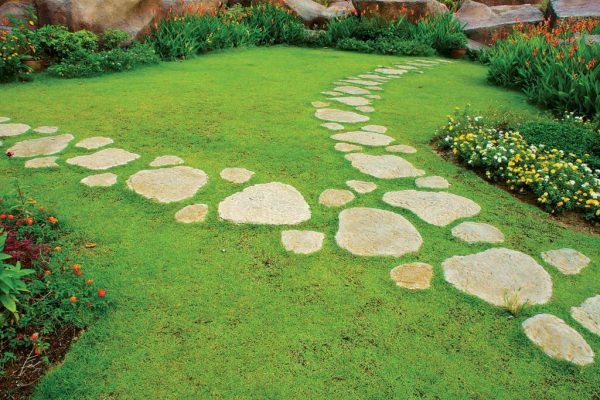
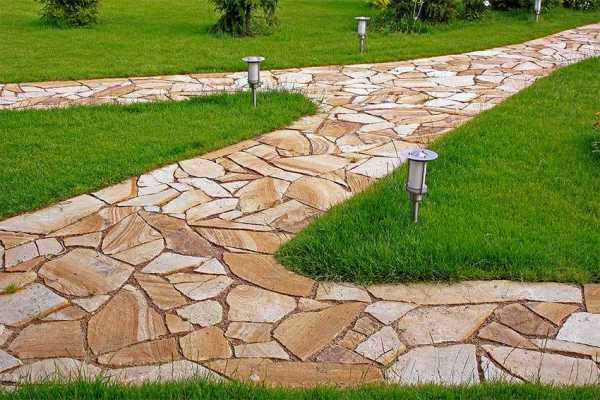
Stones and concrete
The combination of a concrete base with various natural materials gives the path an unusual look. You can prepare concrete slabs separately by mixing the mortar with stones, or lay out the pavers on the poured surface.
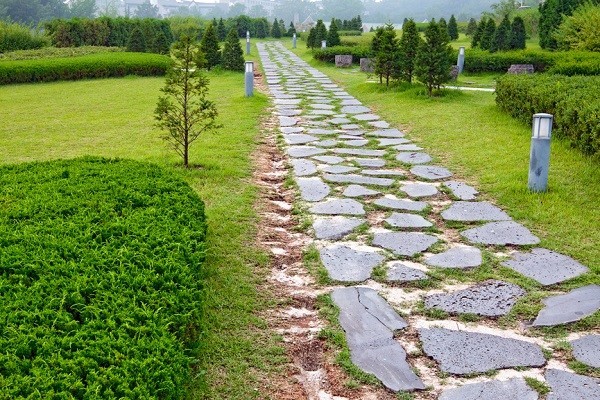
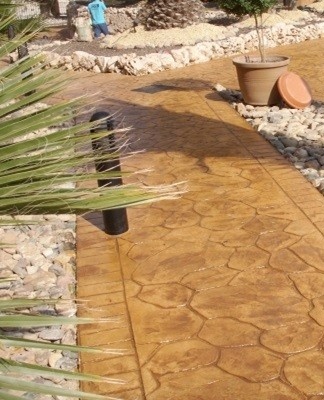
Imitation stones
The stone surface is impressive, but natural stone is more expensive than alternative materials. The best option is to use a concrete solution that imitates natural stone. Concrete is poured without using molds, since an uneven surface in combination with paint will imitate the texture of stone well.

Chess
The chess garden path consists of alternating squares of concrete and grass. By dividing the space allocated for the path into squares, concrete is poured and the lawn is laid in a checkerboard pattern.
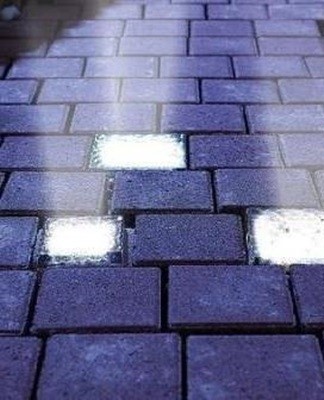
glass pattern
All patterns made of glass parts can be laid out on a concrete surface. For this purpose, standard parts are made and cast with concrete. After waiting for complete drying, the blocks are laid on the site in any way.

Use a plasticizer
Adding a plasticizer to the concrete mix increases protection against moisture and temperature extremes. In addition, the plasticizer reduces cement consumption and makes the mortar stronger and smoother. To make a plasticizer, simply dissolve the dry substance in water, according to the enclosed instructions.
How to properly paint a concrete surface
The process of painting a concrete base has a number of nuances. In order to avoid typical mistakes, it is important to familiarize yourself with the dyeing technology in advance.
What can be painted
For painting the concrete surface, special solutions are produced that are resistant to moisture and other atmospheric influences.

Stain
Staining a concrete surface creates a rich, beautiful hue. When dyed, an uneven color is obtained, as a result of which the coating becomes similar to natural marble.An additional advantage is the increased wear resistance of the coating. There are 2 types of concrete stain:
- Solid color stain also called pigmented sealer. This type of substance paints the concrete surface in a uniform uniform color and is available in a wide range of shades.
- Acid dye for a more transparent effect. Compared to the first option, acid stain has a smaller choice of colors.
Rubber paint
A distinctive feature of rubber paint is its increased plasticity, which is not typical for any other variety. Rubber paint contains polyacrylic resins, due to which elasticity and moisture resistance appear. Rubber paint has a high degree of adhesion to the surface and does not freeze in the cold. Other positive features are:
- when applying the material, no toxic fumes are emitted and there is no strong unpleasant odor;
- the material withstands temperature extremes and does not lose its original performance properties;
- rubber paint creates a vapor-resistant coating, which allows not to disturb the treated surface from the destructive effects of moisture;
- the paint is resistant to constant exposure to ultraviolet rays and does not fade from the sun;
- a couple of hours is enough to completely dry the rubber paint applied to the concrete, after which you can move freely along the paved path in the garden.
Epoxy and acrylic paints
Epoxy concrete paint is a two-component compound that forms a protective film. Drying time is 12 to 24 hours. Acrylic paint is an aqueous composition of acrylic resins and diluted polymers.
The gloss or dullness of the coating depends on the concentration of the constituent components.
Polyurethane varnish
The application of polyurethane varnish gives the concrete surface a decorative appearance. It is also advantageous to varnish the base, increasing the protection against corrosion.
Procedure
When you plan to paint the surface, you must first wait until the concrete is completely dry. Then the coating is cleaned of dust and paint is applied. To prevent the ingress of water and dirt, the painted surface is protected with polyethylene.
How to use the brush
If you want to paint a rough concrete surface, you will need a brush with 15-20 mm bristles. With a strong roughness, it is better to take a tool with a pile of 25-30 mm. The brush is dipped in the paint and applied in an even layer to the coating.

The nuances of working with a paint sprayer
The easiest way to paint large areas of concrete quickly is to use a paint sprayer. There are two types of spray guns:
- compressed air operation;
- paint spraying by airless method.
The second option is used more often, since it does not require special training. Simply connect and use the equipment according to the manufacturer's instructions. It is recommended to work with a paint sprayer in calm weather.
Tips & Tricks
In order to lay the track and get out of it cheaply, it is important to follow the laying instructions to avoid mistakes. Otherwise, the risk of cracks and other defects will increase. If you need to do a colored coating, you can only use specialized paints and varnishes intended for application on a concrete surface.
Operation and maintenance rules
After cementing the garden path, it is enough to wipe the coating periodically to keep it clean.If no mistakes were made when paving the path, then no special care of the surface is required.