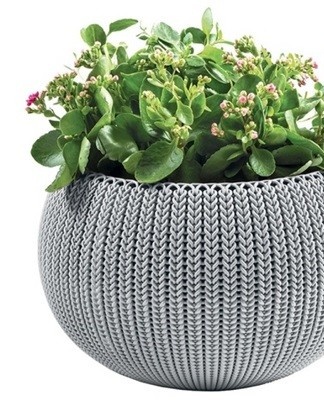
How to make flowerpots with your own hands, interesting ideas and examples of decoration
An original and durable flower box is easy to make with your own hands. The finished product will certainly not look like a store product. There are many options for making and decorating a container for growing plants. In order not to encounter difficulties during the work, instructions come to the rescue with a description of all the stages. A composition made by own hands will successfully fit into any corner of the room.
Content
- 1 What is
- 2 What materials are used
- 3 Examples and instructions
- 3.1 old shoes
- 3.2 Of cement, rags and hessian
- 3.3 tin cans
- 3.4 Useless kettle
- 3.5 improvised means
- 3.6 Boxes for flowers and seedlings
- 3.7 From an old bicycle
- 3.8 old birdcage
- 3.9 old broken toys
- 3.10 Weaving
- 3.11 Newspapers
- 3.12 How to make paper mache
- 3.13 plaster
- 3.14 clay
- 3.15 Mosaic
- 3.16 String
- 3.17 In wood
- 3.18 copper pipes
- 3.19 pearls
- 3.20 baskets and pots
- 3.21 High-tech styling
- 3.22 From bottles
- 3.23 Moss and shells
- 3.24 Twigs or bamboo
- 3.25 From a plastic bottle
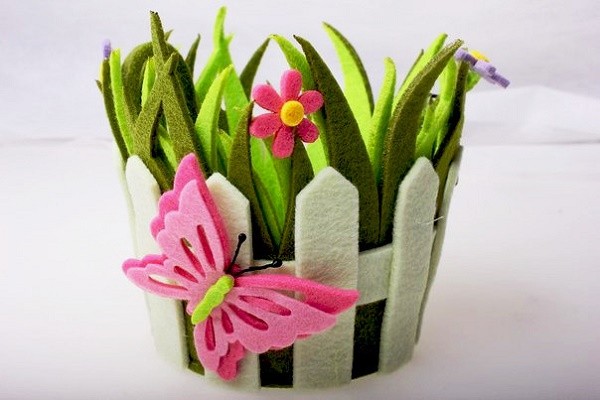
- 3.26 felt
- 3.27 From a gramophone record
- 3.28 mirror tiles
- 3.29 Of the material
- 3.30 Concrete
- 4 Accommodation options
- 5 Examples and principles of decoration
- 6 Tips & Tricks
What is
A hanging or floor planter is a decorative container in which a flowerpot is placed:
- The indoor plant planter has no special pallet and drainage holes to drain excess moisture from the soil.
- After watering, pour excess water from the pots to prevent rotting of the roots of the flowers.
- In order for the pot to sit firmly in the planter, the space between the walls is covered with gravel, moss or another similar material.
What materials are used
The most original pots are made from ordinary materials at hand. You just need to use your imagination and show all your creative abilities. Containers using household items will give a real zest to the interior. It is possible to make a beautiful interior detail from the following materials:
- alabaster;
- cement;
- TREE;
- natural material (shells, moss, coconut shells);
- clay;
- Plastic;
- paper mache;
- burlap or other types of fabrics;
- strong strings.
To decorate the finished product, take beads, ribbons, bark and leaves of trees, gouache or watercolor, shells, cereals.
Examples and instructions
The following items can be used as ideas.
old shoes
In every household there are old shoes that are not worn. It will make an original and unusual flower garden. The basis can be absolutely any type of footwear: sneakers, sneakers, rubber boots, sandals. The progress of the work is simple:
- several drainage holes are made on the sole;
- the boot is covered with fertile soil, after which seeds or a flower sprout are planted;
- the plant is watered with warm, settled water;
- so that the shoes fit perfectly into the interior, it is easy to repaint them in any color.
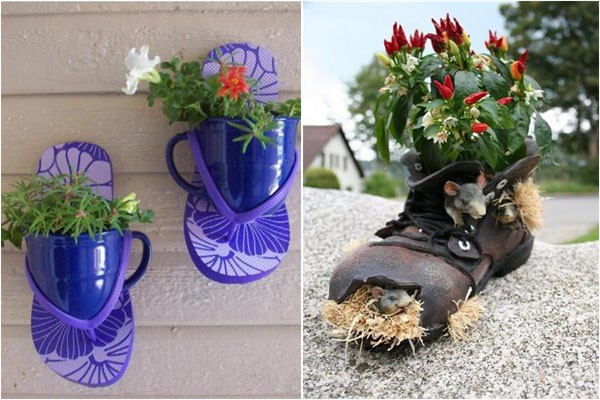
For planting, it is better to choose plants that do not impose special requirements on growing conditions.
Of cement, rags and hessian
The following materials are prepared for work:
- a piece of fabric of the required size;
- cement, water and sand;
- an unnecessary bucket, pot or vase.
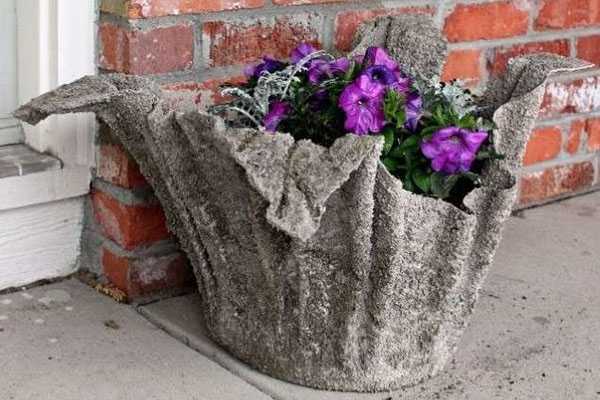
To make a durable and beautiful product, you need to follow a series of sequential steps:
- Initially, they begin to prepare a concrete mixture from the prepared components. The consistency of the mixture should be medium liquid.
- The base is wrapped with a dry cloth, the excess is cut off, after which it is immersed in the solution for a minute.
- The cement-soaked fabric is again thrown on the base and left to dry for 11 hours.
- The base is removed after complete drying.
A cloth soaked in cement mortar can take any shape before drying, so it will be possible to create an unusual composition.
tin cans
It's quick and easy to make a flowerpot from a tin can. For work, choose containers of different colors, volumes and shapes:
- The banks are painted in different colors.
- After the paint dries, drainage holes are made in the bottom of the container.
- Banks are attached to the base, covered with soil and a flower is planted.
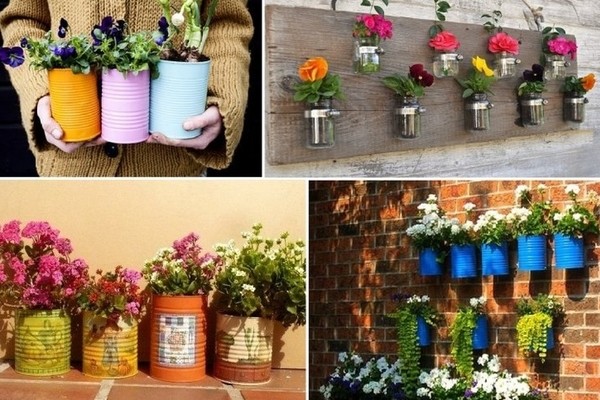
You can decorate the surface of the pot with beads, buttons, ribbons and other decorative elements.
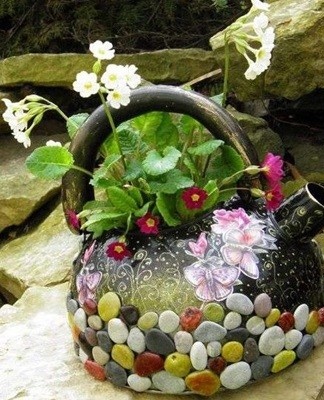
Useless kettle
A beautiful and unusual decoration can be made from an old teapot:
- The surface must be pre-painted with acrylic paint. If you use a stencil, you will get beautiful patterns.
- Then it remains to fill the container with fertile soil and plant your favorite plant.
improvised means
Craftswomen share their master class on making unusual pots from wooden sticks, plastic and glass bottles, from strong ropes.The decorated unnecessary cauldron looks interesting and unusual.
Boxes for flowers and seedlings
From the remnants of boards left after the repair, it is easy to make a box for further planting. You will need a hacksaw, hammer and nails. The wooden base can be painted in any color.

From an old bicycle
A bicycle that has long since lost its function can very well be a decorative element. It is enough to attach a wicker basket or any other base in which flowers are planted.
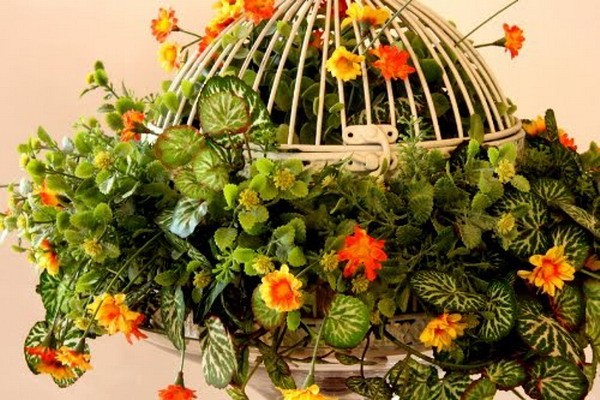
old birdcage
An unusual hanging planter is obtained from an old birdcage. Any container is placed inside the cage, low flowers are planted and decorated with various decorations. Climbing plants look beautiful in such pots.
old broken toys
Use your imagination and make unusual pots out of old plastic toys. Only those that have a container for filling the soil are suitable.
Weaving
For weaving it is better to take grape or willow twigs. If such materials are not nearby, use thin strips of plastic, paper or old newspapers. To make the base strong, weaving is covered with glue or varnish.
Weaving from natural fibers turns out natural and looks best in the interior of the apartment:
- It is best to harvest willow twigs in mid-spring when the buds begin to bloom. The branches should be the same length. Each branch is checked for flexibility. When bent at 95 degrees, the twig should not break.
- To weave a pot of small volume, 8 branches 32 cm long will be needed. The work begins with the manufacture of the bottom.Cross 4 twigs. Then they take 4 thin branches and begin to weave the base with them. After a few rows, the number of branches is reduced to three, then to two. After three more rows, one branch remains. When the bottom is ready, the ends of the branches are intertwined with stems of a horizontal row.
- For the manufacture of walls, thick branches are chosen. Each twig is passed through the bottom weave and bent perpendicular to it. Continue braiding each horizontal branch.

Newspapers
For work you will need to prepare old newspapers:
- Strips 7 cm wide are cut from the newspaper. To obtain strong log rods, it is better to twist the strips.
- Each strip is wrapped around a knitting needle. The edges are glued together to form a tube. After that, the needle is removed from the paper tube.
- Blanks are painted with any paint and varnish.
- To make the bottom, 12 twisted sticks are taken, cut in half and bent perpendicular to each other. Secure with glue.
- A new tube is bent in half and dragged through one of the four parts.
- Each part is intertwined with new tubes. After a few rows, they continue to intertwine two tubes. In the last rows, each tube is already interlaced.
- Then they begin to weave the walls. They make vertical bases from new paper tubes and start braiding them.
How to make paper mache
Paper mache pots are also attached to the wall. The design has a paper and glue base. The work process includes the following step-by-step actions:
- As a base, which will be covered with paper, take a plastic container. This is to prevent moisture from dissolving the paper over time.
- The surface of the container is degreased and primed.
- Prepare the dough.Dissolve 40 g of flour in 500 ml of water. Put on the fire and bring to a boil, not forgetting to stir constantly.
- The paper is torn into small pieces. Scissors are not recommended.
- Pieces of paper are dipped in paste. Pulp soaked in pulp is squeezed out, dried and rubbed on a grater.
- They begin to firmly press the solution against the plastic base, without touching the bottom.
- After work, the product is left to dry for several days.
- The surface of the pots is painted and varnished.
plaster
The cachepot turns out to be durable and reliable. The progress of the work includes the following stages:
- Mix gypsum with water in a ratio of 2: 1. The finished mixture should be of medium density.
- Take two plastic containers of different sizes, but the same shape. In a larger container, the bottom is covered with a film, and in a smaller one - the outer walls. This will allow better separation of the plaster from the surface.
- A solution with a height of 3.5 cm is poured into the bottom of a large container. Wait until the layer dries out a little.
- A smaller container is placed inside.
- The space between the walls of the two containers is filled with a solution and left for two hours.
- Cut the plastic container and carefully remove the plaster pot.
- The product is left to dry for a few days, after which they begin to decorate.
clay
For work you need to purchase a special clay that does not require firing. The product will harden within a day. You can find such clay in a store that sells products for creativity:
- The clay is kneaded beforehand.
- Then, using a rolling pin, roll out a pancake of the desired thickness.
- A plastic container is placed on the resulting layer and the edges are trimmed. It turns out the bottom of the pot.
- The remaining clay is kneaded again and rolled into a long strip.
- The walls of the pots are made of a strip of clay. They are joined end to end or superimposed.
- Smooth the joints with wet fingers.
- Let the product dry for two days.
- The surface of the pot is painted and varnished.

Mosaic
An old vase or an unnecessary tile is used as a decor:
- To get small fragments, you need to wrap a tile or a vase with a cloth and gently knock with a hammer.
- From the fragments, fragments are selected that are suitable for assembling the image.
- The base is smeared with glue and the fragments are pressed.
- The space between the fragments is filled with grouting solution.
- At the last stage, it remains to varnish the surface for greater strength.

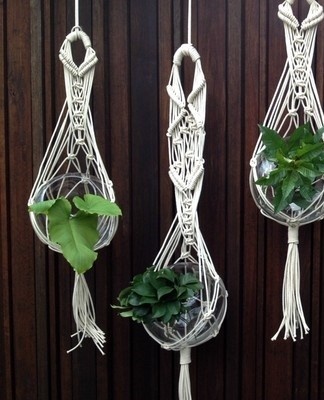
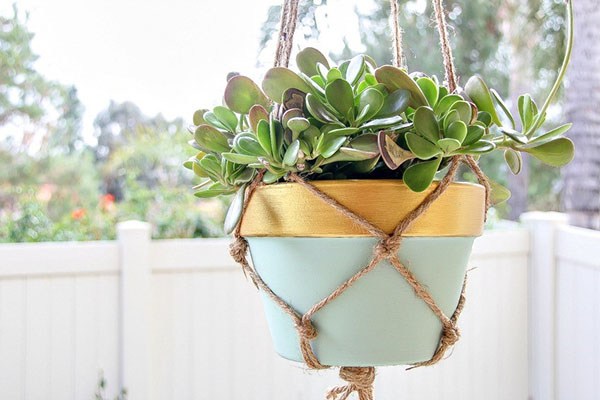
String
With the help of a thick rope, it will be possible to create an exclusive interior decoration. It is best to take an earthen or plastic pot as a base:
- A little glue is applied to the edge of the flowerpot, the end of the twine is fixed.
- Then the container is tightly wrapped with a rope, fixing every third row with glue.
- As soon as the container is completely wrapped in twine, it is cut and the end is fixed with glue.
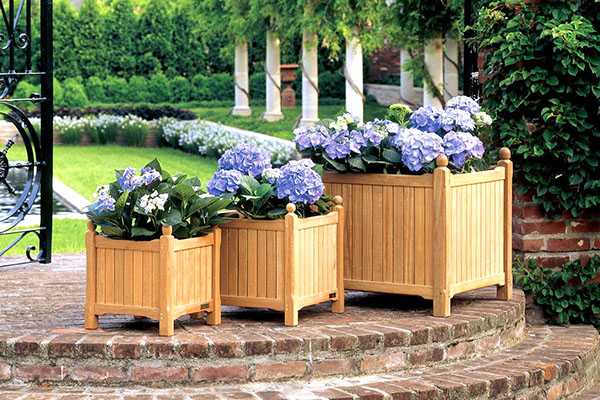
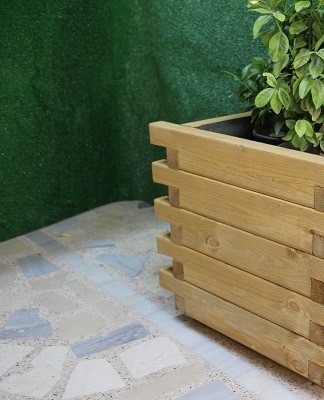
In wood
Wooden slats, planks or bars can be used. To make a wooden planter, you first need to cut pieces for the walls of equal length. Then they are connected with nails. The surface can be in the form of a mesh or a solid canvas.
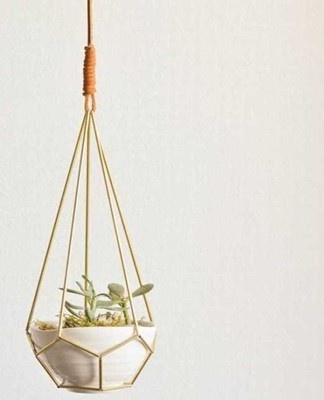
copper pipes
Beautiful, high-quality pots will be made from copper pipes:
- Cut 20 tubes 4 cm long and 5 tubes 24 cm long.
- Take a fishing line and thread 5 tubes on it, bend it into a pentagon.The line is again drawn through the last tube.
- They continue to make pentagons from other tubes, tied together (6 shapes should turn out).
- Long tubes are threaded and connected at the highest point.
- A leather cord is tied and hung in the right place.
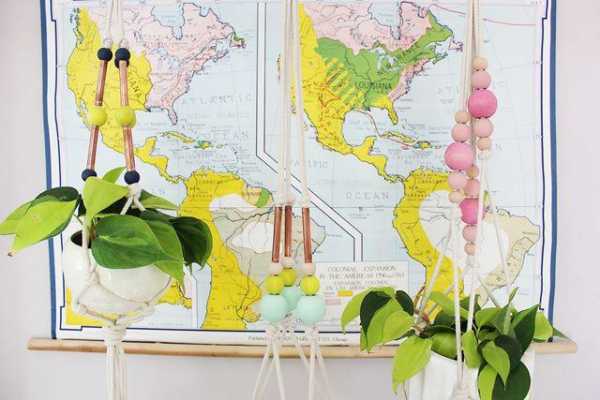
pearls
The decoration of a pearl flowerpot looks lovely:
- Beads of the same size begin to be strung on a string or thin twine. The length should match the bottom of the pot.
- After stringing a sufficient number of beads, the ends of the string are tied, but not cut.
- Continue stringing the beads to the desired length. In this part it is allowed to use beads of different sizes.
- Two more pieces of twine of the same length are attached to the base. Beads are also strung there.
- The three strands are threaded through a bead at the end and tied.
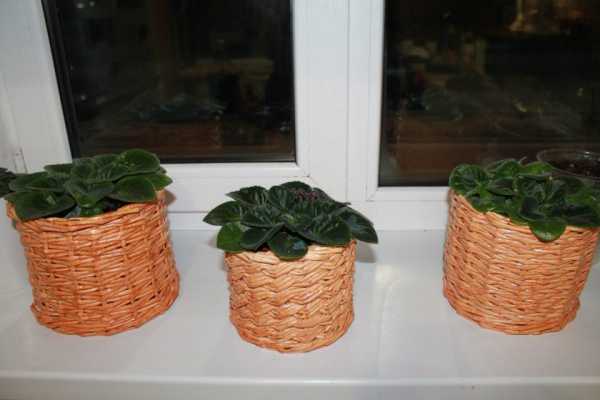
baskets and pots
A similar planter is used both for one flower and for several, which is very convenient. A thick rope is attached to the handles of the pot or the sides of a wicker basket and hung in any suitable place.
High-tech styling
If the interior of the apartment is designed in a modern high-tech style, then homemade concrete, ceramic or brass pots will fit perfectly. Classic or antique models are suitable.
From bottles
Original flowerpots are easy to make from plastic or glass bottles.
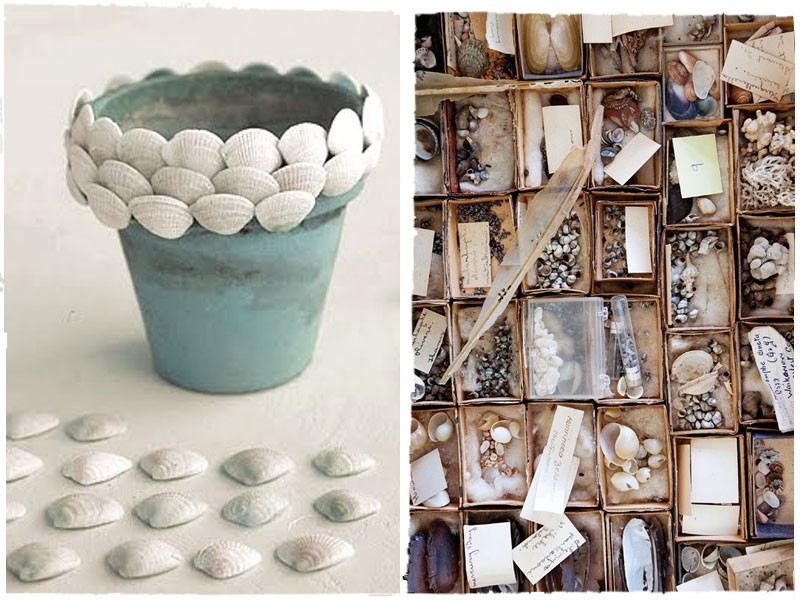
Moss and shells
Seashells brought back from the sea are quite suitable. It is best to plant cacti or other small flowers there. Holes are made at the base, and all free space is covered with earth.
Moss pots are beautiful. For work they buy sphagnum moss, a tin can, scissors and thread.The container is covered with moss and fixed with threads, wrapping it several times around the pot.
Twigs or bamboo
For work use the branches of a tree with a diameter of not more than 2 cm:
- The collected branches are cut into circles 9 mm thick.
- Glue is applied to the surface of the pot and the circles are alternately pressed.
- At the last stage, the product is varnished.
In another variant of making pots, twigs or bamboo of the same height are used:
- The sticks are tied with twine at a distance of 2.5 cm from the edge.
- The surface of the container is greased with glue, and the burlap is glued.
- A fabric of branches is tied around the pot, after which the upper and lower parts are tied again.

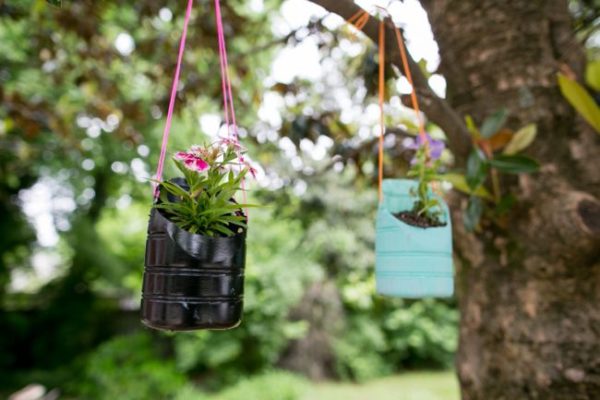
From a plastic bottle
It's easy to make an interesting hanging planter from a plastic bottle:
- Using a utility knife, cut the bottom of the bottle to the desired height.
- The product can be painted in any color.
- After the paint dries, holes are drilled and a strong rope is strung to hang it.
felt
You can make a variety of interesting pots from felt. The cut parts are connected according to the desired pattern and glued to a container of any material.
From a gramophone record
At the dacha there may be phonograph records that already have nothing to listen to. You don't need to rush to throw them away. The original pots can be made from the plates:
- Prepare a suitable container in advance to shape the vinyl.
- Vinyl records are heated, after which they become soft and easily change shape.
- The plate is placed on an inverted container and the edges are bent down.
- The finished planter is ready to be painted.
- If you make two holes in the heated vinyl, the planter can be easily hung in any suitable place.


mirror tiles
Such tiles will make an original and bright planter. Five tiles are chosen for work. One of them will serve as a background, the others as walls. All parts are connected with glue. The finished product will perfectly fit into any interior.
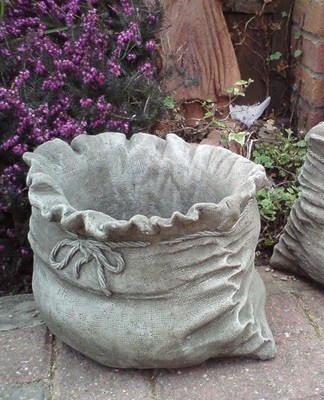
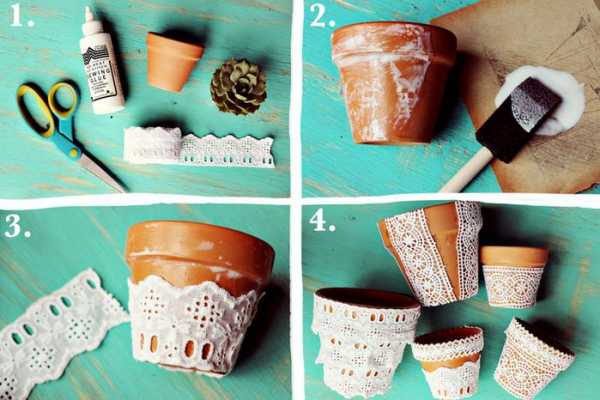
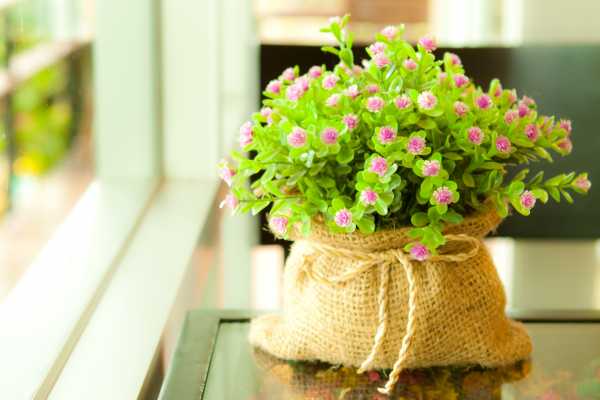
Of the material
For work it is better to choose a dense fabric, the size should correspond to a flowerpot:
- A circle is cut out of the fabric, the edges are hemmed.
- PVA glue is poured into a bowl, a little water is added and a piece of fabric is lowered.
- After a few minutes, the fabric is wrung out and straightened on a flat surface.
- A pot is placed in the center (it is better to wrap it in a plastic bag).
- They begin to form the pot, bending the upper edges and forming folds.
- The product is left to dry for a day. Then they are painted in the desired color.
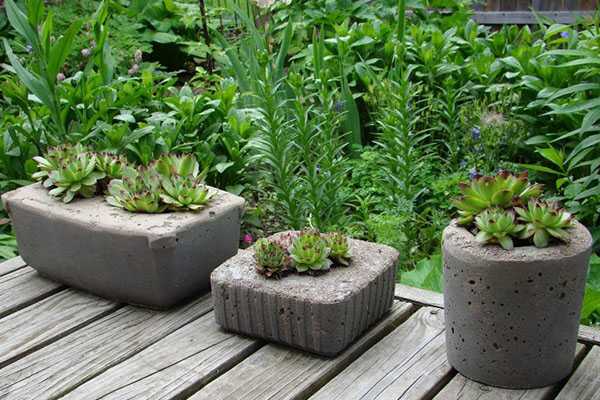
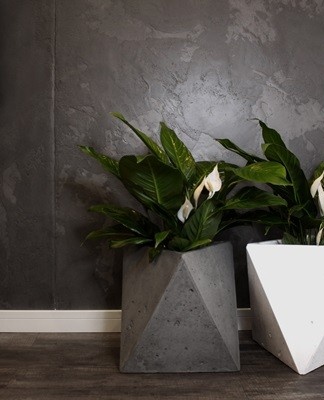
Concrete
Pre-stir the solution until thick. Most often, two containers are used to give the desired shape. One container is poured with concrete and the other is inserted inside and pressed with weight. As a result, the concrete will rise along the edges to take on its original shape. To easily separate the cement from the main form, the base is treated with a lubricant:
- The solution is poured into a large volume container. The layer should be equal to 3.5 cm. After that, it is better to level it with a spatula.
- Small metal tubes are inserted for drainage.
- A smaller container is placed over the metal tubes and filled with a filler.
- Continue pouring the concrete between the molds.
- The part is left to dry for a day, after which all unnecessary elements are removed.
- The pot is immersed in water and left for 5 days.
- Then it remains only to paint and decorate the pots with decor.
Accommodation options
You can put or hang pots with a plant in any corner of the apartment.
above the desk
The hanging planter does not take up much space.
It will be especially good for plants if the table is near the window.
In the bedroom
It is useful to place plants in the bedroom. Be sure to decorate and diversify the room with handmade pots.
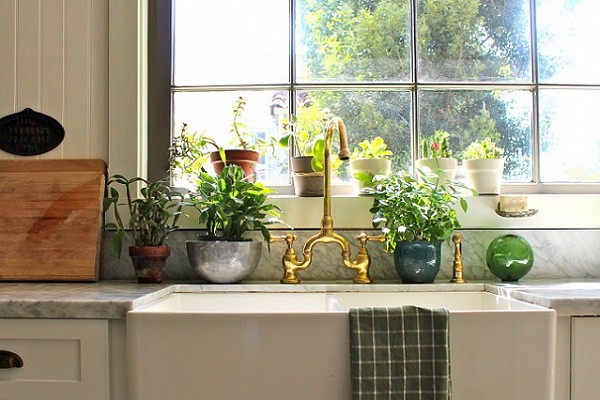
On the kitchen
It will be possible to make the kitchen area warm and cozy with the help of indoor plants.
Hanging flowers will not get in the way and free up space.
On the balcony
It will also be possible to create a green space on the balcony. If heated, the plants are left for the winter.
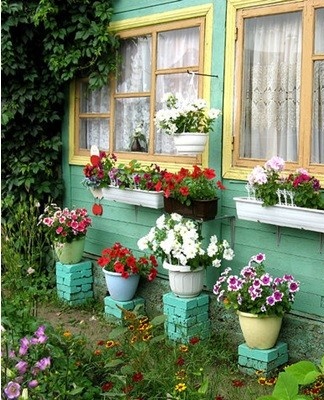
In the countryside
Homemade pots will certainly decorate the territory or the premises of the country house. They are placed in the center of a flower bed, along the paths or a fence, near a fountain. You can also hang it on a fence, porch or other base.
Examples and principles of decoration
Decorating pots with your own hands will help diversify the interior and attract the attention of guests with its originality. There are many options for decorating pots:
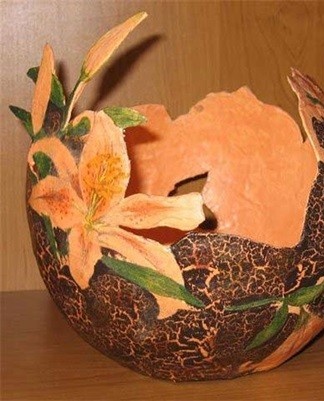
- Decorate the jar with eggshells. The shell is laid on the glue base with the convex side. The gaps between large parts are filled with small shell particles. Then the surface is covered with PVA glue and varnish.
- In a marine style, it will be possible to decorate the pot with the help of seashells. They glue the entire surface with them or draw some kind of pattern from the shells.
- Another decorative accessory is ropes, strings, laces, woolen threads. They are wrapped around a pot or make an interesting weave.
- The decoupage technique can be used to decorate jars. The surface of the pots is covered with white paint and waits for it to dry completely. A pattern is cut out of a napkin, applied to the container and covered with glue.
- Pieces of fabric that can be found in every house will help decorate the pot. Beautiful bows are tied from them or other unusual patterns are created.
- Flowerpots decorated with cereals, cones, dried leaves, seeds, twigs look original.
- A bright and original flower stand will turn out if you decorate it with beads and buttons.
Tips & Tricks
When making planters for flower pots, you should be guided by functionality and visual appeal. The size and variety of the plant must also be taken into account:
- The size of the pots is determined by the dimensions of the flowerpot, which is supposed to be placed inside. The planter should be 3 cm more in diameter and height.
- The shape of the container may be different. Usually it is chosen depending on the basic style of the decoration of the room. The shape can be square, oval, elongated. It is also important to consider the type of plant here. If the flower has long roots, it is better to choose a tall narrow pot.
- Design pots are made of various materials. For hanging pots, choose a light material, for example, plastic, textiles, wood. Heavier materials are suitable for floor compositions: concrete, tiles, terracotta.
- The planter made should emphasize the beauty of the plant. For example, houseplants with solid-colored foliage will look great in bright pots.
You can make an original planter from any material at hand. All you need to do is set aside some time, be patient and let your imagination run wild.