How to clean a hull correctly and quickly and the best ways to do it at home
Conchiologists and collectors often ask themselves a question: how to clean the shell themselves? Almost all the beaches are strewn with shells, only their appearance is not marketable. The shell is covered with lime, and there is an unpleasant smell inside. It turns out that this problem can be easily dealt with using improvised means. The main thing is to be patient, because cleaning sinks is a simple, but time-consuming process.
How to collect correctly
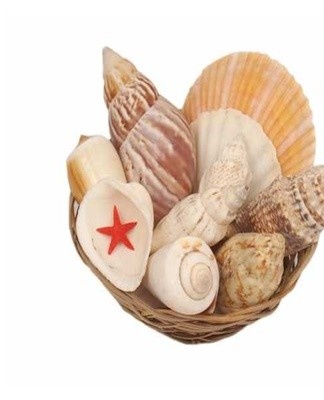
While relaxing on a sandy or rocky beach, many tourists enjoy collecting seashells. They make jewelry, handicrafts, paintings. Shells are collected, given as souvenirs and even used for soil drainage. Seashells are the hard shells of molluscs, their shells. Usually there is nothing in the shells found on the beach, they are empty. True, inside some you can find a living or dead mollusk.
The contents of the shell must be removed, otherwise the unpleasant smell of decay will destroy the entire collection. In no case should you put a shell with a clam in a bowl of cold water. The remains of the animal discolor the shell. You can place the sink on dry sand with the hole down.Sometimes the content will be leaked after a few minutes. If this does not happen, the mollusk is removed by boiling, freezing or burying.
There are several types of shellfish (rapa, scallops, ceritiums, reticulated tritium, mussels, oysters). They have a different shape and appearance. The shells are collected in a plastic bag. They are previously cleaned of sand, dirt and internal contents. Before you put your seashells in boxes, you need to sort them by type and size.

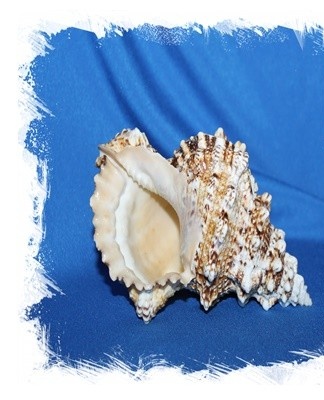
True, there is usually scale on the surface of the shells, giving them an unsightly appearance. Dull shells are not suitable for jewelry and souvenirs, so they are first cleaned, polished and varnished.
Processing steps
There are several ways to clean the surface of seashells. Before removing the limestone, it is necessary to remove the dead shells from the inside.
Removal of organic matter
The remains of shells give the shell an unpleasant odor. It is imperative to get rid of it before making any shell decoration or craft.
Boiling
You can remove the shells by boiling them. True, it is forbidden to throw seashells into boiling water, otherwise they will crack. First, they are put in a saucepan, poured with cold water and slowly heated over a fire. The shells are boiled for about 3-10 minutes, depending on the size. Then the water is cooled for an hour and drained, and the contents are removed from the shells using tweezers.
Important! It is undesirable to boil shells with a thin shell and a shiny surface. Boiling water can crack or ruin the appearance of your sink.
Frozen
Experts advise folding sinks in an airtight container or bag and putting them in the freezer for 4 days. True, at first the shells need to be cooled in the refrigerator at a temperature of + 2 ... + 4 degrees for several hours. Once cooled, they are placed in the freezer. Freeze the shells for at least 3-4 days. Defrosting the shell is also necessary in two stages. First, they are placed from the freezer in the refrigerator for 12 hours, then put in cold water. The inside is removed with tweezers or a fork.
landfill
There is another natural way to remove dead shells from shells. It can be placed on an anthill for ants to eat the contents. A cleaning method such as burying the shell in the ground for a period of a month will help get rid of the shells inside. During this time, soil inhabitants (worms, bugs) will eat the contents of the shell.
Important! After removing the clam, the shell should be washed with a brush in warm soapy water.
Clean sinks at home
After removing the mollusk, the surface of the shell must be washed from limestone. There are several ways to clean the hull.
Soak in water
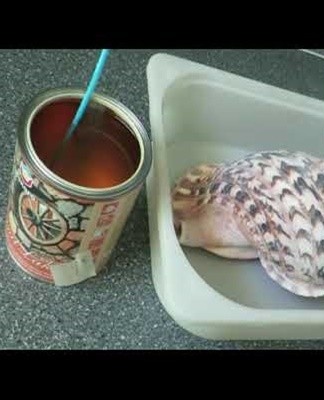
First of all, it is recommended to wash the shells well in warm soapy water, wash, clean all dirt. It is better to put the shells in a salty liquid and leave for several days. The water should be changed every 5-6 hours.
Instead of salt, you can add a little vinegar to the liquid. Sometimes the shells are completely filled with vinegar essence diluted with water, having previously lubricated the shells with baby cream.You can soak cotton in vinegar, wrap it outside the sink, and wrap it in aluminum foil or foil. Such a compress is left for 5-6 hours. Then the shells are cleaned with a washcloth, causing the lime to fall apart.
Important! Sinks can become tarnished after applying vinegar. Restore their shine and color will help varnish.
Bleach
You can bleach the shells with bleach, which is diluted 1:1 with water. The shells are immersed in the solution for 1-2 hours. After bleaching, they are washed off with a washcloth in clean warm water.
Toothpaste
Regular toothpaste will help remove limescale from the shell. It is applied to the entire surface of the sink. The shell covered with toothpaste is left for 5-6 hours or overnight. Then the shell is placed in hot water. The paste is cleaned from the surface with a brush or washcloth. With him, all the lime comes off the shell.
Important! You can first try to clean the shell with toothpaste, and remove the remains of limescale with a vinegar solution.
Final coverage
The hairspray will help give the shell a great look, shine and intense color. Before applying varnish to the shell, the shell is dried for several days, the surface is smeared with glycerin or vegetable oil.
Mineral oil
Not all products can be used to varnish shells. Better to buy oil varnish for wood or paint. It resembles liquid honey in appearance. This varnish is made on the basis of oils and after application it dries for a long time.

Matt or glossy polyurethane spray
The surface of the shells can be covered with a polyurethane spray. This spray varnish is oil-based. They are used to cover furniture, antiques and various handicrafts. The spray dries quickly and is perfectly absorbed by the hull surface.
clear nail polish
Seashells are even varnished with regular nail polish. It is advisable to use transparent, oil from a plant.
Important! Any varnish is applied in 2-3 layers. The interval between applications is several minutes or hours (depending on the type of product). The varnish should dry at room temperature.
What to do if an unpleasant odor persists
If a seashell stays inside the shell, it will give off an unpleasant odor when decomposing. You can get rid of the stench with hydrogen peroxide and ammonia, bleach, vinegar, and salt water.
Tips & Tricks
Getting a clean, shiny hull isn't easy. It must be washed, descaled and the internal contents removed. The main thing is not to rub the shell with an iron brush. Limestone is removed by soaking. The mollusk is extracted mechanically, after freezing or boiling the shell.