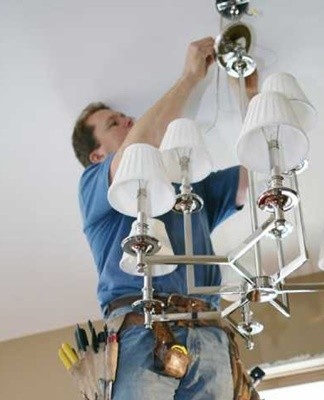
Step-by-step instructions on how to replace the cartridge in a chandelier with your own hands
A socket in the light fixtures holds the bulb and provides electrical contact. A malfunction of the element leads to the fact that the bulbs do not light up. In most problem situations, you need to replace the chandelier cartridge.
How an ordinary cartridge works
The electromagnet is an integral part of any lamp and chandelier. The element is used for detachable connection of bulbs and other light sources to wiring. VAll types of cartridges work on the same principle, and their differences lie in size, design features and material of manufacture. On the body of the device, as a rule, there is a marking indicating all the technical parameters.
E14
The compact socket with the E14 marking is most often installed in fixtures with decorative bulbs of the corresponding diameter. The power of such bulbs does not exceed 60 W, in addition to the chandelier, additional devices are used in the premises.This solution allows you to provide comprehensive and comfortable lighting.
E27
The universal E 27 screw version is suitable for screwing in standard light bulbs, as well as energy-saving halogen and fluorescent bulbs. Due to the universal characteristics, it is not necessary to take into account a number of nuances when choosing and buying light bulbs.
E40
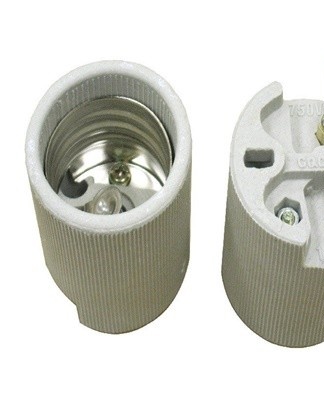
The E40 version is suitable for high power position lights that can light up spacious rooms. In terms of dimensions, this species is larger than the others, which is visually noticeable and simplifies the choice for beginners.
G9
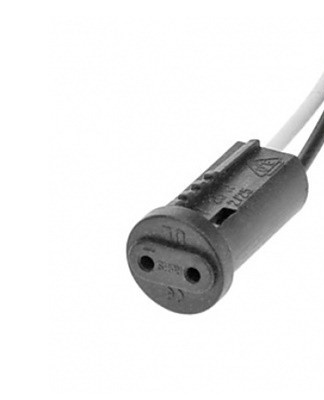
The G9 pin socket is used to mount halogen and LED lamps. Depending on the material of construction, items bearing the G9 mark are classified as follows:
- Ceramic. This option is distinguished by short circuit protection and is recommended for use in devices that need to be turned on for a long time. With prolonged exposure to temperature, the ceramic retains its strength and does not crumble.
- Plastic. The difference is the lightness and preservation of integrity in the event of a fall. As a rule, plastic varieties are used for LED lamps.
Compared to other models, the cartridge with the G9 mark has a number of advantages. These include:
- the design of the G9 variety allows mounting on screws or using a thread;
- the element is protected from moisture, dirt and dust;
- the presence of a spring mechanism ensures a solid fixation of the lamp;
- the heat-resistant braid in the ceramic versions eliminates the risk of burns and resists high temperatures;
- it is allowed to use an adapter for bulbs with other models of sockets.
G4
The G4 marking indicates the possibility of its use in the arrangement of auxiliary lighting systems.Among the main areas of use can be distinguished the decoration of space, laying in stretch ceilings, laying in specialized models of lamps, the decoration of signs, the organization of picture lighting.
Screwing bulbs into G4 sockets does not require professional skills. A light source with pins is placed in a special holder. You can make sure that the bulb is chosen correctly if the dimensions and cross-sectional shape of the protruding elements correspond to the existing holes.
Bayonet element
The bayonet model is equipped with guides and fixing slots for placing and fixing the light source. To hold the lamp, insert it and turn it sideways.
How to replace
Installation of a new bracket in the chandelier should be carried out according to the sequential instructions. By following the basic rules, dangerous situations and common mistakes can be avoided.
Switch off the light on the switchboard
Before starting the direct replacement, it is necessary to de-energize the room where the work will be carried out. For convenience, you can turn off the entire apartment.
To turn off the electricity, simply activate the corresponding levers in the panel.
Disconnecting the wires
After turning off the electricity, you can proceed to unscrewing the fasteners that hold the chandelier. As a rule, these elements are hidden bolts on the body or a suspension hook and a set of wires.
Disassembly of the chandelier
It is possible to install a new cartridge without disassembling the luminaire, but it will be more difficult.For the convenience of work, you need to remove the chandelier by disconnecting the conductors, and then gently lift it from the stand.
Analyze Lamp
To disassemble the light source, you need to unscrew the lamp and remove the cover. In most situations, this does not require specialized tools and it is possible to do all the work by hand. When disassembling the luminaire, it is important to take care not to break the fragile structural elements.
Removing the old cartridge
In the process of replacement, unscrew the visible part of the electrical cartridge and disconnect the connected wires. In some types of fixtures, the contacts are located on the bases, in which case you will need to unscrew the clamping screws.
Installing a new cartridge
For a direct replacement, connect the phase to the central contact of the base, and the zero to the second contact. If you have difficulty identifying the correct wires, it is recommended that you first familiarize yourself with the color coding of the contacts.
Chandelier installation
The final stage of work is the installation of the chandelier, which is carried out in the reverse order. First, the wires are connected, after which they hang the lighting device on the bar or hook.
How to unscrew a light bulb if a light bulb has exploded
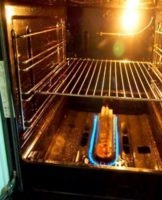
Situations often arise when the bulb bursts during the operation of the lighting device. The reasons for this problem are poor quality of the light source, sudden changes in electrical voltage, prolonged use of the device, external influences and other factors.
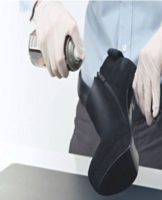
plastic bottle
If there is no set of tools at hand, it is permissible to use the tools at hand to solve the problem. A suitable option is a plastic bottle.The instructions for unscrewing the light source are as follows:
- remove all debris, as they interfere and may cause injury;
- take a plastic bottle of any volume with a standard neck;
- remove the lid and heat the neck until the material melts;
- the neck is placed in the base and the plastic is left to cool;
- gently pull the bottle to get the base with it.

pliers
A more convenient way is to use pliers to grab small components. To remove the base, hook it with a tool and unscrew it. To prevent the ceiling from coming off, you need to hold it with your hands. When handling it is important not to violate the integrity of the circumference of the cartridge.
If the base is firmly fixed in place and cannot be turned, you can try to bend its sides inward, and then continue to unscrew. When removed, the plinth may deform, but this will only simplify the work. The main thing is to make sure that the base does not damage the cartridge.
In a situation where it is not possible to conveniently grab the part by the edges, place the clamp inside the base and spread the ends as far as possible so that they rest against the side walls. Then the clamps are turned counterclockwise.
Possible problems and errors
When installing a new cartridge, it is easy to make a number of mistakes without any practical experience. There is also a possibility of experiencing issues that depend on third-party factors. Common errors and issues include:
- Attempt to repair an energized light fixture. If the part is not de-energized beforehand, there is a risk of injury.
- Wiring issues. During operation, you may notice damage to the wiring and you will need to replace it. Without restoring the wiring, you can subsequently deal with more complex malfunctions.
- Bad contact connection. Due to this error, the fixture will not work properly and may be damaged.