How to make papier-mache from toilet paper and PVA glue with your own hands, step-by-step instructions
You can make papier mache from toilet paper and PVA glue. These simple and affordable materials can be found in every home. If you have imagination, you can make a lot of figurines and toys from it - New Year's decoration, animals, flowers. Often, various decorative elements for the house and summer cottages are made of papier-mâché. To get an interesting and accurate result, you need to familiarize yourself with the technology of manufacturing such items.
Content
- 1 What is necessary
- 2 Technical options
- 3 Interesting craft ideas
- 3.1 Frame
- 3.2 Christmas tinsel
- 3.3 Vase
- 3.4 Decorative figurines for the garden
- 3.5 Garland
- 3.6 The music of the wind
- 3.7 Panel with tulips
- 3.8 Crocodile
- 3.9 Plaque
- 3.10 A cup
- 3.11 Vase
- 3.12 Heart
- 3.13 small houses
- 3.14 Christmas toys
- 3.15 flowers
- 3.16 Animals
- 3.17 Fruits and vegetables
- 3.18 Plane
- 3.19 Mushrooms
- 3.20 Ball
- 3.21 snowman
- 3.22 Baba Yaga
- 4 Examples of ready-made solutions
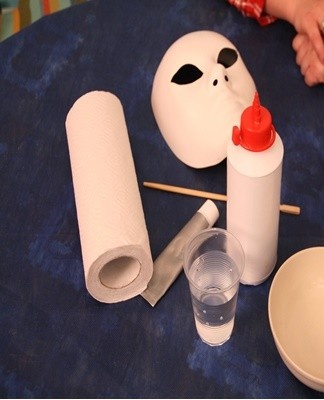
What is necessary
Paper mache is considered a unique material that can be made from regular paper and an adhesive. This technology is often used for joint recreation with children. This interesting hobby is sure to please the child.In addition, it is very beneficial - it promotes the development of fine motor skills and imagination, trains perseverance and makes the child more patient. To get good results, you should prepare everything you need in advance.
Raw material
To make the mixture, take a roll of regular toilet paper. For this purpose, it is permissible to use the cheapest material. It is recommended to break it into small fragments. To speed up the work, it is allowed to fold the paper.
adhesive base
PVA is generally used as an adhesive base. It is a safe and affordable material that is sold in all stores. It is also allowed to use dough.
Glue application brushes
With the help of brushes, it is possible to apply the adhesive mass. They are also used to decorate the finished product.
Paints
Coloring compositions are necessary for the decoration of finished crafts.
Vegetable oil
This substance is used to treat the surface from which the impression is made.
stationary mixer
This device can be used to turn paper into a homogeneous mass.
Oil cloth
It is recommended to cover the table with oilcloth so as not to stain it with glue and paints.
Technical options
Paper mache can be made using different methods. A popular method is to glue pieces of paper layer by layer or to sculpt figurines from wet clay.
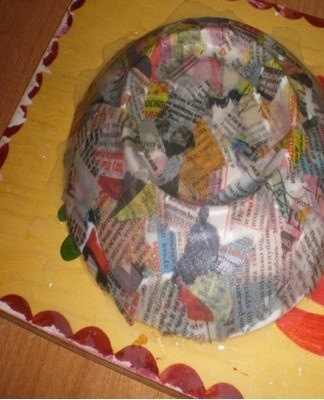
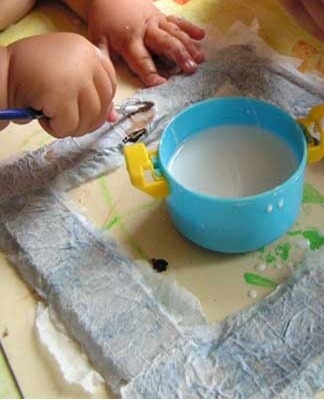
Progressive bonding of parts
To make a figurine in this way, you must do the following:
- Grind the toilet paper. It is also allowed to use a newspaper.
- Do not use scissors for this. Dense material borders of a dried figure cannot be aligned.
- Apply the first layer to the prepared figure and process it with glue on top.
- Dry the product after every two coats.There should be a total of 10 layers.
- The pieces of paper should overlap. It is important to ensure that there are no irregular fragments on the surface.
It is recommended to dry the finished product for 2 days. In this case, the temperature regime should not exceed 22-25 degrees. Otherwise, cracks will appear on the product. The last layer is made of white paper.
Wet pulp modeling
In this case, the templates are not used. You can get a mass for modeling from any paper or cardboard, since when heated the material softens and acquires homogeneity. The stickiness of the mass affects the quality characteristics and durability of the gear. Therefore, during the preparation process, the stickiness of the substance should be assessed.
To give it elasticity, it is worth adding glue or paste. Chalk and alabaster will help make the mass smooth and solid. However, these components must be added immediately.
From this mass it is allowed to make the following types of crafts:
- digits with voids inside;
- models with frame;
- frameless objects.
To get a hollow figure, it is worth using templates. They put a lot on them. Then the sample is disconnected from the gear. To make a frame product, it is worth taking the basics. They must be left inside the figure. They can be made from wire, cardboard or plastic items. Frameless products are molded from paper pulp. It is recommended to dry the figurines for several days. In this case, the temperature and humidity should not change.
paper and newspaper
To make a figurine out of paper and newspaper, you need to follow these steps:
- Lay an oilcloth on the table.You need to work with the glue with your hands, so you need to prepare a dry towel.
- Glue pieces of paper to the blank. After lubricating the first layer, it is worth moving on to the next one. To distinguish the layers, it is allowed to use paper of different shades. This will help achieve uniformity.
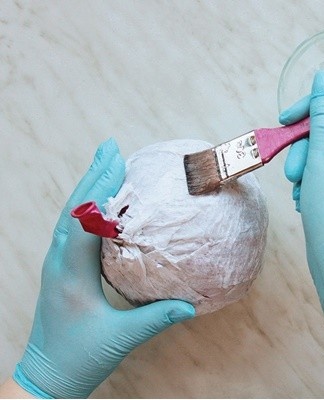
- There are many ways to apply glue. They are allowed to cover the diapers. It is also allowed to immerse the paper in a container with an adhesive composition. The second method is considered the most effective. In this case, the substance better impregnates the material, avoiding untreated areas.
- Objects that look like handicrafts in form are suitable as models. It can be a ball, a plate or a cup. The mold can also be made of modeling clay. If the surface of the product is not too smooth, then it must be covered with an aqueous solution of putty. When the primer is dry, sand it with sandpaper.
- At the final stage, the models are decorated. To do this, it is allowed to use dyes - oil or acrylic. It is also allowed to decorate the product using the decoupage technique. If you plan to use gouache or watercolor, you need to prepare the varnish in advance. It is allowed to decorate the product with textiles, beads or paper. It is also allowed to use cereals or pasta.
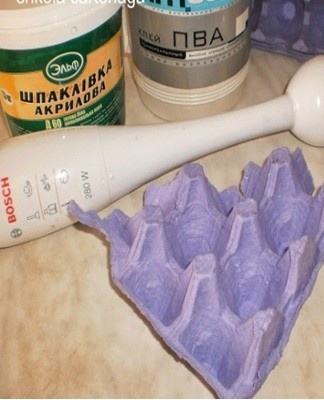
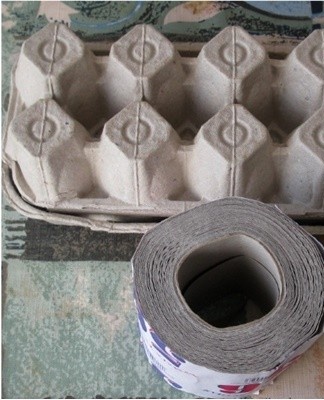
egg boxes
To get a papier-mâché product in this way, you need to do the following:
- Grind the trays and put them in a deep container.
- Add boiling water and leave for 24 hours. It is important to ensure that all fragments are covered.
- When the paper is soft, you can use it.
- Beat the mass with a mixer to a uniform consistency.
- Add 2-3 tablespoons of PVA glue to the composition.
- Take a sieve and cheesecloth and drain the excess liquid.
- Wrap in gauze and pass under a press so that all the water flows out.
- Store the mass in the refrigerator. This is done in a sealed package.
- Make a craft by waving or carving it. Experienced craftsmen prefer modeling. From egg boxes it is possible to get an elastic mass that looks like plasticine. In addition, the high density makes the substance heavier. Therefore, it is allowed to use it for making large figures that can be used to decorate the garden and interior.
- Before decorating the product, it must be treated with a putty. To decorate crafts, it is recommended to use varnishes and paints.
Towels
It is allowed to make such figures by sculpting or waving.Depending on the chosen method, it is recommended to make a paste out of napkins or tear them into small pieces. To mold a figurine from napkins, you need to follow these steps:
- Prepare several packs of white towels.
- Put them in a deep bowl and cover with water. It is important that the liquid is not colder than room temperature.
- After 5-10 minutes, the material will completely absorb the moisture.
- The resulting mass must be squeezed out and mixed with glue or paste.
- Knead the dough well until it is completely homogeneous.
- You can make a figurine with or without a frame. It is allowed to use cotton or iron wire as a frame. The frame must first be treated with glue, then lay out the mass in layers and leave to dry. It is recommended to grease each layer with glue.
- Products made from napkins have a flat and smooth surface.It is recommended to dry them for 4-6 hours. The dough has a loose and elastic consistency. Therefore, it is possible to obtain light products.
- After drying, it is allowed to decorate the objects. To do this, it is permissible to use gouache or acrylic, which are applied in several layers. At the end, the craft is treated with varnish.
Interesting craft ideas
Today on our portal there are many interesting options for such crafts. Each of them is characterized by a certain manufacturing technique.
Frame
For DIY, it will be good to take a mass made of egg trays. It is important to use fresh material. To make a frame, it is recommended to follow these steps:
- Wrap the board in plastic. This will help painlessly separate the gear from the base.
- Roll out the mass with a rolling pin. The result should be a layer of 1-2 centimeters. It is recommended to prepare the mass in advance. Make a rectangle. Its width should be 15 centimeters, its length 21.
- A smaller box will help make a depression for the photo. It should be placed in the center of the mass and surrounded by a pile of plasticine. Pressing along the perimeter, make a depression.
- If you don't have a box, a pencil and ruler will do. It is recommended to apply a smaller rectangle inside and make a depression.
- To decorate the product, it is allowed to use the method of indentation. For this, it is allowed to take a shoelace. It must be laid out on the surface of the frame, pressed and pulled out. For small drawings, it is permissible to use a knife.
- Dry the frame at room temperature. After the material has dried, it is allowed to process it with varnish paints.
- Double-sided tape will help secure the photo.
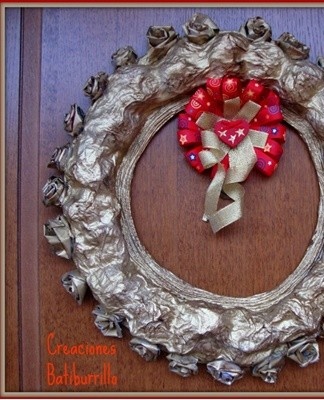
Christmas tinsel
To make a wreath, it is worth taking spruce branches and flowers. It is recommended to attach them to the base in the form of a ring. To get a nice product, you need to do the following:
- Take small pieces of cardboard and pour boiling water over them. Go away for a day.
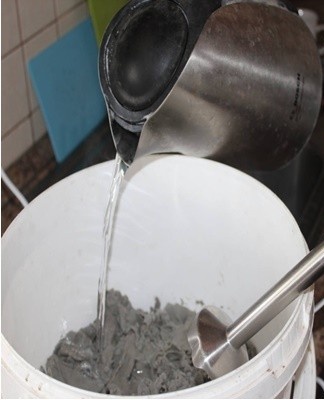
- Grind with a blender and remove excess liquid. Add 1 tablespoon of PVA.
- Unroll the mass on the tray.
- Place the substance on a plate with a minimum diameter of 30 centimeters, circle and cut out a circle.
- Prepare a plate with a diameter of not more than 23 centimeters and press the circle. Then you can cut a hole.
- Let the product dry.
It is recommended to make flowers separately:
- Shred the paper.
- Make a paste. To do this, add 250 milliliters of water to 2 tablespoons of flour. Pour the resulting mass into 2 liters of boiling water and boil.
- Inflate the balloon. Its diameter should not exceed 15 centimeters.
- Dip each piece of paper into the paste and apply it to the ball. The result should be 5 even coats.
- After drying, cut the ball into 2 identical pieces. They are painted in different colors - yellow, blue, red. Thus, it will be possible to get the petals.
- Make a 10cm circle out of cardboard and paint it.
- Attach the petals to the circle. This is done using PVA. The paint is added to the glue, which is used to paint the circle.
You need to collect a crown, starting with spruce branches - living or artificial. Then it is worth tying the ribbons and flowers.
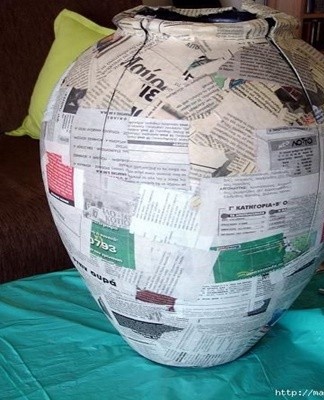
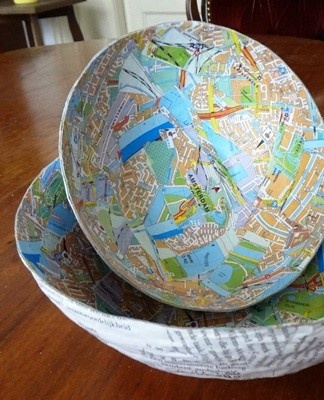
Vase
If you plan to get a hollow vase, you should use the corrugation technique. If you want to prepare a filled product, it is recommended to use the modeling technique.In this case, perform the following actions:
- Prepare a wet mass from egg trays. To do this, they need to be soaked, squeezed and mixed with 1 small spoonful of glue. It is also recommended to add 7-10 large spoons of paste to the composition.
- Prepare 2 balls of different sizes. From one - the neck of the product is made, from the second - the base. Fix the fragments by adding a wet mass. This will help you achieve a smoother outline.
- Cover with a layer of mastic and dry. Decorate according to your preference.
To make a product by shaking, it is worth doing the following:
- Prepare the product you plan to use as a base. It is important to choose the simplest form possible. After completing the work, the product will need to be removed from the base.
- In order not to damage the surface of the product, it is wrapped in a film.
- It is recommended to turn the base upside down. The film should be covered with petroleum jelly.
- Pour white PVA glue into a small container. It must be of high quality.
- Dip pieces of cardboard into the adhesive and apply in layers to the film. The result should be 10 layers. Each of them must be thoroughly dried. After completing the procedure, the vase is dried for 24 hours.
- If the product has a complex shape, the cardboard layer is cut lengthwise, and then glued with several layers of paper. After drying, the surface must be puttyed.
Decorative figurines for the garden
Different figurines can be used to decorate the garden. Fairy-tale characters, flowers or fountains look great.
To make a beautiful craft, you should consider the following:
- Garden products are big and heavy. Therefore, you must first prepare the frame. It should look like a future product.
- Prepare the glue and paste.
- Grind egg trays. Dip the fragments in glue and fix them on the frame. As a result, you should get 8-10 layers. Dry all 3 coats.
- Small fragments of the product are made from toilet paper. It is recommended to wet it with glue. Thanks to this, the material becomes more elastic.
- Finally, apply toilet paper to the contraption.
- You can use gouache as decoration. The finished figurine must be opened with varnish.

Garland
Making garland lampshades is a waving technique. To do this, it is recommended to proceed as follows:
- Inflate balloons of an appropriate size. Fix the yarn on the table and treat the ball itself with cream.
- Shred the boxes.
- Make a paste. To do this, take 2 tablespoons of flour per 1 liter of water. It is recommended to cook the mass to the consistency of jelly. Add gouache to the finished substance.
- Put the pieces of cardboard in the cooled dough and attach them to the ball in layers. As a result, you need to get 3-4 layers. Each of them is recommended to dry thoroughly. Very dense cardboard should be immersed in water for a few hours.
- When the material dries well, the ball can be deflated and removed.
- Make a hole at the bottom of the craft. Its diameter should not exceed 1 centimeter.
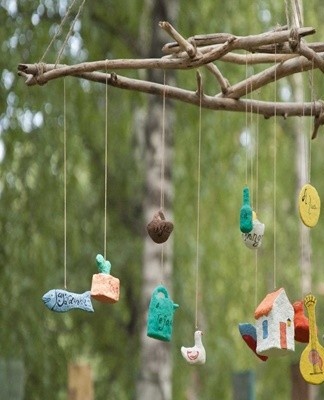
The music of the wind
Such a structure includes a papier-mâché ring and bell parts. To craft a product, you need to do the following:
- Make a waving ring.
- Grind the trays and mix with hot water. Leave for a few hours.
- Place a layer of cardboard on a baking sheet and treat with PVA.
- Run 5 layers. Each of them must dry completely.
- Divide the craft into 2 identical products. They should be glued together to form a ring.
- Tape the joint areas with paper.Cover the product with a layer of mastic.
- When the product is dry, make holes. They are carried out at intervals of at least 9 centimeters. Threads with bells are inserted into the holes and fixed.
- The area of the holes must be covered with putty, dried and decorated.
Panel with tulips
To get such a profession, you will need to do the following:
- Prepare plywood, egg cartons and glue. You will also need an automatic pencil.
- To begin with, it is worth cutting cardboard trays and pouring hot water into them for 2 hours. Divide the finished composition into 3 parts.
- Mix the paste with 3 scoops of PVA.
- Attach the soaked cardboard mass and a third of the prepared paper to the plywood. You should get 3-4 coats.
- Draw the outline of the design with a pencil.
- Add 7-8 tablespoons of glue to the remaining cardboard mass.
- Put the stuff inside the picture. All layers must be dried.
Crocodile
To make a crocodile, follow these steps:
- Prepare a wet substance from egg cartons.
- Blind frame. This can be done with a tourniquet.
- Shape the dough into paws and a comb over the back. Fix the parts with glue one by one.
- Dry the product within 2 days. Cover the finished crocodile with green gouache.
Plaque
To make a plate, you need to follow these steps:
- Grind up newspaper and soak in water.
- Grease a plate with Vaseline and cover with damp newspaper.
- Cover the surface with glue and lay out the next layer. In total, you should get 10-12 layers.
- Dry for 24 hours.
- Grind and soak the white paper.
- Remove the product from the plate and cover the inside with glue.
- Apply wet paper in 2-3 layers.
- Treat the outside of the plate the same way.
- Once completely dry, the decor can be applied.
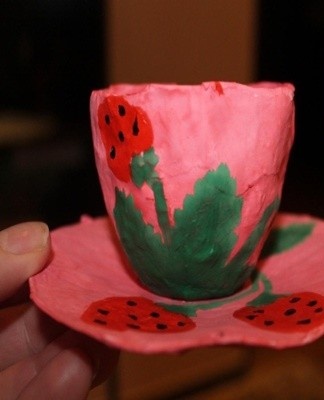
A cup
To make a cup in this way, you need to follow these steps:
- Tear the paper into small pieces and soak it.
- Treat the model with cream.
- Apply wet paper and cover with paste.
- There should be a total of 8 layers.
- Dry for a day.
Vase
To make a vase, you need to do the following:
- Mix PVA with water in equal proportions.
- Take a vase as a model and cover it with petroleum jelly.
- Shred the newspaper. Dip each fragment in glue and apply to the surface of the vase. You should get at least 7 coats.
- Dry the product for 4-5 days.
- Cut the structure lengthwise to take out the base. This must be done with a clerical knife.
- Secure the line with 3-4 layers of newspaper.
- Dry and start decorating.
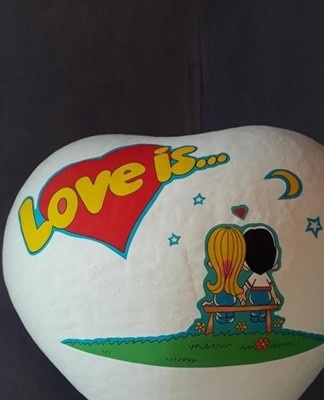
Heart
There are different methods to make a heart. To implement the wave technique, proceed as follows:
- Make a heart out of modeling clay.
- Shred the paper into 2cm pieces and soak in warm water for 10 minutes.
- If the form needs to be removed, it should be wrapped in plastic. Prepare 7-8 layers of paper on the blank. Each of them is greased with glue.
- Dry for 24 hours and cover with a primer. If the part needs to be removed, the product is cut with a clerical knife before priming.
- The finished heart can be coated with acrylic and varnish.
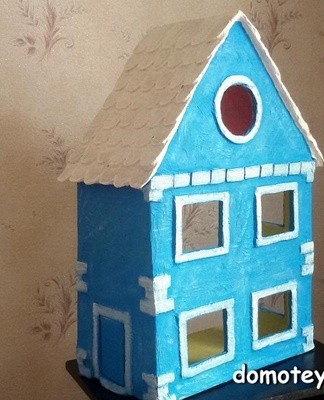
small houses
To do this, you must do the following:
- Soak egg cartons in hot water for 4-5 hours.
- Add a few spoonfuls of PVA.
- Prepare the frame - it can be a packaging for juice.
- Arrange the pulp. Dry each layer.In total, it is worth doing 5-6 layers.
- Blind the roof and connect the fragments.
- After the product dries, treat it with putty, paint and varnish.
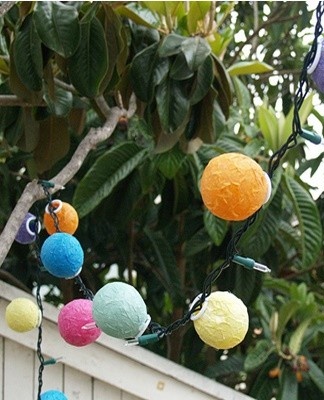
Christmas toys
To make a light ball, use the ripple method:
- First of all, you need to choose a model and treat it with petroleum jelly.
- Grate the paper and soak it in a bowl of water.
- Make a paste with 2 tablespoons of flour and 1 liter of water.
- Place the paper in layers, coating each of them with glue. Make 8-9 layers.
- Thoroughly dry the product, putty and decorate.

flowers
To make flowers, you need to do the following:
- Take an appropriate sample.
- Shred the paper and soak it for a quarter of an hour.
- Apply layers of paper to the part, treating them with PVA glue.
- Cut the loom. In this case, the parts should have the shape of petals.
- Make the core of the flower and glue the petals to it.
Animals
To make animals, you can use the ripple method:
- First you need to prepare a toy.
- Shred the newspaper and soak it.
- Apply 7 to 8 layers of paper on the base, drying them.
- Cut the craft lengthwise and remove from the mould. It is recommended to do this with a knife.
- Connect the fragments with paper.
- Prime and decorate.
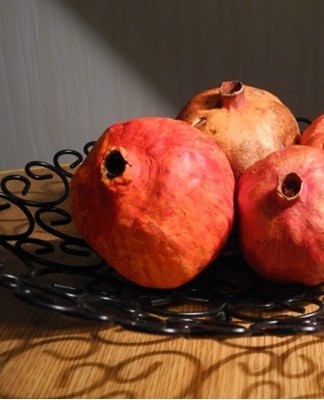
Fruits and vegetables
To craft such items, it is worth doing the following:
- Prepare the pulp.
- Remove excess water and knead a thick dough.
- Give the substance the required shape - it can be an apple or a tangerine.
- Use a knife, fork or spoon to achieve the texture you want.
- A dry surface should be primed and painted.
- Open the finished craft with varnish.
Plane
To craft an airplane, you need to do the following:
- Make a cardboard tail and wings.
- Make holes for the wings and tail on the bottle. Place cardboard cutouts in the holes.
- Seal the joints with duct tape.
- Shred the newspaper and glue several layers to the model.
- Dry the craft, cover it with paint and varnish.
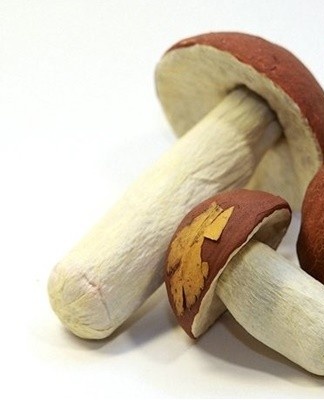
Mushrooms
To make mushrooms, you need to do the following:
- Prepare the pulp.
- Blind the stem and cap of the mushroom.
- Dry thoroughly and cover with paper towels.
- Connect the leg with the cap with superglue.
- Prime, paint and varnish.
Ball
To make a ball, it is worth using the ripple technique:
- Grind the towels and soak them.
- Inflate the balloon and treat with petroleum jelly.
- Stick napkins to the surface. You should get at least 10 layers.
- Dry the gear.
- Pierce the ball and remove it from the product.
- Plug the hole and apply varnish.
- You can apply patterns with paints or pencils.
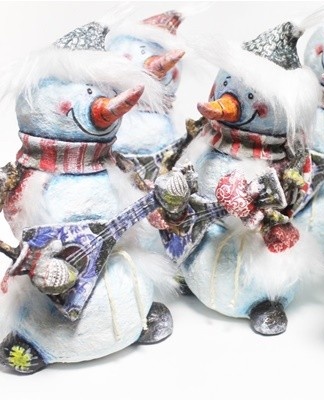
snowman
To make a snowman, follow these steps:
- Make lots of paper mache.
- Form 3 balls of different sizes. You must also make 2 handles in the shape of branches, a nose and a scarf. Rounded pieces should be put on a skewer.
- Dry parts for 2 days and apply to cardboard.
- Paint the balls with white paint. Draw the eyes, mouth and eyebrows. Attach the scarf and the arms.
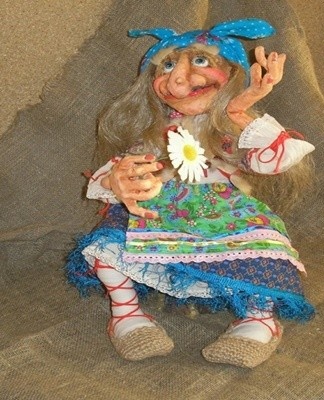
Baba Yaga
To make such a trade, you need to do the following:
- Prepare a cylindrical blank. You need to stretch your nose right away.
- Use a skewer to push into the mouth and eyes.
- Make hands and fingers.
- Let the items dry.
- Glue hands and eyes.
Examples of ready-made solutions
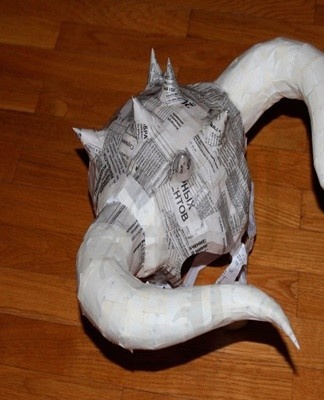
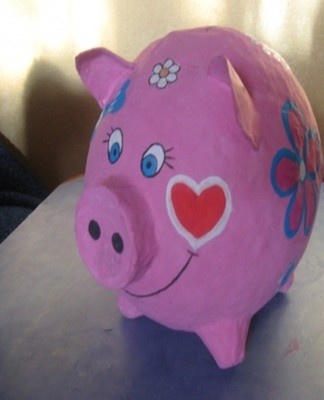
Paper mache allows you to make a variety of figurines. The most popular options are:
- fairy tale characters;
- vegetables and fruits;
- cartoon characters;
- animals and birds;
- home and garden decorative items.
Paper mache is made from simple materials at hand. You can get an interesting figure from toilet paper and ordinary office glue. To get good results, you need to familiarize yourself with popular workshops and common crafting techniques.