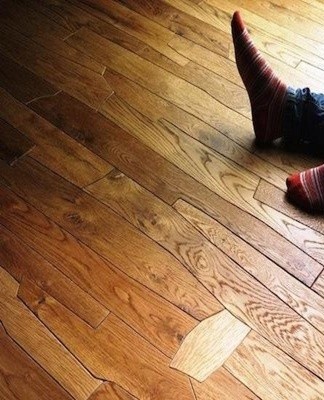
Ways to eliminate the creak of wooden floors with your own hands without dismantling
People often wonder how squeaky wooden floors can be eliminated without dismantling. To achieve good results in this area, it is recommended to establish a provocation factor. There are various reasons for the appearance of unpleasant sounds. This may be improper installation of the coating or violation of the rules of operation. A variety of methods will help to cope with the problem.
The main causes of squeaking
There are several reasons that lead to squeaking. For the repair of the flooring to be successful, a provocation factor must be established.
Loose fasteners
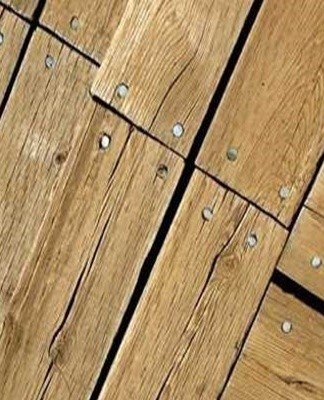
If the board is attached to the joists with nails, the holes in the wood will gradually widen. This is due to the influence of stress or drying of the wood.
Improper installation
The appearance of unpleasant sounds is due to a violation of the editing technique. There are many factors that cause difficulties.
Nails only in the middle
If the nails have only been nailed in the middle, there is a risk that the floorboards will come loose. This is done laterally. This process leads to the emergence of sounds.
Insufficient clearance between wall and deck
In such a situation, the appearance of a creak is due to the absence of a gap of 10 millimeters. It is necessary for the possibility of expansion of the boards due to changes in the microclimate.
Use of substandard material
The factor provoking the appearance of a squeak is the use of poor-quality floor materials. When laying such a coating, even the correct procedure will not prevent squeaks.
Offsets are not defined exactly in level
If during fastening the logs were not leveled, the difference in height causes deflections under load.
Insufficient length used
If the nails or screws are not long enough, the fixing of the boards gradually weakens. Floorboards pull away from logs and fall under stress. As a result, there is a creak.

Use of soft leveling pads when installing joists
Squealing occurs when using soft leveling wedges. After a while, they are compressed. This causes uneven settlement of the structure.
Deformations
When a deformation appears in the form of outward or inward bending, an unpleasant sound appears. This creates the need for secure fixing of the boards.
Lags
The drying of the bars often becomes the cause of problems. They move with the bridge and create friction sounds.
Old age
Over time, the properties of the material deteriorate. At the same time, natural raw materials are damaged faster than artificial ones.
Subsidence of the foundation of the house
In old rooms, the subsidence of the foundation leads to deformation. In this case, large-scale repairs are required.
How to determine the exact cause
To establish the reasons for the squealing, you need to do the following:
- If, when the board flexes, a nail is exposed, the reasons lie in the weakening of the flooring fasteners.
- If the fragments of the coating are knocked down firmly, but the load causes the structure to deflect, this indicates the curvature of the lags.
- When checking the coating, it is recommended to use a building level. A creak usually occurs where the height of the bars changes.
- If it is not possible to identify the reasons for the squeak, it is worth dismantling the floorboards and assessing the condition of the lags.
- If the floor bends under load, this indicates a large step lags.
When examining the coating, it is recommended to firmly press the boards that are along the walls and baseboards. In such an area, cracks in the plinth may appear. There is also a risk of the wood drying out.
The main ways to solve the problem
To eliminate problems, it is worth choosing the right technique and strictly following the rules of the procedure.
Installation of wooden dowels
To cope with the creak without dismantling the floors, the use of wooden dowels will be useful. To do this, you need to make a hole so that it passes through 2 adjacent boards. They are placed randomly. Apply PVA glue to the dowel and press it into the hole. Once the glue dries, cut off the excess.
Application of a sealing bead
The method is used for solid and even floors in an apartment. It is used when gaps appear between boards. When using natural cord, it is impregnated with wood glue. The artificial version of the material does not need to be glued. When entering the space between the boards, such a cord expands. As a result, the space fills up.
anchors
The method is required if the logs do not adhere well to the rough screed. Moreover, it must be reliable. To begin with, it is worth dismantling several boards and determining the condition of the screed. The placement of the lags is also important. The anchors should be the same length as the space between the black screed and the sheathing. To do this, in the creak area, it is worth making a depression of 8 millimeters. A hole is made in the center, in which the anchor is placed. Then it is pressed against the screed and fixed with a bolt.
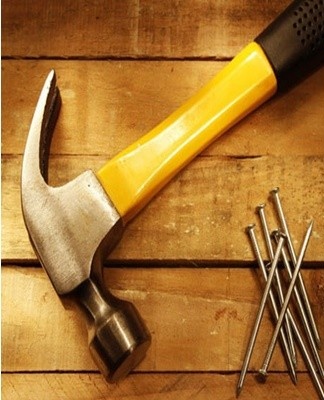
Fixing the board with self-tapping screws
When loosening the fastening of the boards, fastening is required. In the role of such elements, long self-tapping screws are used. They should fit into the wood by at least 40 to 50 millimeters. First you need to determine the location of the lags. Holes are made where the boards bend. The diameter of the drill should be 1-2 millimeters smaller than the size of the screw.
After screwing in the screws, the floor is cleaned and treated with a putty. After drying, the coating is cleaned and sanded.
Polyurethane foam
Today, many modern compounds are used for repairs. They help to cope with the cracking of the boards, which occurs due to the drying out of the structure.To begin, it is necessary to identify the area of the squeak and mark this area. Make 2-3 holes between the boards. Fill the holes with a special compound with a syringe gun. When dry, it will hold the boards together.
Clevis with a special tool
It is recommended to lay the floorboards back to back. They should be 2-5 centimeters thick. By compressing the dried material in certain places, it is possible to increase the rigidity of the structure and eliminate the creaking. To make a screed, you can use the following methods:
- wedging the wall - in this case, wedges are used;
- clamping with a clutch is a special tool that is installed on the coating.
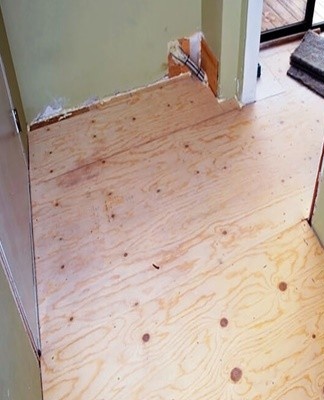
Plywood or chipboard flooring
It is an effective method that does not require dismantling on the ground. In this case, the sheet material is mounted on a wooden base.To avoid squeaks, it is recommended to use 12 mm plywood or chipboard. It is worth mounting them with glue.
How to iterate over the floor
If it is not possible to eliminate the squeak by simple methods, it becomes necessary to dismantle the coating.
Dismantling
First you need to remove the baseboards. When reuse is necessary, they are removed very carefully. To locate the nails, the plinth is carefully lifted using a lever. Then it is recommended to use it to remove the boards. When you remove the bars, they should be numbered immediately. This will help lay the boards in the correct order. Cracked and rotten boards are numbered and set aside.
Database cleaning
After removing the boards, it is recommended to carefully remove the base. Otherwise, it will not be possible to establish the reasons for the squeak.If there are cracks in the concrete base, they must be widened, cleaned and primed. Damage can be repaired with cement mortar. It is also allowed to use a special putty.
If bad offsets are identified, they should be replaced. If the lags are located with a large step, then it is worth adding elements to the frame.
Setting offsets per level
It is recommended to adjust the offsets by level. They must be in the same plane. For leveling, a long level of 1.5-2 meters is required. If it is necessary to raise the joists, it is allowed to use joints or special anchors. After setting the lags in one plane, they are firmly attached to the base.
Heating and soundproofing
For this, the floor is covered with a waterproofing material. Insulation is placed on top. Its role is played by polystyrene or expanded clay. It is also allowed to use mineral wool.
The insulation layer is covered with a membrane that helps to remove moisture and prevents dust or mineral wool lint from entering the house. All liners are attached to the logs with a stapler and staples.
Installation of a new coating
Finally, the old boards are put back in place. If necessary, some of them are replaced with new ones. The boards are fixed in such a way that there is a certain distance between them. The gap should be 8-10 millimeters. This will help maintain the integrity of the coating as the material expands.
Additional tips and tricks
Regardless of the chosen method of repair, at the final stage, the surface of the flooring should be examined again and the cracks identified. They should be treated with wood polish and the repaired areas should be sanded.Cover the floor with linseed oil, which will help eliminate sounds for a long time. If the floor includes boards, it is recommended to open it with varnish or paint. If another coating is required, it must be laid.
Squeaks are considered a very common problem and cause serious discomfort. To deal with unpleasant sounds, you need to establish the causes of their occurrence and find an effective way to eliminate them.