How to do it yourself with your own hands to remove scratches from a mirror and the intricacies of restoration at home
With careless handling and mechanical stress, various defects appear on the surface of mirrors. When you're wondering how to get scratches out of a mirror, there are a few ways to familiarize yourself with this one. Restoration of the product can be carried out manually, using specialized or improvised means.
Advantages and disadvantages of home catering
Having found minor flaws in the bathroom mirror, many people prefer to carry out the restoration themselves. This procedure has several advantages and disadvantages. The benefits of self-catering include:
- Minimum costs. For processing, you will have to buy only cleaning products, without spending money on the services of professionals.
- Use of scrap materials. Most defects can be removed using household products.
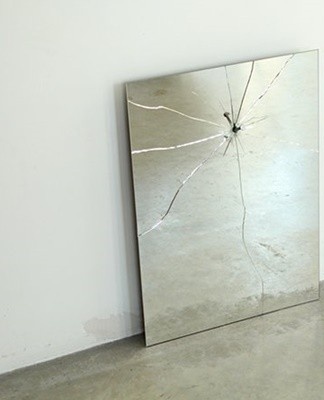
The main disadvantage of doing the job yourself is the ability to remove only minor scratches. To eliminate deep flaws, you will need the help of specialists.
Preparing catering at home
Before starting the restoration of the mirror surface, you need to carry out the preparatory stages. The preparation process depends on the type of mirror and the size of the defects present.
For big damage
If the mirror is inserted into the frame, then in order to more easily restore the surface with large defects, it must be removed from the structure. To do this, use a small hammer and screwdrivers, unscrew the fixing screws and remove the hammered nails. In cases where it is impossible to remove the product from the frame, it is recommended to lay the entire structure on a flat, solid surface in order to prevent displacement from its original position.
Minor repairs
When planning to get rid of minor and subtle scratches, simply wipe the surface of dirt to better see the damaged areas. It is not necessary to remove the product from the wall, which greatly simplifies the task.
Procedure
When restoring a mirror, it is recommended to follow the step-by-step instructions. Keeping order in mind will help you avoid mistakes and get the job done efficiently.
Scratches and chips
To eliminate the found cracks and chips, you can resort to various methods using improvised and specialized tools. The most common options are:
- Toothpaste. A small amount of paste is applied to the product and rubbed lightly with a flannel cloth, making rotational movements. After the toothpaste dries, the surface is carefully polished, so that all minor flaws become invisible.
- Mustard powder. Dry mustard powder and vinegar essence at a concentration of 9% are mixed in a container, observing equal proportions. The components are stirred and the resulting mass is applied to the damage.Excess mixture is carefully removed and the product is buffed with a soft cloth until the shine appears.
- Cerium oxide. A specialized chemical allows you to visually hide chips and scratches. It is often called jewelry blush because of its ability to optically smooth the surface of the mirror. In powder form, cerium oxide is dissolved in a liquid and applied to the product. Then polishing with a damp cloth is necessary. If necessary, the procedure can be carried out several times in a row.
- Nail polish. Deeper chips and scratches should be pre-filled with a substance and then buffed out. Due to its special consistency, clear varnish is excellent for this purpose. First, a layer of varnish is applied to the damage, remove the excess and wait for it to dry. After that, wipe the surface until it is shiny with a soft cloth.
- Paste GOI. The substance is crumbled to a powder state, applied to a piece of cotton wool and smeared with a thick layer on all defects. After waiting 1.5 minutes, the product is rubbed into the surface and wiped off with a clean, dry cloth. After completing the procedure a second time, the duration of polishing is increased to 15 minutes. To prevent the paste from fading, you cannot intensively rub it into the product in order to repair the surface.

DIY decoration
Large cracks in the mirror can be repaired with decorative elements. The advantages of self-decoration are the ability not only to hide flaws, but also to transform the appearance of the product, showing imagination. The simplest technique is to use transparent stones.After choosing the stones you like, they are glued to the surface by putting a drop of silicone sealant on the back side. The design of the mirror looks most original precisely with the use of transparent and translucent stones, which can be monotonous or colorful.
You can also decorate the defect with paint. This requires special materials, including:
- Glass outline. It is a colored or transparent composition in a container with a pointed spout. The substance is applied to the mirror with a thin strip and the contours of the invented pattern are drawn. The contour can be with or without baking, but in domestic conditions it is easier to use the second option.
- Stained glass paintings. This type of paints differs from simple paints in that after drying they become transparent. The paints are applied with brushes or squeezed out of a tube and smeared on the mirror with cotton swabs.
- Sequins. Small shiny elements can be in the form of different geometric shapes - stripes, circles, polyhedrons. They add glitter to paints and varnishes, giving them an original shine. A substance with glitter is applied to the crack, drawing a pattern.
Dull surface
Due to exposure to high humidity and sunlight, mirrors eventually develop characteristic staining and dulling. To restore the natural shine of a tarnished product, you can use a composition of water, vinegar essence and crushed chalk.
To prepare a surface treatment solution, first add a tablespoon of gasoline to a glass, then a similar amount of chalk.
Before use, the solution is heated and left to infuse, then a few drops are added to a fluffy cloth and the mirror is wiped.It is important to keep in mind that this method is only suitable for mirrors with an aluminum reflective layer. To remove dull spots and bring an original shine with a bluish tint, you can clean the products with a solution with the addition of blue. In case of significant darkening of the mirror, treatment with a mixture of water, magnesia or ammonia mixed with gasoline is required.

Amalgam recovery
If defects appeared on the amalgam on the back of the product, you can visually hide them and restore the surface finish by gluing the film.To do this, carefully remove the mirror from the frame or other pattern and place it on a smooth, flat surface with the front side down. Then a piece of foil of suitable size, which should be slightly larger than the defect, is smoothed and glued to the surface of the amalgam.
Rules of care
Proper maintenance will help prolong the life of your mirror. To prevent the product from deteriorating, it is recommended to respect the following rules:
- Products are affected by excessively humid or dry air. Frequently wipe the surface with a damp cloth, especially during the winter heating season.
- Do not hang the mirror in direct UV light. Due to their influence, the coating will tarnish and stain.
- When using mirrors in the bathroom, they often fog up, so it is worth wiping them with a soft cloth, applying a solution of 50 ml of water and a teaspoon of gelatin.
- If the mirror is on the cabinet doors, then it is removed from the structure before processing. Otherwise, it will be inconvenient to carry out the work and there will be a risk of further damage.
- When the product is too old, the amalgam may start to dust around the edges. A special plastic tape can be glued along the contour. You can also coat the back with a 1:2 mixture of melted wax and turpentine to protect the amalgam.
- It is better to fix the products not close to the wall, so that the air circulates freely to the back and the amalgam does not collapse.