11 best ways to make lightweight clay slime at home
Among the many methods of making slime, the option with the addition of plasticine has become widespread. If you have a question about how to make a slime from lightweight modeling clay, just follow the simple instructions. Making a slime does not take much time and effort.
The benefits of plasticine slimes
Plasticine slimes are popular for their many benefits. These include in particular the following:
- material for making mud can be purchased in a large number of stores;
- mud with the addition of plasticine acquires a viscous structure;
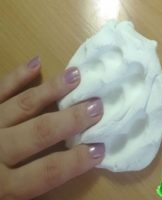
- lightweight modeling clay does not stick to hands and creases easily.
How to choose the material
Several varieties of modeling clay are suitable for making slimes. Therefore, when choosing, it is worth comparing the options with each other. Soft clay is very easy to process due to its consistency.
A feature of hard plasticine is its increased density, due to which the product is more elastic.
Ingredients
In addition to the basic component, you need to use a number of additional ingredients to create slime. The exact list of ingredients depends on the type of slime.
The water
If you don't use water, the slime will be dull and won't stretch well. Typically, most methods of making slime involve the addition of water.
Edible gelatin
Adding edible gelatin when creating a slime gives the product the ability to hold its shape well. Otherwise, the toy will unintentionally change shape due to different consistency.
iron container
Plasticine is heated in a metal dish to soften it and mix it with the rest of the ingredients. To melt plasticine, you need to make a water bath.

plastic containers
All components are mixed inside a plastic container. After preparing the slime, the container is placed in the refrigerator for several hours.
Manufacturing rules
When creating a slime, you must adhere to standard rules so that the product turns out to be of high quality. Especially:
- Considering the ingredients used, you need to follow the sequence of adding them.
- After creating the slime, you need to put it in a cool place. The high temperature will make the product sticky.
- To prevent the slime from becoming too hard and tearing when stretched, it is important not to use excessive amounts of sodium tetraborate. To soften the slime, you can use glycerin or cream.
Home services
After reading the instructions, you can easily make a slime at home using the available components. Homemade slime has a number of advantages over buying a product from a store.
At low price
No expensive ingredients are required to make a toy. Most of the ingredients can be bought cheaply at any store. Also, many recipes involve the use of improvised components.
Pleasant pastime
Creating a slime is an interesting way to pass the time. The manufacturing process is atypical and in addition develops the motor skills of the hands during pleating.
own fantasy
By adding food coloring, glitter and other decorative elements to the standard components, you can show your creativity and imagination. According to your own wishes, you can make the slime unique and beautiful.
Membership verified
By using different components as slime components, you can be sure of the safety of the toy. When buying an alternative in a store, it is impossible to check its composition.
Beneficial Features
Slime is not just a toy for children. The product has several useful features, thanks to which even adults can use it.
Relaxation and tranquility
By stretching a slime in your hands, you can relax and collect your thoughts. The toy works on the anti-stress principle, helping to calm down, relieve tension and relax.
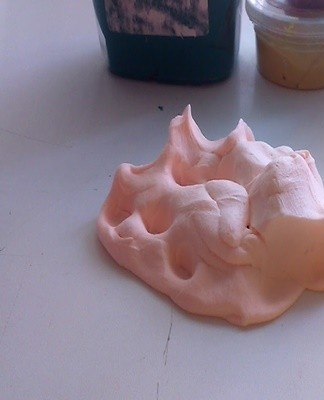
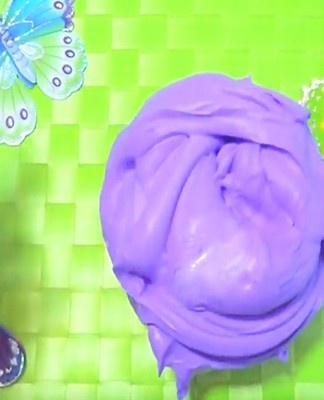
Form retention
Slime made with the addition of plasticine is able to keep its shape well. This property allows you to use slime for decorative purposes, creating a shape for it.
Hand cleanliness
Due to its special consistency, the slime leaves no dirt on the hands. Even with prolonged crumpling of the toy, the hands always remain clean.
Hand massage
The use of anti-stress replaces the light massage of the hands.Periodic crushing of the toy relaxes the hands and improves fine motor skills and grip.
Homemade Baking Soda Recipe
An easy way to make slime at home is to add baking soda. Also, to create a toy, you will need:
- PVA glue;
- food coloring (if desired, color the slime);
- soft modeling clay;
- metal and plastic containers for mixing components.
Having prepared the necessary components, they take plasticine and melt it in a water bath in a metal container. To speed up the process, you can cut the clay into several pieces. In a plastic container, mix a quarter of a glass of water and the same amount of glue, then mix well until a homogeneous mass is obtained.
If desired, add a dye and pour in melted plasticine, then mix again. While mixing, add a solution of one tablespoon of baking soda in 50 ml of water.
So that the slime does not have to be redone, it is important to take into account several nuances. Including:
- The PVA glue must be with a new production date.
- Water should be preheated to just above room temperature.
- To achieve the required consistency, you must adhere to the recommended proportions.
A simple recipe for making slime with gelatin
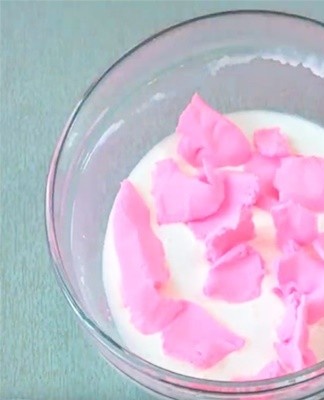
No less common is the method of making slime with the addition of gelatin. This component allows you to turn a toy into a denser substance that will keep its shape well. To prepare the slime, you need to prepare 1 sachet of gelatin, 100 g of plasticine and 50 ml of water.
To create a toy, gelatin is poured into a container and poured with cold water. The solution is well stirred and left to infuse for an hour. Then the soaked gelatin is brought to a boil on the stove.At this stage, plasticine in a separate container is melted in a water bath. The clay is heated until it is completely softened. Then it remains to mix plasticine with heated gelatin and stir.

The finished slime should be well kneaded with your hands and left in the refrigerator for several hours. Exposure to cold will make the garment harder and denser.
Other recipes
By adding additional ingredients to the standard recipe or replacing the base ingredients, you can change the consistency, appearance, and other characteristics of slime. Thinking about making slime at home, you need to consider several options and choose the most suitable, taking into account the available ingredients and your own wishes.
Play Do and stationery glue
The soft and light modeling clay called "Play Do" is ideal for making slimes. You will also need PVA glue, water and liquid to store the lenses. After preparing all the ingredients, you need to follow simple instructions:
- Squeeze 2 tubes of glue into a plastic or glass container and dilute it with water.
- Add a few drops of lens storage fluid to the solution and mix all components thoroughly. As you mix, the slime will gradually begin to take shape and pull away from the sides of the container. If the mass does not come off, it is worth adding a few more drops of liquid.
- Mix the resulting mass with light plasticine. It is not recommended to put a large piece of it right away. It is best to tear off small pieces and gradually mix them into the mud.
- Knead the slime with your hands until it becomes soft, airy and viscous.Provided the slime is made correctly, it will not stick to your hands.
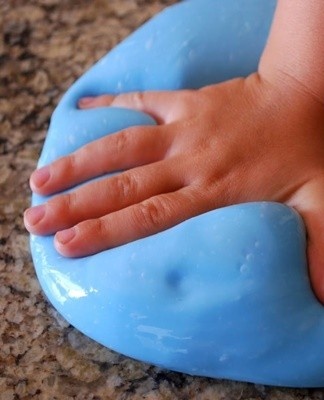
Butter Slime
Butter mud gets its name from its soft, delicate consistency, which resembles slightly melted butter. The mud spreads easily on the surface of the hands or on various surfaces. To make air slime, it is better to take a light variety of plasticine, since its structure is more suitable and combines well with other components.
In addition to modeling clay, you will need glue, shampoo or liquid soap, food coloring, soda, water and boric acid.
Glue and shampoo are mixed in a container until a homogeneous mass is obtained. Then add some food coloring and mix well. In a separate container, prepare a solution of soda with warm water. The components of both containers are mixed and diluted with an acid to thicken. When the mass becomes dense, you need to mix it with plasticine and knead it in your palms.
Ball
The ball-shaped variety differs from the usual slime in its crispy structure and unusual appearance. To create slime, you will need special plasticine, washing gel, hand cream, PVA glue and a container for mixing the components. The manufacturing process includes the following steps:
- Glue is poured into a container and diluted with a tablespoon of cream.
- A spoonful of washing gel is added to the mixture and the ingredients are mixed well. If the mass remains liquid, you can add another spoonful of gel.
- The resulting thick mass is removed from the container and crushed in the hands until smooth, until the slime stops sticking to the hands.
- The slime is mixed with plasticine into a ball in an amount equal to half of the slime and continues to knead.
The shade of the finished product will depend on the color of modeling clay chosen. If desired, you can use plasticine of several colors.
Glittering
Special neon paints help make the slime sparkle. You will also need glue and liquid starch. To make a toy, you must successively carry out the following steps:
- Pour the glue into the container and, adding liquid starch in portions, mix the ingredients until a thick consistency is obtained.
- Remove the resulting mass from the container and knead with clean hands. After a few minutes, a white light substance will form, which can be transformed into a sparkling slime.
- Take two bowls and pour white glue and starch into them. Add neon paint to each container.
- Mix the contents of the two bowls, put the slime inside.
- Knead the slime with your hands to absorb the paint.
- Let the product dry in a cool place for a few hours.
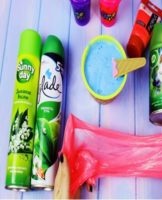
Very elastic
You can give your slime extra elasticity with regular shaving foam and starch. First, a starch mixture is diluted in a container. To this end, water is poured into the starch, first in equal proportions, then gradually increasing the amount of starch until a thick consistency is obtained. In this case, the total ratio should not exceed 350 g of starch per 200 ml of water.
After receiving a viscous mixture, shaving foam is added in portions. Typically, it takes up to a bottle full of foam to make a slime. If desired, you can also add powder dye and glitter to the product.To make the surface of the toy shiny, you also need to use PVA glue, which is added at the rate of 60 g per 150 g of water.
Pleasant
Additional decorative elements can make the slime more beautiful. Food colorings, which are mixed in at the final stage of production, help give the slime a vibrant color. You can also use large sequins to add sparkle to the piece. The shiny toy will glow beautifully when exposed to light.
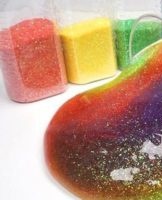
Rainbow Chewy Jelly
One of the most unusual varieties is rainbow slime, for the creation of which you will need: liquid glue, starch, water, paints or food coloring of several colors. When starting to make fluffy slime, mix the glue with room temperature water and divide the mixture into 4-7 containers in equal proportions. Then a different shade of dye is added to each bowl.
If the shades seem pale, add more dye or liquid paint.
To give the mixture a thick consistency, starch is poured into the container and mixed well. When the slime starts to harden, you can scrunch it up with your hands. As a result, you should get several colored products connected to each other and get a rainbow fluffy slime.
Tips & Tricks
Sodium tetraborate, which is added to the main components until the desired consistency is achieved, allows the mud to obtain a thicker structure. If the mud begins to harden strongly, you can increase the amount of water used. The set of ingredients for slime may vary depending on the type of product.
Making a slime, you can use your imagination and experiment to make the toy unusual and beautiful. For children, you can do edible sludge, which are absolutely safe to use and will not harm the child if he accidentally eats part of the toy.