Patterns for making do-it-yourself paper squishies at home
Making paper squishies is very popular with children. This anti-stress toy looks very original and has a calming effect. To successfully manufacture it, it is worth choosing the right model and strictly following the technology. Paper squishes can be simple or large. With the necessary skills, anyone can do them.
What are paper squishes
Squishies are anti-stress toys for children. They are twisted, crumpled, squeezed. After such actions, the products regain their shape. The rustling and pleasant tactile sensations have a calming effect, and the rich shades give a positive effect.
In fact, squishies are small figurines that represent real or fantastic animals. There are also products in the form of food and household items. Among the finished products, there are flavored ones. They have an additional relaxing effect.
One of the common materials used to make squishies is paper. On our portal there are many master classes, which show the stages of making such products.
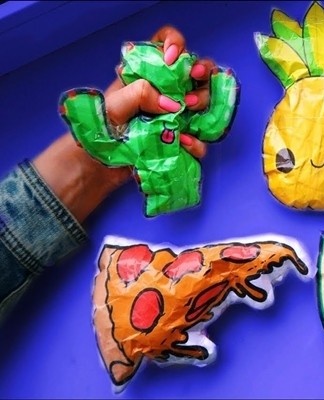
To make a stress relief toy, regular office paper will do. It is also allowed to use color. To make the toy bulky, use a soft filler. These include cotton or foam rubber. Polystyrene, synthetic winterizer, bags are often used. Additionally, you will need scissors, tape, pencils.
Basic methods for making homemade squishies at home
To make squishies with your own hands, you should clearly follow the main steps
The easiest
To make a paper toy you will need tape, scissors and a pencil. It is also worth taking mastic and various decorative items. For this, crayons, stickers, crayons are used. Markers or markers are often used.
To make squishies, you must follow these recommendations:
- Choose or submit a design. The main thing is to focus on your preferences. The image should not evoke negativity.
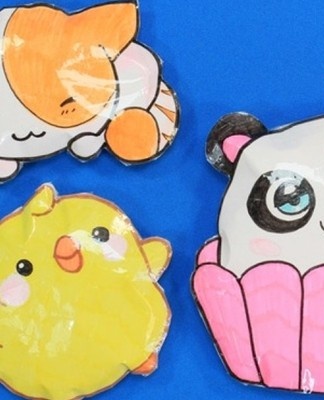
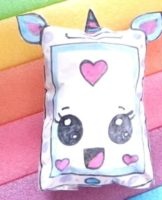
- The drawing should not contain too small details. This will make it difficult to fill the product and make it less functional. Usually simple designs are chosen for toys - for example, a cupcake, an emoticon or a cat. Cartoon characters are often used.
- It is better to draw the picture yourself, and then color it. You can create your own image or use a ready-made drawing from the network. It is allowed to draw, print or transfer the image to a sheet by attaching it to the monitor.
- To get a clear and even image, it is worth printing an image with an outline. Then the details are added and painted.
- It is not recommended to make the image too large.Otherwise, you will not be able to crush it with one hand. The image size should be the same as your palm size.
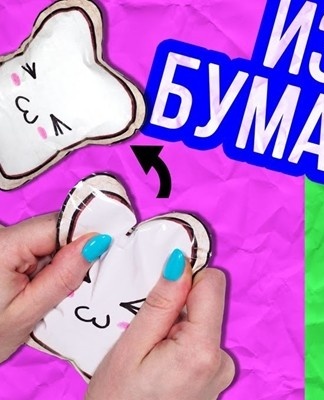
- The toy should be double-sided, therefore, the second part is mirrored. It is recommended to cut 2 identical pieces and then start coloring. If only the front is important, the back remains blank.
- It is recommended to crop the images in the next step. It is important to ensure that both parts are identical. There should be no sticky paper on it.
- To facilitate the process, it is recommended to fold the sheet in half. First you need to draw the front part, then cut out 2 identical ones. If there is a desire, it is allowed to arrange the second side. This will ensure that the images are identical.
- At the next stage, the blanks need to be glued with adhesive tape. It is better to use wide material. This will help with fewer seams on the paper and a cleaner toy. If there is no such strip, you can use a narrow one.
- It is recommended to take a blank and carefully glue a strip of adhesive tape. This is done so that half a centimeter from the edge goes beyond the limits of the paper. Then glue another strip. In this case, you need to go back a little to the previous one. As a result, there will be no unpasted places on the paper.
- In this way, it is worth gluing the whole part. This is done on the side that will be outside. It is recommended to do this as carefully as possible. It is important to make sure there are no wrinkles or air bubbles under the tape. They will make the toy unattractive.
- Then it is worth gluing the 2 halves together. For this step, thin tape will do. If it is absent, a wide ribbon is cut into 2-3 fragments.
- Fold 2 pieces and glue them together. This is done along the contour.The thinner the bands, the more accurate the toy will be.
- It is recommended to glue fragments of adhesive tape with an overlap. Thanks to this, it will be possible to get a sealed toy. In this case, it is worth leaving a small hole through which it will be possible to fill the product.
- When the parts of the squish are secure, a sealant should be used. If you plan to use a sponge or foam rubber, it is recommended to grind the material. This will make it softer. If you want to get an elastic consistency, it is worth cutting out a shaped piece of foam rubber. In this case, the hole must be large enough. Otherwise, it will tear when stuffing.
- Fill the squishy with a soft material. To distribute it evenly over the toy, you need to use a brush. A thin stick will also work.
- It is recommended not to overtighten the product, as it should be compressed to a small size. Nevertheless, the density of the product should be chosen according to your preferences.
- After filling the toy, it is worth sealing the hole. If you want the item to spring back into shape slowly, it is recommended that you leave a small gap between the pieces of tape or do without. It will take 2-3 gaps to quickly regain form.
To appreciate the quality of the toy, it is recommended to try to squeeze it. If she recovers slowly, everything went well.
If the product expands too quickly, it is worth finding the air outlet area and covering it with tape.
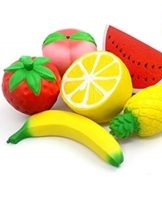
Volume
Homemade squishes can be bulky. For this reason, they look like real objects in appearance. Paper is considered a thin but flexible material.It can be used to craft various items.
3D
To make squishies in 3D form, you need to do the following:
- Select and color the models.
- Cover the sheet with clear tape.
- Cut and bend the elements to create a three-dimensional figure.
- Secure the pieces with double-sided tape. A glue stick is also suitable for this.
- Fill the toy with foam rubber. It is also allowed to use a dishwashing sponge.
- To make a filler from a whole piece of foam rubber, you need to circle the product along the contour and cut it so that the piece deviates slightly from the line.
- To fill the gaps, cut small pieces of foam.
- Carefully place the mastic and glue the product.
How to make a model with your own hands
To create a model, you can draw it yourself and then paint it as you wish.
If there are no ideas or skills, it is permissible to find a ready-made drawing and print it on paper.
Circuit examples and ideas
To get a beautiful toy, you can use ready-made ideas that are full of sites.
Mushroom
Mushroom squishies are very cute.

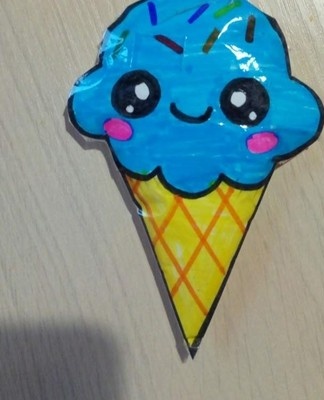
ice cream
A great solution would be a mouth-watering ice cream.
Hamster
Animal lovers will definitely love the hamster.
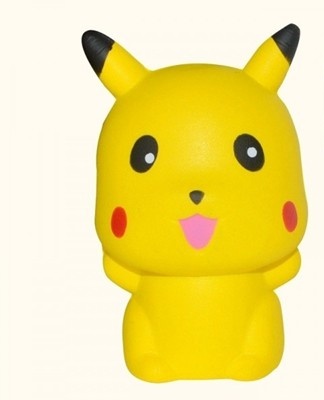
Pikachu
Pokemon lovers can choose Pikachu.
Spongebob
This option will suit fans of cartoons.
Espeon
Another popular Pokemon.
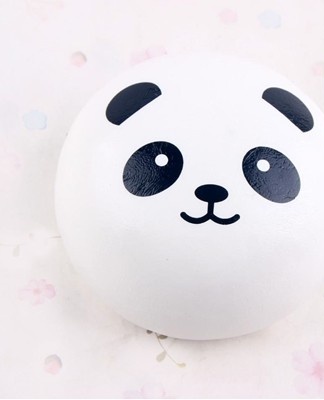
Panda
This cute animal is perfect for decorating a product.
Hare
Animal lovers can choose a cute bunny.
Koala
Another popular hero for making squishies.
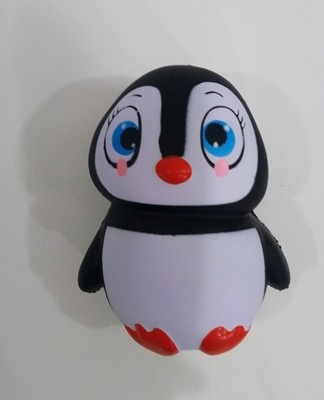
penguin
The penguin product is very popular.
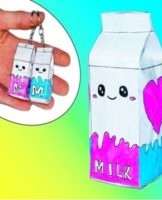
A carton of milk
A carton of milk is also a good option.
Application of adhesive tape to glue
Scotch tape is used to laminate paper products. This makes them more resistant to damage. For this, a wide adhesive tape is suitable, which must be glued in even strips. This should be done as carefully as possible. This will help prevent bubbles and wrinkles from appearing.
Additional tips and tricks
To successfully squish, you must follow these rules:
- choose the right model;
- paint the picture;
- cut out fragments;
- connect the pieces to each other;
- fill with soft material.
Paper squishies are very popular with children. To get a beautiful and neat product, you need to choose the right model and follow the rules for making toys.