Instructions for leveling the ceiling with putty with your own hands
In order for the do-it-yourself ceiling putty to bring results, it is recommended to carry out this procedure correctly. First of all, you need to pay attention to the choice of composition for the procedure and prepare it for use. Compliance with manipulation technology is not negligible. It includes a number of sequential steps.
Preparation of materials and tools
In order for the putty to bring the necessary results, a number of features should be taken into account.
How to choose a putty
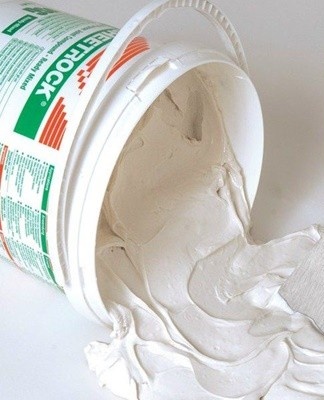
For puttying, 2 types of mixtures are used. They are called Start and End. The first variety contains coarse-grained elements. Therefore, it is used to apply a coarse layer, intended to level the surface. Sometimes multiple coats are needed. The finishing putty is soft. It is used for the final treatment of the finished surface. The composition contains coarse-grained elements. This results in a uniform and smooth ceiling texture.
As part of modern tools there is gypsum.Therefore, after applying the putty, the substance hardens very quickly. The composition dries completely in 12 hours. The exact time depends on the layer thickness, temperature parameters and air humidity.
What you might need
To putty, apply the following:
- spatulas of different sizes - wide and narrow;
- half-metal - its length should be 50 centimeters;
- roller for the use of a primer;
- a convenient basin for preparing a dry mix;
- construction mixer - helps to quickly dilute the composition.
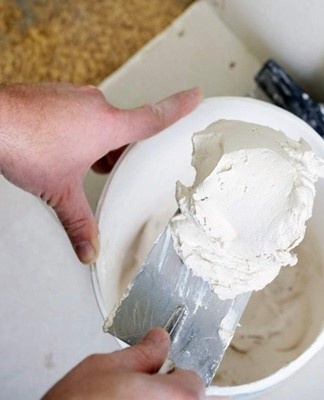
How to prepare a mastic mixture
For successful putty work, it is worth preparing the putty correctly. To do this, it is recommended to proceed as follows:
- Take a metal bucket and fill it one-third full of water. It is not recommended to use plastic containers. They can be damaged by the mixer.
- Pour the mastic and mix the contents of the container with a mixer. When using a special drill, it is allowed to choose any whip. If you plan to use a regular drill, you should choose the smaller whip. Otherwise, the drill may burn out. To prevent the mass from splashing during mixing, the reverse of the device must be reversed. This will achieve counter-clockwise rotation of the mixer.
- It is recommended to mix the composition to the consistency of thick sour cream. Then it should be left for 5 minutes. Thanks to this, the lumps will have time to soak. After that, it is recommended to beat the composition again. It's done for the last time. Additional whipping will lead to a violation of the structure of the mass and the loss of its main properties - strength and quick adhesion.

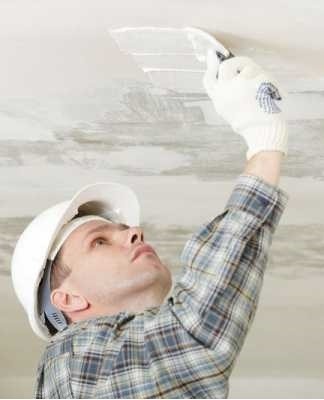
How to properly prepare the surface
In order to achieve good results on the surface of the ceiling, it is recommended to perform a number of works.
Anchorage
First, the ceiling should be well moistened with water 2-3 times. It is allowed to do this with a paint roller or use a spray bottle.
For the duration of the procedures, the furniture must be covered or removed.
How to remove old plaster
With a steel spatula, clean the surface of incodes, cracked plaster and other coatings affected by the fungus.
How to get rid of fungus
If the room is affected by a fungus, then it is first worth applying an antiseptic primer. This will help prevent further mold growth.
Primer
Before puttying, you will need to treat the surface with a primer solution. For this, it is recommended to take deep penetrating formulations.
Mix selection
There are a number of effective blends, each with specific characteristics.
Acrylic
It is a versatile option that is suitable for all types of surfaces. It takes 2-4 hours to dry such a primer. It is an excellent option for the treatment of drywall.
phenolic
Such compositions are used for the treatment of metal and wooden surfaces. It is forbidden to apply the primer to the putty, while it is actively used as the first layer.
alkyd
This compound is suitable for woodworking. It is strictly forbidden to apply this substance on the mastic.
Glyphthalic
It is the most powerful formula. It is allowed to work with it only in well-ventilated rooms. The substance is not used for living rooms.
Service request
A roller or brush is used to apply the primer.In some situations, it is permissible to use a primer spray. However, in such a situation, there is a risk of uneven coating and high mortar costs.
This step ensures the best adhesion of the putty mixture to the ceiling surface. Before proceeding to the next step, it is recommended to wash off the solution that settles on the walls.
Work with putty
For successful application of putty, it is worth choosing the right composition for repair work.
Universal
This type of mastic combines the properties of all varieties. It is actively used and is easy to use. In this case, it is allowed to putty different types of surfaces with a paintable substance.
It should be borne in mind that the quality of such a composition is slightly lower than that of specific species. At the same time, the price is quite high. This is due to the large number of components in the composition.
Leveling
This putty allows you to level the surface of the ceiling. It is used for rough preliminary processing of a part. The composition should be chosen very carefully. It should have good resistance to curing and a high degree of adhesion to the substrate. It is worth applying the composition up to 25 millimeters thick.
Finishing
This substance is used before the fine finishing of the ceiling, which is carried out for decorative purposes. It is often called the composition of the second layer. With this tool it is possible to align defects. However, when choosing a composition, it is worth considering the decorative surface coating.
If you want to prepare the surface to be painted, it must be perfectly smooth. This is provided by a fine mineral filler.In such a situation, choose a plaster putty with a grain thickness of no more than 100 microns.
Specialized
This type of putty helps to seal the joints of gypsum boards, to eliminate cracks and to carry out emergency repairs. The destination of this substance is indicated on the packaging.
drywall
Separately, it is worth mentioning plasterboard construction putty. This process is considered easier, since a properly executed ceiling has a flat surface. The plasterboard ceiling has certain features.
To complete the procedure, you must do the following:
- Prime the surface. It is recommended to pay special attention to the seams.
- Fill the holes for the self-tapping screws. First of all, you need to make sure that they do not protrude from the sheet. To do this, it is recommended to run it with a spatula and manually tighten the protruding screws. Then it is recommended to putty them.
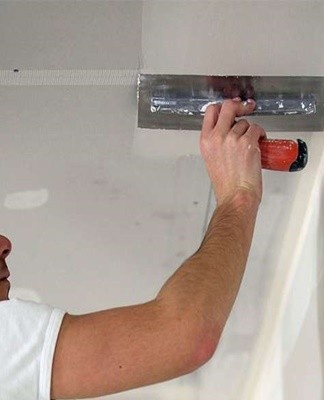
- Prepare the seams. No preparation is required on the long side of the sheet. Particular attention should be paid to the short sides of the sheets and where the sheet is cut. In this case, you must first deepen the seam by cutting the edge at an angle of 45 degrees. Starter putty should be used to fill the joint. Tie a masking net or serpyanka on top. It should sink into the seam. After that, putty the seam of the serpentine and level the surface.
- Sand the joints and putty the holes for the self-tapping screws.
- Cover the entire ceiling with a finishing coat.
The technology of work is considered standard. In this case, it is recommended to minimize the putty layer, since significant leveling is not required. After the substance dries, the surface is sanded. As a result, it will be possible to get a flat and smooth surface.
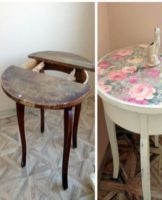
Features of ceiling decoration
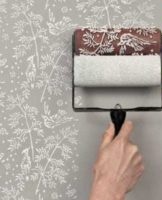
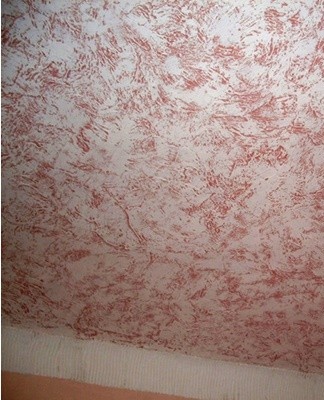
The use of decorative plaster is considered a real option for creating an interior. To achieve good results, you need to entrust this matter to specialists. A popular decorating option is the use of structural plaster. It is a ready-made white mass. It can be easily tinted, giving the desired shade. It is recommended to apply the composition to the surface of the ceiling and walls. Thanks to this, it is possible to get relief.
To obtain a decorative surface, use a roller, various spatulas, a sponge, a comb. Craftsmanship and professionalism are required to create a unique relief.
In addition, there is textured plaster. In this case, the relief is formed on the surface of the ceiling. If you want to make the decor yourself, you need to use this material. After the ceiling is dry, it can be painted in any desired shade. The use of formulations with fillers of different fractions makes it possible to obtain a unique pattern.
Common Mistakes
When filling the ceiling, inexperienced craftsmen make various mistakes. If there are defects on the surface after applying the finishing compound, this indicates poor-quality leveling of the ceiling. If blemishes appear after staining, this indicates putty savings.
If the composition does not adhere to the molding seams and cracks appear, this indicates improper installation of the decorative plinth. Therefore, it is worth using high-quality glue and spending a lot of time drying the surface. To increase adhesion, craftsmen use nails with a thin head.The putty layer dries for 12-24 hours.At the same time, it is strictly forbidden to open the windows or ventilate the room. Otherwise, there is a risk of deformation of the material.
Additional tips and tricks
When performing work, sag sometimes appears. This usually happens at the beginning of the movement of the spatula, on which there is a lot of mortar. In this case, the master exerts insufficient pressure on the tool. To avoid sagging, gradually change the angle of inclination of the blade. If tool movement started at a 50 degree angle, it should end at a 20 angle. With proper tool positioning, the risk of sagging is minimized.
The surface should be putty next to the leveled layer. In this case, the movement of the spatula is towards this layer, and not from it. If you stand below and move the tool towards you, the sag area is clearly visible. Any flaws can be smoothed out during the next treatment. The main thing is that they do not have time to dry out. If defects nevertheless appear, part of the ceiling should be moistened with a sprayer.This is done before starting the processing of the next fragment.
When applying the solution, it is recommended to slightly roll the spatula over the wet area of the ceiling. If the surface is dry for a long time, it needs more abundant wetting. It is permissible to carry out this procedure in advance with a roller. To achieve good results when plastering the ceiling, you must follow these rules:
- Before performing the procedure, seal all cracks and cracks. Removal of old coatings and dust is essential.
- Prime the surface. The composition should be applied in one layer.
- Apply 2 coats of mastic. One is done by starting, the second by finishing.If there are significant irregularities in the ceiling, more black coats will be required. It's important to make sure they don't get too thick.
- After applying the composition, it is recommended to sand the ceiling with sandpaper.
- Apply a paint primer to the surface.
Ceiling putty is a complex and responsible procedure that requires compliance with a number of recommendations. To achieve success in this matter, it is recommended to perform all stages of manipulation. This will help achieve a flat, neat surface and prevent sagging.