Step-by-step instructions for installing and fixing the sink in the bathroom
The sink is one of the most important things to have in a bathroom. In addition to the hygienic function, it should organically fit into the interior. Therefore, it is important to take a responsible approach to the choice of the sink. Let's see what types of washbasins there are on the market, how to choose the right one and how to install a washbasin in the bathroom with your own hands.
Kinds
There are several types of sinks, which differ from each other in shape, size and functionality.
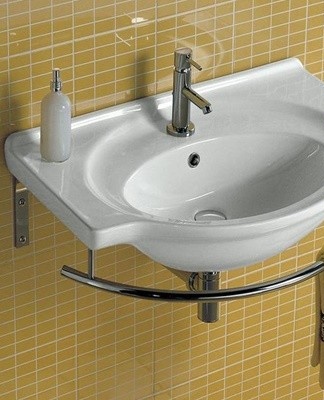
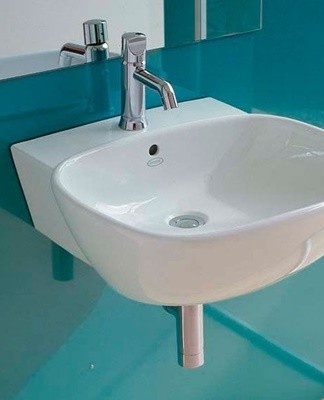
classic wall
The most common and versatile option.This structure can be hung both in the family bathroom and in the guest bathroom. The classic washbasin does not require a plinth for installation - it mounts directly to the wall. The structure is particularly elegant on a thin base.
tulip shells
This design is a conventional sink mounted on a pedestal leg. The pedestal has two functions - it serves as a sturdy base for the sink, and also hides the water and sewer pipes inside.
The advantages of this design are compactness, versatility, affordability and ease of installation.
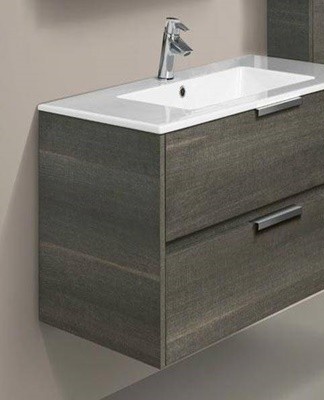
For furniture
Furniture sinks are designed to be installed on a curb, table and other furniture. In addition, they can cut directly into the surface. Structures are divided into overhead and built-in. The main advantage of such a washbasin is a significant saving of space in the bathroom, since the washbasin is installed directly on the cabinet, which bears its own functionality.
Corner
The corner sink, as the name suggests, is located in the corner of the room. Due to its shape and location, such a structure effectively uses the space of the bathroom, since the corner of the room is often left unused. Corner washbasins are available both as classic furniture - wall-mounted and built-in, as well as tulip-shaped furniture with a support foot.
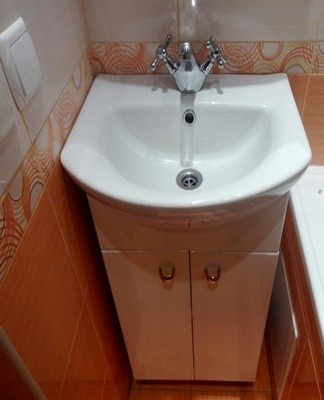
With a border
A cabinet with a sink is a ready-made design that combines the functional features of a cabinet and a sink. This is a convenient and practical option that saves space in the room. The coping is suitable for storing laundry, perfumes, cleaning products.

The structure can have different shapes - it can be angular or straight. There are suspended washbasins with a vanity unit. This design helps protect the furniture from water pooling at the bottom. There are also plinths with a plinth - they cannot be turned over and do not require additional fastening.
Material
When choosing a washbasin, attention should be paid to the material of construction. There are ceramic, glass, metal models on the market, as well as sinks made of natural or artificial stone.
Ceramic
Ceramic sinks are environmentally friendly, resistant to scratches, chemicals, temperature changes, easy to maintain and pleasant to the touch. The disadvantages of porcelain stoneware sinks are considered their considerable weight, which creates inconveniences during installation, fragility of the structure and relatively high prices.
artificial stone
Artificial stone sinks are resistant to moisture, chemicals, high temperatures, environmental friendliness, a wide range of different colors and shapes, and retain their original appearance for many years. they are used correctly. The disadvantages are the high cost, heavy weight and fragility of budget models.
natural stone
Natural stone products are cut from large pieces or assembled from several parts. The sinks are made of granite, marble, onyx, basalt, travertine. Stone products are durable, strong and functional. The disadvantages are the high price and heavy weight, which complicates installation and transportation.
Glass
Glass sinks may seem fragile at first glance, but in fact thick tempered glass can withstand temperature fluctuations and mechanical damage.They are easy to maintain and retain their integrity for many years.

Metallic
Metal sinks are made of cast iron, steel, copper and bronze. They are popular for their low prices, ease of installation, functionality and practicality. The metal has high strength and resistance to temperature extremes. The disadvantages are the susceptibility to scale formation and the need to ground the sink if there are electrical appliances and sockets nearby.
Varieties of attachments
Depending on the type of sink, there are different accessories for its attachment.
Brackets
Mounting with brackets is the most common technique for installing a washbasin on a wall. The supports are not visible, so the structure will not be knocked out of the overall interior of the bathroom.
Frame
Frames are usually used for the installation of exclusive design glass and decorative sinks. They come in square, round or rectangular shapes. Due to the large number of attachment points, they are characterized by high stability.
Plugs, dowels, anchors
The simplest methods of fixing the structure. The strength of the fasteners is chosen according to the strength of the wall and the dimensions of the sink.
What is necessary
Here is a list of the tools you need to install your sink in your bathroom.
Drill with hammer drill
Necessary for making holes in the wall.

Break through with a victorious solder
A victorious drill is required for mounting the brackets.
Wrenches or adjustable wrenches
For driving nuts and bolts.
Roulette
To measure the height.
Level
It will be necessary to install the sink strictly horizontally relative to the floor.
Pencil
It will be necessary to mark the places for drilling holes and the level of installation of the structure.
How to fix
Before installing, make sure the wall is solid. Often in apartments under the tiles in the bathroom there is ordinary drywall, which may not support the weight of the sink. In this case, the wall will have to be partially dismantled, mortgages installed.
Prepare construction details and all necessary tools and proceed with installation.
markup
Determine the installation height and accurately measure the distance between the devices. According to the standard, sinks are installed at a height of about ninety centimeters from the floor.
When marking the holes, use a level so that the structure is installed strictly horizontally.
Drilling holes for fixings
Drill holes should be approached carefully so that the coating does not crack. Before drilling a hole in the tile, you must use a plumbing core to plow the tile with a hammer. After drilling the tiles, the load-bearing wall is drilled with a perforator.
Placement of fasteners
The first step is to insert dowels or pegs into the holes made. This is necessary so that the anchor bolts are firmly held in the wall and do not loosen. Then we screw the rods into the holes, leaving the required length outside. This should be enough to accommodate the sink itself and the fixing nuts. If there are cracks under the tiles, they can be treated with epoxy glue.
How to install a sink
If the previous steps are carried out correctly, the installation of the sink itself will not cause problems. We thread the structure on the anchors and press it tightly to the bearing wall.At the ends of the pins, firmly tighten the fixing nuts. After installation, we connect the mixer and the drain system.
Fill the gap with putty
You can use glue to reinforce the attachment. Then, before directly installing the washbasin, its part adjacent to the wall is coated with a putty. The sealant treatment gives a stronger bond to the structure, but may cause problems with equipment replacement in the future.
Communications Login
After installing the sink itself, it must be connected to the water supply and sewage system.
Checking water intakes
Check the correct installation and operation of the water intakes. They should not protrude beyond the plane of the finishing wall. If the sockets protrude, it will be impossible to install the mixer accurately, since the reflectors will not completely cover the eccentrics, which will create a gap.
Installation of shut-off valves
The next step is to install shut-off valves. Cranes differ from each other in attachment and materials. They are made of cast iron, stainless steel, polypropylene, brass, bronze. Depending on the method of attachment, they are coupled, adjusted, clamped and welded.
The welded valve is mounted in the pipeline using a welding machine. It is difficult to tie it with your own hands, so such products are not very popular. For small diameter pipes, a socket is mainly used. For large diameter pipelines, flange fasteners are used. Fittings are universal and are used with pipes of different diameters.

How to install water pipes
Before installing the supply pipes, make sure they are not damaged.Also check the integrity of the gasket set. Do not pull the eyeliner pipe, so calculate the length you need in advance. Do not twist the eyeliner, as this will cause it to deform. You cannot bend it more than indicated in the passport. It is worth tightening the end caps by hand, tightening them a little with an adjustable wrench on the end, in order to avoid damaging the seal.
How to install a mixer
In expensive models of sinks, as a rule, a mixer is included in the delivery kit. For cheaper models, you will have to buy it separately. To install the mixer, screw the flexible hose with a wrench. Place a rubber gasket on the base of the faucet. Screw the studs. Thread the pipes into the sink. Slide the mounting piece from the bottom. Slide the metal washer over the top. Attach a union nut to each of the studs.
It is important to wrap tape around the outside of the blender when tightening the nuts.
Connecting pipes to the mixer
After installing the mixer, it must be connected to the water supply. Connect the ends of the underwater hose to the pipes and tighten the nuts.
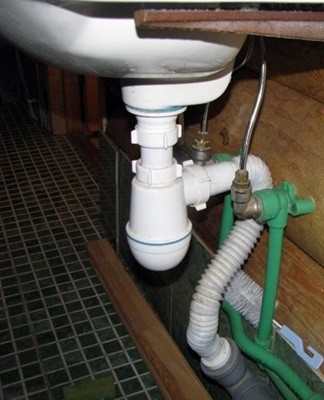
Collection and installation of a siphon
Assemble the siphon following the instructions for your model. Install gasket and slide on bottom. Place a spacer and a stainless steel outlet in the sink outlet. Tighten the connection screw with a screwdriver. Connect the siphon to the sewage system.
Review
Turn on the water supply and turn on the faucet. Inspect the connections, make sure nothing is leaking anywhere.
How to dismantle an old sink
Close the valves and drain the mixer. Disconnect the sink from the drain and the drain pipe. Remove the siphon. Unscrew the nut under the faucet, disconnect the hoses and remove the faucet from the sink.Gently unscrew the fasteners, holding the sink so that it does not fall, then remove the sink itself.
Bracket mounting technology
Before attaching the brackets, you must ensure that the wall is solid. Mark the mounting holes with a screwdriver or a nail. When drilling holes, control their depth, since soft plaster will not allow the structure to be firmly fixed. The base under the plaster should be drilled at least three centimeters. Polymer dowels are inserted into the holes, into which anchors are screwed to fix the brackets.
Rules of operation
Rinse the sink with warm water after each use. Remove food debris from the drain to prevent blockages. Clean the sink weekly with a sponge and detergent.
If the sink is very dirty, fill it with water and vinegar for several hours. Do not let the metal sink come into contact with rusty objects to prevent rust from appearing on the surface of the sink.