How much to charge the robot vacuum cleaner and what to do if this does not happen
Household appliances are constantly being improved, which facilitates daily household work. To combat dust, automatic devices have appeared that operate according to a given schedule. But what if the vacuum robot suddenly does not charge? What kind of repair does an expensive device need? Is it possible to find and fix the problem on your own without resorting to the services of service centers?
How to charge correctly
The robot vacuum charges in two ways: manually and automatically.
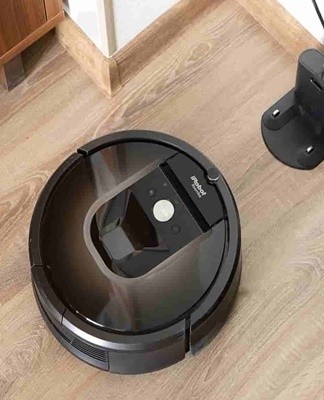
By adapter
The base's power plug connects directly to the vacuum's socket.
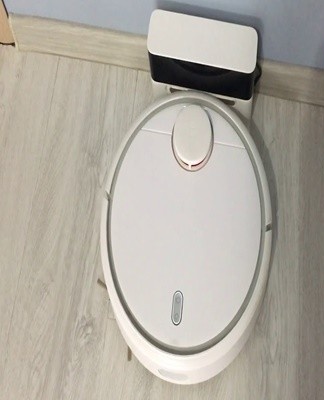
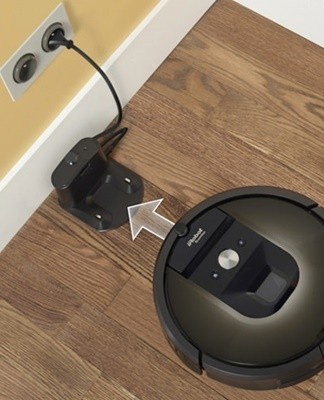
From the base
The robot enters the charging station or is placed on it.
Loading time
The vacuum will take about 3 hours to charge. When the battery is completely discharged, the charge is restored in 16 hours.
Rules of maintenance and operation
The manufacturer's instructions give recommendations for the correct use of the robot vacuum cleaner:
- garbage removal from the bin after each cleaning;
- timely cleaning of brushes, wheels, sensors, cameras, base contacts from contamination;
- replacement of engine and exhaust filters every 3 to 6 months;
- choose the right place for the charging station;
- remove small items and objects from the floor (socks, scarves, threads);
- store the battery during prolonged inactivity outside the vacuum cleaner in a cool, dry place.
Manufacturers of automatic vacuum cleaners emphasize the importance of properly charging the device for the first time. For any type of battery (lithium-ion or nickel-metal-hydride), it should last 16 hours, despite the green light coming on after 3-4 hours to indicate the end of charging.
What to do if it does not load
Charging issues can occur with a new robot and during operation.
The reasons for the absence of the indicator signal of the robot's charge when you turn it on for the first time:
- battery drift during transportation:
- battery isolation;
- lack of battery.
There is a label on the bottom of the robot that protects the battery contacts, which must be removed.
To check the presence and correct positioning of the battery, you will need to open the vacuum cleaner, ensure that the battery is present, remove it and replace it.
The robot has a malfunction indicator that flashes when there is no charge, and the vacuum cleaner gives a voice error message. In the instructions for using the robot there is a table, by checking it you can find the cause and remedy.
A list of problems you can fix yourself:
- The side wheel does not scroll properly, interfering with the connection between the robot and the pins on the docking station. It must be cleaned of debris and return mobility with rotational movements.
- The robot cannot enter the base. The reason for this is the disconnection of the docking station from the mains.
- The battery contacts lock.To make sure if it is present or not, inspect the lower part of the vacuum cleaner, on which the paper can stick during cleaning.
- Contamination of the contacts of the power supply and/or the station. To check its presence or absence, remove the door of the battery compartment (unscrew the screws connecting the cover of the lower part of the robot and the door of the battery compartment). Check that there is no debris on the contacts. Remove dirt with a clean, dry cloth. If there is no dirt, the contacts still need to be wiped with a dry cloth to remove dust. Replace the battery, close the battery and robot covers.
- Battery overheating. Do not charge the battery near heating devices or indoors at temperatures above 25 degrees Celsius.
In any case, you must ensure that the original battery is installed in the robot.
In this case, the following procedure is carried out:
- press the "CLEAN" button;
- hold for 20 seconds;
- let's go;
- a white spinning ring will appear around the trash can lid;
- the restart will be completed after 1.5 minutes (the light ring will turn off).

When you reset the settings, the cleaning schedule is saved. If the robot vacuum cleaner is connected to the load via an adapter, then it is necessary to check the condition (degree of pollution) of the socket of the charging station and the charging socket of the robot. Wipe the contacts with a cloth dampened with a few drops of alcohol/vodka. Then the plug is turned several times in the socket and the inclusion is checked.
Additional tips and tricks
First, the docking station must be protected from power surges. It is necessary to control the integrity of the wires going from the network to the base.The device requires a careful and careful attitude. Interruptions in the operation of the robot negatively affect the state of the battery.
The robot cannot be turned on immediately after replacing the battery. The new battery should "wake up" to the charging station. The vacuum is installed on the included base. The station's power indicator should turn green. The robot's charge indicator should light up intermittently. After one minute, the battery indicator will turn off and the station indicator will remain on, indicating that charging is in progress.
Before turning on the robot for charging and then using it for its intended purpose, you should carefully study the manufacturer's instructions. Following the manufacturer's advice on the timing of prophylaxis, cleaning the device, replacing consumables will allow you to use the vacuum cleaner without interruptions and contact the service center.