How to choose the best primer for walls for wallpaper and the rules for applying compounds
Decorating the walls with wallpaper requires careful preparation of the surfaces of the room. The last stage of the preparatory work is priming. To achieve a high-quality finish, you need to choose the right primer for the walls under the wallpaper. Manufacturers offer a wide range of quality formulations for all types of surfaces and types of wallpaper.
Do I need to prime the walls before pasting the wallpaper
Why prime the walls before sticking the wallpaper? Because wallpaper can only be glued beautifully on flat, smooth and dry walls.
Preparing walls for wallpaper installation is a more laborious and demanding process than the final decorative finish. The quality of finishing work depends on compliance with technology.
The primer is the last part of the preparatory work to create a coating film on the surfaces.Priming the walls before finishing the decoration is imperative to achieve a durable and beautiful wallcovering. The degree of adhesion of the decorative coating to the wall, the service life of the performed repair depend on the quality of the composition of the primer, compliance with the application technology.
Primer Coat Functions
The primer of the walls contributes to:
- dusting;
- a decrease in the absorbency of wallpaper paste, which reduces its consumption;
- increase the adhesion of glue and wallpaper;
- prevent fungal infections under the wallpaper;
- reinforce the wall material.
The choice of a primer is based on an evaluation of three parameters:
- wall material;
- their physical condition;
- type of wallpaper.
Building materials have varying degrees of moisture absorption, which is taken into account in finishing works. Gypsum board, timber and plastered/filled walls have varying degrees of moisture holding and loosening ability. There are special adhesives for different types of wallpaper, for which you need to create a suitable adhesive base. In some cases, wallpaper paste is used for the primer.
Advantages and disadvantages of primer
Wall primer is an emulsion of a specific consistency designed to fill porous structures. With its help, smooth surfaces with good adhesion are obtained. The composition of the emulsion may contain additives that prevent biological damage. The drying time depends on the composition of the primer mixture and the temperature conditions in the room.
Advantages and benefits of primers:
- reduce the consumption of wallpaper paste;
- give a uniform and strong adhesion of the wallpaper to the wall surface;
- prevent the development of mold;
- have no harmful effect on human health;
- form a flat and smooth surface;
- colored primers enhance the decorative effect of the wallpaper.
The disadvantages of the primer are manifested in non-compliance with technological requirements, which affects the quality of decoration:
- shifting wallpaper from the walls (when pasted on damp walls);
- peeling off the plaster under the wallpaper (using too concentrated a composition).
The use of transparent emulsions makes it difficult to visually determine the uniform distribution of the impregnating composition along the wall.
Which primer to choose
Primers are classified according to the types of wall surfaces:
- For concrete and plaster surfaces, manufacturers offer a deep penetration primer. The emulsion strengthens fragile structures and creates good adhesion.
- For "heavy coverings", when walls and decorative materials have minimal absorbency (non-woven, vinyl wallpaper, concrete and drywall).
- For the preparation of decorative rooms with high humidity (antiseptic floors).
- Universal - for all surfaces.

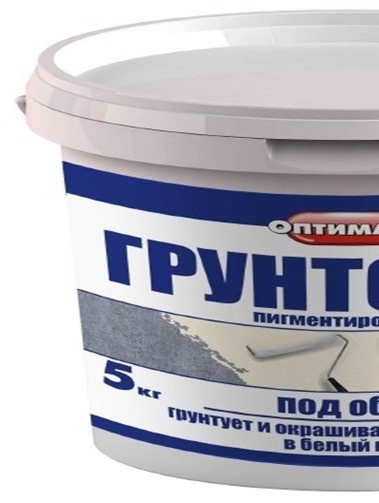
Manufacturers offer compositions for priming walls under wallpaper:
- acrylic (water-based);
- alkyd (composite, based on solvent and resinous substances);
- latex (polymer);
- concrete contact.
The most demanded for its properties and price is a water-based primer.
Under non-woven wallpaper
Non-woven wallpaper means a material made of untreated modified cellulose and paper, vinyl wallpaper on a non-woven backing.
Non-woven wallpaper is a dense corrugated material that allows you to hide minor surface imperfections.
To prepare the walls for this type of wallpaper, 4 primer options are used, depending on the type of surface:
Acrylic compound (universal). Has varieties:
- reinforcement (plaster, wood);
- deeply penetrating (concrete, plasterboard);
- antiseptic (wooden, for high humidity);
- adhesive (paint, concrete, plasterboard).
- Alkyd. It is used for decorating walls made of chipboard, fiberboard, plywood, wooden panels. The polymer composition has the property of forming a thin, moisture-resistant film with good adhesion properties. Available in three colors: white, gray and brown. For priming under non-woven wallpaper, it is recommended to use a white composition.
- Latex. Effective in preparation for decorating furniture walls, plasterboard, wood-containing materials. Advantages - high penetrating and strengthening ability, moisture resistance.
- Wallpaper paste. For the primer, the same brand of glue is used as for gluing. Wallpaper paste is diluted to a thinner consistency and applied to the walls. Does not apply to walls with structural defects.
Before gluing non-woven wallpaper, you need to create a uniform color base. Otherwise, the color background will be disturbed due to the transmission of dark spots from the primer.
Under the vinyl wallpaper
Non-woven vinyl wallpaper has high density and weight. In order for them to adhere to the walls, good adhesion of the glue and the primer is necessary. Concrete, drywall, walls painted with oil paint or enamel have a smooth surface and do not absorb moisture well.
For decoration, these walls are treated with acrylic compounds with mineral inclusions: quartz sand. This adhesive primer, after drying, turns into a smooth and rough surface resembling sandpaper. Thick, embossed wallpaper will stick well and stay on the wall for a long time.
On looser substrates, vinyl coverings are bonded to an acrylic primer (reinforcing, deep penetrating, strong adhesion, water repellent).
For the paper
Paper wallpapers are pasted on acrylic, alkyd primers, wallpaper glue. The choice depends on the type and condition of the wall surfaces:
- For smooth, even, low-absorbency walls, use an acrylic primer or wallpaper paste.
- Chipboard, fiberboard, wood panels are treated with an alkyd composition.
- Coated - with latex primer and wallpaper glue.
When gluing the wallpaper to the putty, wallpaper glue diluted 2 times is used.
Under the washing wallpaper
Washable wallpaper has a structure similar to vinyl wallpaper. Purpose - rooms with high humidity (bathroom, kitchen) or dirty (hallway, hallway). To obtain a durable adhesive layer, use an acrylic primer with quartz sand (concrete contact).
Tools Required for Seed Jobs
To start you will need:
- paint bath;
- roll;
- narrow flute brush;
- a piece of foam rubber;
- spray.
The mechanical method of wall processing gives a better result than the manual method, but requires some skill to achieve a uniform finish.
Step by step guide
Preparatory work before wallpapering is easy to do with your own hands.
Surface preparation
Primer walls must be properly prepared:
- remove old wallpaper;
- washing off the water-based layer;
- clean the oil layer.
Painted walls are completely free of paint if there are peels and cracks. Walls in good condition (plain and smooth) are washed with lukewarm water to remove dust and dirt.
Walls with damaged plaster are subject to repair: filling and subsequent filling of cracks. After drying, the putty layer is sanded.At the final stage, the base under the primer is dusted with a vacuum cleaner or broom.
Plasterboard is putty, after which it is treated with soil.

To obtain a high-quality coating for wallpaper, it is recommended to impregnate:
- with acrylic composition - 2 times;
- alkyd - 2 times;
- latex - 1 time;
- with mineral additives - 1 time;
- wallpaper glue - 1 time.
The main thing in the preparation of the primer is to remove dust and dirt, seal cracks, level the walls.
Dilution of the working solution
Preparation of the primer mixture is carried out according to the manufacturer's instructions. Acrylic concentrates are diluted with water. Ready-to-use compositions (water-based, alkyd, latex, concrete contact) are well pre-mixed. The wallpaper paste used for the primer is diluted with water 2 times.
Application of the first layer
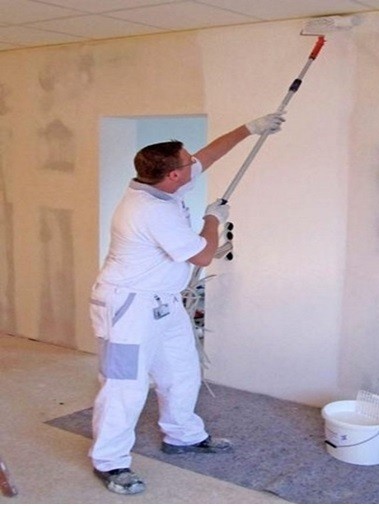
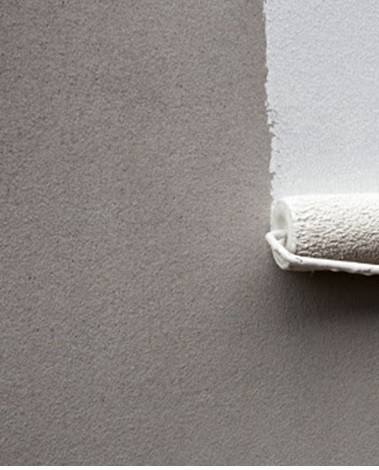
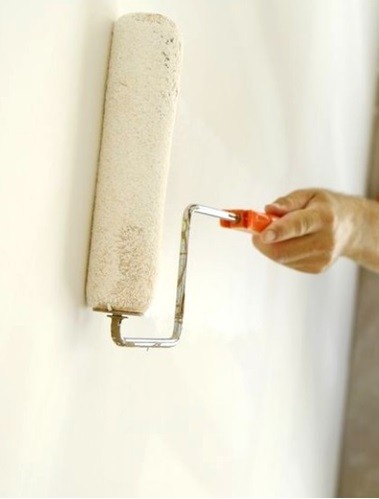
The priming process can consist of 1 or more steps, depending on the type of primer chosen, the material and quality of the surfaces and the type of wallpaper. The first coat is applied to the entire wall simultaneously so you can visually check how the entire area is primed.
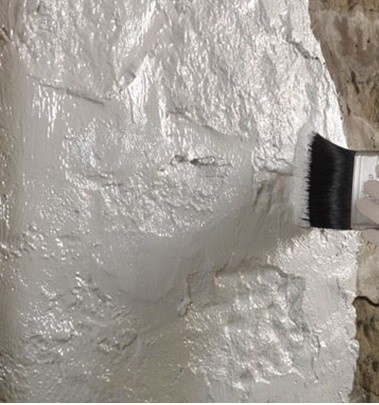
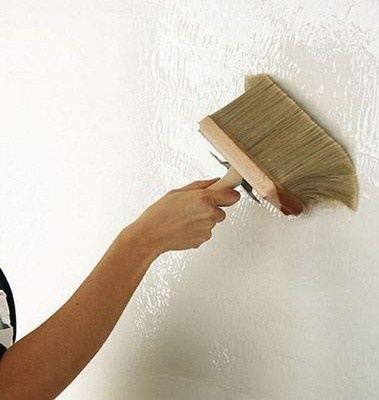
Prepared and well-mixed primer (first portion) is poured into a squeeze tray. The roller is moistened in a primer and pressed well. The floor is applied to the wall with gentle movements, moving the roller up and down, from floor to ceiling, in order to avoid splashing. First, the area accessible to the roller is primed.
The corners are primed with a wet brush, moving it up and down. The joints of the walls with the floor and the ceiling are also treated with a brush. The primer should be evenly distributed over the entire surface, immediately removing stains. When dry, the wall should be smooth to the touch and visually flat.
Drying time
Wallpaper should be pasted, in most cases, on dry walls. The drying time of primers depends on the number of layers, the type of soil, the ambient temperature.
Average indicators are indicated in the instructions of the manufacturers:
- acrylic primer and latex dry for 2-3 hours;
- alkyd - 4-5 hours;
- wallpaper glue - 10-12 hours;
- concrete contact - 24 hours.
When applying 2 layers, the drying time increases by 2 times.

The main mistakes made when drying
The primer must dry, except in special cases. If you don't give it time to polymerize, it will be ineffective. It is important that the primer layer dries evenly over the entire depth and over the entire surface.
Open windows and doors in the room (draught) will lead to non-simultaneous drying of the surfaces. The flow of hot air on the walls from a heat gun or hair dryer will disturb the uniformity the depth of the primer: the exterior will dry out, and the interior will remain wet.
How long does it take to glue the wallpaper
Finishing starts depending on the type of floor. If the primer was carried out with wallpaper glue, the installation begins without waiting for complete drying. Paper and wallpapers based on non-woven paper are glued immediately if you use an acrylic primer and water-based wallpaper paste. In all other cases, wallpapering begins after the primed walls are completely dry.
Recommendations from the masters
The priming process must be carried out at an ambient temperature of at least 5 degrees Celsius. The temperature of the walls should not be close to zero.Otherwise, the emulsions will not saturate the surfaces and will not be evenly distributed over the entire surface.
In baths, toilets, kitchens, antiseptic floors with water-repellent properties should be used. In bathrooms, it is recommended to apply a primer in 3 coats. Plasterboard walls and plasterboard surfaces must be primed before gluing. Otherwise, later when you try to change the wallpaper, they will be removed with the gypsum boards or a layer of putty.
Unevenly painted walls should be tinted with a paint primer. Using PVA glue when gluing non-woven wallpaper in the future will spoil the appearance of the room (yellow spots will appear).
To determine unprimed areas, two methods are used: light and color. In the first case, priming begins from the window to the door. If you look along the wall towards the window, dry and wet areas will be visible. In the case of the color method, a color palette is added to the floor during preparation to match the decorative material.
Decorative material is glued to well-dried walls after priming. To check their dryness, use tape: a piece of tape is firmly attached to the surface, trying to achieve air-free contact with the surface. If the next day there is an accumulation of moisture inside the tape, then it is necessary to prolong the drying.
The soil should be diluted according to the table specified in the manufacturer's instructions. Each type of surface requires its own degree of concentration: for moisture absorption - more liquid, for water repellent - thicker.
Excessive priming of surfaces reduces the quality of the finish: an excessive number of coats creates the effect of a glazed surface on which the decorative finish adheres weakly.In addition, the vapor permeability of the wall is violated.
When priming soft materials, for example, finishing putty, apply a roller and a brush once along the plane, so as not to soak the surface layer.
Diluted primer should not be stored for a long time. Under the influence of sunlight, in the heat, microorganisms will soon form in it, and it will deteriorate. Delamination will occur in the emulsion. Such a composition cannot be used.
The surfaces to be treated must be well free of dust, otherwise the polymer film will fall off after drying under the weight of the pasted wallpaper.