How to store Jerusalem artichoke at home in winter, rules and best methods
Jerusalem artichoke, earth pear and tuberous sunflower, also called Jerusalem artichokes, belong to the category of dietary foods. It is widely used for nutritional and medicinal purposes. The fruits of this plant are rich in ascorbic acid and B vitamins. It is necessary to know how to store the Jerusalem artichoke at home in winter in order to preserve all its precious properties.
General collection rules
For several hundred years, people have been growing Jerusalem artichoke, using it as affordable food and medicine. There are certain rules for picking ripe fruit. The crop can be harvested in late autumn - after the end of the rainy period, but before the first frost.
However, the preferred time is early spring, before the tubers start sprouting. In this case, the maximum amount of vitamins is retained. Jerusalem artichoke tolerates frosts down to -40 degrees Celsius and is able to survive well in the soil layers, so it can be dug up as needed.
Jerusalem artichoke has a feature - a thin and weak crust. Thanks to her, moisture quickly evaporates from the tissues of the fetus, which accelerates the aging process. At the same time, it is thanks to this skin that the tuber safely overwinters in the ground without losing its taste, nutritional and healing properties.
Jerusalem artichokes are best harvested in two stages. Collect one part in the fall, before the onset of frost, and the second - in the spring, after wintering. The part of the Jerusalem artichoke that remains in the ground should be covered with snow or dry earth.
Harvesting the Jerusalem artichoke must be done in several stages:
- Cut Jerusalem artichoke bushes all over the site, leaving a stump up to 30-40 centimeters high from each stem. These shoots will help you orient yourself correctly when digging up the tubers later.
- Dig up the Jerusalem artichoke using a shovel or pitchfork. The second option is more convenient because it makes it easier to dig up the roots and reduces the risk of accidental damage.
You can store root vegetables in cellars, basements, as well as on balconies. They must first be poured with clean, moistened sand and placed in wooden boxes of a suitable size.
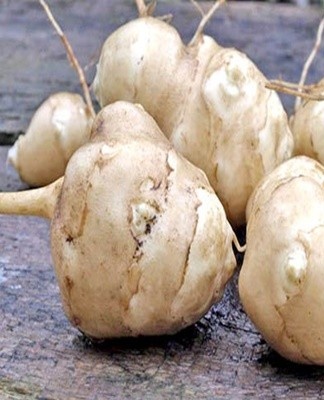
How to choose the right one
Jerusalem artichoke should be chosen correctly, paying attention to several main points:
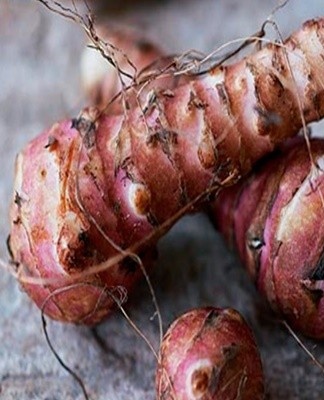
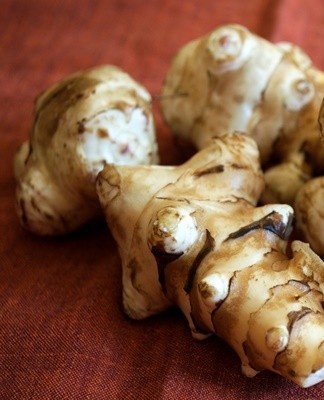
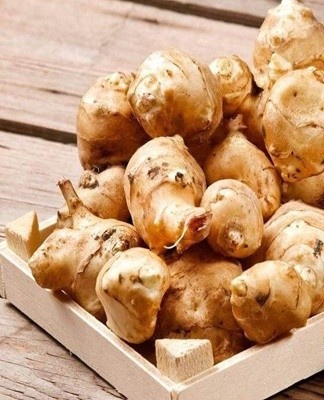
- Root crops are characterized by yellow, reddish and brown colors.
- The texture of quality specimens should be dense and elastic. Slow and mushy root vegetables should not be bought.
- The presence of roughness and small growths on the surface of the Jerusalem artichoke bark are the norm.However, it is worth abandoning the acquisition of root crops with wrinkled skin and pronounced spots.
- Fresh root vegetables have a light, pleasant earthy smell.
Optimal storage conditions
When storing Jerusalem artichoke, certain temperature, humidity and lighting requirements must be observed.This will fully preserve the valuable properties of root crops.
Temperature
Jerusalem artichokes are recommended to be stored at home at temperatures from +4 to -1 degrees Celsius.
Humidity
The optimum humidity level for storing Jerusalem artichokes is 85%.
Lighting
Root crops should be protected from the sun.
Recommendations for choosing a location
You can store Jerusalem artichoke over the winter in the cellar, basement, balcony, glass containers and other suitable places. Each method has its own advantages.

Basement or cellar
Storing Jerusalem artichoke root crops in the basement or cellar is convenient because you do not need to carry out a long preliminary preparation. The disadvantage of this method is the short shelf life.
When using this method, you must:
- Place Jerusalem artichoke tubers in wooden or plastic containers, without first cleaning the remnants of the earth.
- Pour a layer of sawdust or peat on top.
You can do it a little differently:
- Grease the roots with clay.
- Dry.
- Place in a plastic bag and tie tightly to keep air out.
When storing Jerusalem artichoke in the basement or cellar, it is necessary to check the roots from time to time for signs of rot.
Freezer
Jerusalem artichokes can be stored for up to three months in the freezer. It needs:
- Rinse the root vegetables and let them dry out a bit.
- Peel.
- Cut into small cubes.
- Place in a food container or polythene bag. If a bag is used, it should be tied tightly to create a vacuum inside.
Subsequently, to thaw Jerusalem artichoke cubes, you must place them in cold water.
Fridge
You can also store root vegetables in the refrigerator, but not so long - within three weeks. To do this, you need to peel the Jerusalem artichokes and put them in sealed plastic containers.
On the balcony of the apartment
A glazed balcony in a city apartment is a good place to store Jerusalem artichoke roots in the winter. Useful properties will be retained for two months even with some freezing of the tubers.
Before going to the balcony, the Jerusalem artichoke should be placed in a wooden box with wet sawdust or sand at the bottom.
In a glass jar
Glass containers are used to store dried or salted Jerusalem artichoke. This method does not apply to fresh, untreated root vegetables.
Immersion in paraffin
Paraffin waxing is one of the most reliable methods for preserving the original juiciness of Jerusalem artichoke for a long time. However, it is important to take into account that this type of tuber does not tolerate prolonged heating. This procedure must be carried out in a cold room so that the roots do not overheat and can cool down naturally.
You must do the following:
- Gently peel the tubers from the soil residues without damaging the thin skin.
- Dip each root vegetable in a previously prepared container filled with melted paraffin.
- Let the roots dry for a while.
- Place in the basement or refrigerator for additional storage for a month.
In a trench on the site
One of the easiest natural methods of storing Jerusalem artichoke in the winter is to make special trenches on the site. It is a convenient method, but it has one drawback - the culture remains vulnerable to rodents.
Therefore, in this case, it is recommended to place burdock inflorescences close to the storage site of root crops, which has the ability to scare away unwanted visitors.
When using the trench method, several rules must be taken into account:
- Dig a trench in the fall when the ground is soft.
- The minimum depth should be half a meter.
- A thick layer of straw or sawdust should be laid out at the bottom of the trench.
- Select good quality, undamaged fruits and place them in a trench.
- Cover them generously with a layer of soil or straw.
- Cover with plastic wrap and fill with soil to the top edge of the trench.
Until early spring, Jerusalem artichoke can be kept in the trenches.

How to Freeze Properly
In the frozen state, you can store grated or chopped Jerusalem artichoke roots, as well as (small) whole Jerusalem artichoke roots. First of all, the tubers must be washed and peeled. Cut with a sharp knife or a grid. Then carefully fold into food containers or plastic bags (which should be tightly tied) and sent to the freezer for storage.
Drying methods
In dried Jerusalem artichoke, almost all the beneficial properties inherent in root cultivation are preserved. You can prepare it in several ways - in the oven, in an electric dryer, or naturally, in the fresh air.
On air
Air-drying root crops is one of the most affordable and popular methods for preserving key properties. This procedure should be done within 5-7 days, which should be sunny and clear. Cloudy weather is not recommended for drying Jerusalem artichoke in the open air, since the process will be significantly delayed, and the roots themselves may be damaged by midges and flies.
Spread the whole or chopped Jerusalem artichokes on parchment paper and expose to the open air. The product can be considered completely ready as soon as all the moisture has evaporated from it.
In the oven
The kiln drying process is faster and can be applied at any time of the year, regardless of weather conditions. In this case, you must:
- Place special parchment paper on clean baking sheets.
- Cut the Jerusalem artichoke tubers into thin slices and place them on the covered baking sheets so that they do not come into contact with each other.
- Set the oven temperature to +50 degrees and hold for three hours. During this period, part of the water evaporates from the cut tubers.
- Leave the Jerusalem artichoke slices alone for a day so they can cool naturally.
- Return the chopped root vegetables to the oven, where they are finally baked at a temperature of 60 degrees.
The result is very tasty thin and crispy slices of Jerusalem artichoke, which fully retain their useful properties.
In an electric dryer
The electric dryer is very convenient for preparing such parts, since it is equipped with several sections and a function for adjusting the temperature level. On the dashboard, you can preset all the necessary settings. The device will notify the availability of the product with a special signal.
whites for winter
The ground pear makes delicious jams, jams, as well as pickled and marinated preparations.
winter salad
For an appetizing vitamin salad for the winter, you will need:
- one kilogram of fresh roots of Jerusalem artichokes;
- half a kilogram of carrots;
- 100 grams of lemons;
- 35 grams of salt.
The cooking process is simple:
- Peel and rinse the washed root vegetables and carrots under running water.
- Grate them or cut them into thin strips (to taste and desire).
- Wash the lemon and, without peeling it, grate it on a medium grater.
- Mix all the ingredients and sprinkle with salt. Leave in this state for five hours - enough juice will be released during this time.
- Arrange the prepared salad in sterilized glass containers and cover with lids.
- Sterilize the jars for about twenty minutes, then close them tightly, let cool naturally and move to a cool place where the salad will be kept.

Jam
Jam from these root vegetables with the addition of additional ingredients is not only tasty, but also healthy. To prepare it, you will need:
- 1 kg of Jerusalem artichoke;
- 250 g of honey;
- 2 medium lemons.
Description of the kitchen:
- Rinse the tubers under running water, peel them and grate them.
- Stir in the honey and let sit for ten minutes to release the juice.
- Peel the lemons and remove the seeds, then grind them with a blender or meat grinder.
- Stir the lemons with the Jerusalem artichoke until smooth.
- Put in sterilized glass jars and close with sealed nylon lids.
- Place in a cool place for later storage.

Jam
Jam is no less tasty and healthy. To prepare it, you will need:
- 1 kg of pear roots in the ground;
- 500 g of plums of all kinds;
- 100g of sugar;
- 100ml of water;
- 5g citric acid.
The cooking process is very simple. Necessary:
- Wash the plums and remove the pits.
- Carefully rinse the Jerusalem artichoke with a brush and, without peeling it, cut it into thin slices.
- Put all the ingredients in a bowl and mix with water and sugar.
- Bring to a boil over low heat, remembering to stir constantly.
- Boil for an hour under the lid, stirring the mass regularly.
- Slightly cool the prepared jam and pass it through a colander to easily separate the plum skins.
- Boil the grated mass with the addition of citric acid for 10 minutes over low heat.
- Transfer to sterilized jars and roll up with sealed lids.
Fermentation
To prepare a healthy marinated snack, you will need:
- 1 kg of root vegetables;
- 100 g of fresh dill;
- 1 liter of water;
- 60g of salt.
First of all, you need to select tubers of the same size and good quality, then follow a series of actions:
- Rinse and dry the Jerusalem artichoke roots.
- Cut them into thin slices and place them in a glass container.
- Alternate each layer of thinly sliced root vegetables with sprigs of dill.
- Prepare the brine by dissolving the salt in boiling water.
- Wait for it to cool and pour the brine over the pot with the ingredients.
- Maintain under oppression at room temperature for one week.
- Place in a cool room for later storage.
Stripping
To prepare a pickled snack, you will need:
- 1 kg of ground pear;
- 600ml of water;
- 200 g caster sugar.
Root vegetables can be used with or without skin. In the first case, they must be thoroughly cleaned with a kitchen brush.
Cooking process:
- Place the washed roots in a glass container.
- Prepare a brine from 2 liters of boiling water and 4 tablespoons of salt.
- Boil and cool the brine, let sit for 15 minutes and pour over the root vegetables.
- After a week, drain the brine and add the peas and garlic cloves to the jar.
- Bring another 2 liters of water to a boil and add cilantro (to taste) and 3/4 cup of vinegar.
- Remove the resulting marinade from the heat and pour it into jars.
You can eat the pickled product after three days.
Additional tips and tricks
In order for the tubers to be reliably stored at home, certain rules and recommendations must be followed.To preserve the beneficial properties, root crops should be placed in peat, sawdust or moistened sand. Under such conditions, the freshness and nutritional value will last for more than 60 days.Root crops should be sent for long-term storage immediately after being dug up. Otherwise, they may be damaged due to exposure to high temperatures and exposure to sunlight.
Cases that show signs such as darkening, loss of juiciness, appearance of mold, lack of a characteristic fresh odor, green spots and fungal overgrowth are not subject to long-term storage . In addition to freezing and drying, many different preparations for the winter can be prepared from root crops. Jerusalem artichoke is combined with sea buckthorn juice, coriander, garlic, mustard, pepper and lemon.