Do-it-yourself bathroom tile restoration, how to repair chips and remove scratches
As a result of mechanical damage or long-term use, defects form on the tiles in the bathroom. During a repair, the question often arises of how to properly repair a chip on a tile on the floor. Eliminating the defect, you need to follow the step-by-step instructions so that the final result meets the requirements for the condition and visual perception of the coating.
How can you update your old bathroom tiles with your own hands?
There are several ways to restore tiling. It is recommended to choose the appropriate option, taking into account the size and extent of the damage, as well as your own wishes for the appearance of the tile after the repair.
Vinyl Stickers
Using vinyl stickers allows not only to hide flaws, but also to transform the interior of the room. The stickers are made of PVC film with a self-adhesive backing.
Any image can be placed outside the vinyl sticker, so you can choose an applique that will match the dominant design.
The proliferation of vinyl decals in bathroom furniture is associated with a number of benefits. These include:
- Decorative features. When properly combined with a seasoned style, a vinyl sticker can become a strong accent on the siding or an addition to the finish.
- Possible replacement. If you wish, you can easily peel off the sticker and place a new one in its place. To remove the sticker without leaving a trace, simply moisten it with warm water and gently tear it off the tile.
- Masking of large defects. With the help of a sticker, you can visually hide large chips by choosing a product of the appropriate size.
- Ease of maintenance. The stickers are impervious to moisture and stubborn dirt. To maintain cleanliness, wipe only the vinyl surface with a damp cloth.
- Affordable cost. Decorative items are sold at a low price due to easy production and minimal cost price, which helps to reduce repair costs.

Applying patterns
If shallow chips have formed on the surface of the tile, they can be visually masked by applying a pattern. To apply a pattern on ceramic tiles, you will need to use a special paint and stencil. The need to use a stencil arises in cases where artistic skills do not allow you to independently create and depict a drawing. The pattern on the floor makes the decoration of the bathroom exclusive and allows to show creative imagination.
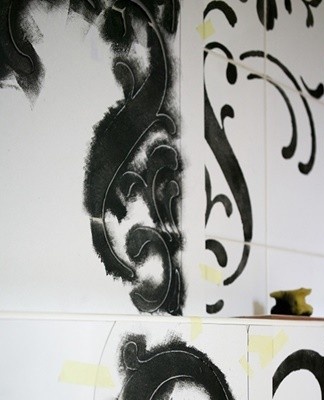
When using a stencil to apply a pattern, it is recommended to follow the step-by-step instructions. It includes the following actions:
- Wipe down the liner with an alcohol solution or cleaning agent to remove accumulated dirt and dust. Wipe the cleaned surface with a dry cloth.
- A small amount of glue is applied to the back of the stencil. This is necessary for convenience and ease of subsequent application of paint to tiles.
- Paint of different colors is applied sequentially. It is better to start tinting with a dark color in order to better hide the flaws on the tiles. When drawing a pattern, the brush is held perpendicular to the coating, and the paint is applied with tangential movements.
- After the drawing is completed, the stencil is immediately removed, as the acrylic paint dries almost instantly.
- If part of the pattern is smudged, the details are corrected by drawing the outline and other pattern elements. Inaccurate smears can be removed using the back-end of a normal match.
Once the paint is completely dry, the tiles can be washed even with the use of cleaning products. The acrylic paint is water repellent and resistant to solvents.
Paint
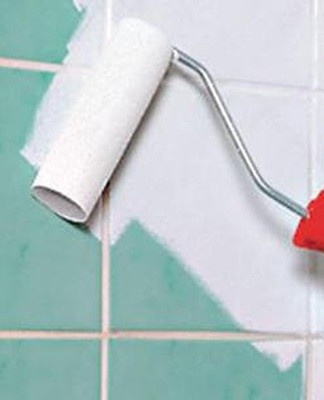
Staining ceramic tiles is an unconventional finish. In addition, this method is interesting for the opportunity to radically change the perception of space. You can paint the walls with different compositions, which are chosen taking into account the type of room. Most often, acrylic, epoxy and gloss solutions are used for finishing. The acrylic paint is bright in color and easy to use. Epoxy dries quickly and is virtually odorless. Brilliant solution preserves enamel coverage and provides a pronounced shine.
After choosing a paint, you need to decide on a design option. In the bathroom, you can perform major or partial staining.A foam roller is used for painting a large area, and brushes of different sizes are suitable for drawing small details.
Before painting, the tiled coating is cleaned and wiped with a dry cloth. Depending on the style chosen, limiters in the form of masking tape are glued along the edges of the repaired area. This will help not to stain the rest of the space and paint the ceramic surface better.
volumetric decor
An unusual option for decorating tiles to enhance the design and hide chips is the creation of volumetric compositions. In the bathroom, this design option looks impressive and original. The procedure for creating a three-dimensional decor requires the following steps:
- Prepare work materials and equipment. For decoration you will need multi-colored glasses, rhinestones, beads and other design elements. As an adhesive base, you will need hot melt glue, Moment or acrylic varnish.
- Clean and degrease the tile surface. After processing, the coating is allowed to dry.
- Provide a design option. When creating a composition, there are no special rules, so you can create any decor according to your own wishes.
- Glue decorative elements. An adhesive solution is applied to the surface of the selected elements and fixed on the tile. For secure fixing, it is recommended to lean the element against the wall and hold it there for a few seconds.
Renewal of seams
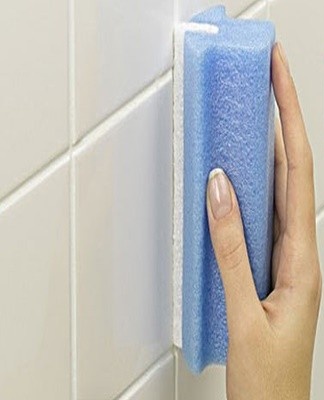
If the tile joints have lost their original appearance, become dirty and begin to crumble, they need to be updated. The most common way to renew seams is to clean them thoroughly with detergents.To remove contamination, use a powder, liquid gel or spray.
The agent is applied to the inter-tile space, left for 10-15 minutes, after which the surface is cleaned with a toothbrush or sponge.
In advanced situations, when cleaning does not yield the desired result, it is easier to apply a new layer of grout. For this, the prepared composition is applied in small portions between the tiles and tamped with a spatula. Excess material is gently wiped off with a sponge. When the grout becomes harder, the surface of the coating is wiped off along the contour of the joints and smooth concave joints are formed.
How to remove scratches and chips
Significant damage to the tile coating, which visually cannot be masked, requires full repair.To make the chipping less noticeable, you can use stucco alabaster. The material is diluted to a pasty consistency and the defect is filled, forming the required shape upon application. After the alabaster has hardened, the surface is polished, dust residues are removed and decorated with acrylic paint. It is important to choose the right shade of paint to ensure harmony with the overall design.
How to perform a full replacement
In case of significant wear of the coating, a complete replacement of the tiles is the best option. To reduce labor costs, it is recommended to study some nuances of dismantling and laying tiles in the bathroom.
Floor tile
To remove the tile from the seats, cover it with a thick cloth and apply strong blows with a hammer. The crushed material is collected at the base and the wall is cleaned of traces of glue, dust and other construction debris.The place of laying the new material is opened with a primer, after which a whole tile is fixed with the glue solution, leaving the assembly joints with the help of distance crosses.
Ceramic
Dismantle old and damaged ceramic tiles in the bathroom using specialized tools. For practical work, it is better to use a hammer drill with a spatula attachment, a spatula or a chisel. After getting rid of the previous coating, the entire surface is washed with soapy water and opened with a deep penetration primer.
Additional tips and tricks
If it is necessary to replace the flooring, an important nuance is the preliminary leveling of the surface. The plane is leveled with the help of special building mixtures, and since the screed tends to expand, it is necessary to additionally use steel reinforcement. When laying floor tiles directly, alignment pressure is exerted evenly so that excess of the applied adhesive solution does not protrude beyond the tile. Additional tips include:
- a distance of 1-3 cm is always left between the tiles, which after installation are filled with grouting material;
- the adhesive solution for fixing the coating is evenly distributed, using a special notched trowel for convenience;
- when choosing tiles for installation on the floor, it is important to take a thicker variety than the options for the walls in the bathroom;
- during the process of work, it is better to use protective glasses and gloves, which is especially important when removing the old coating.