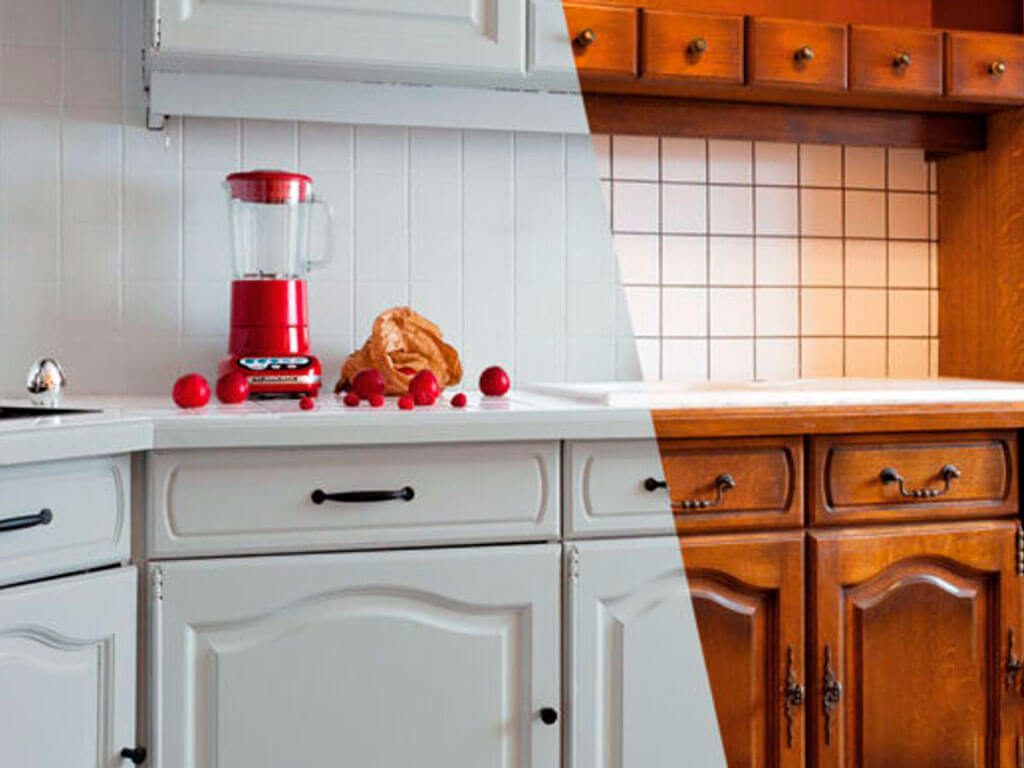
How to repaint a kitchen facade with your own hands and the choice of suitable compositions
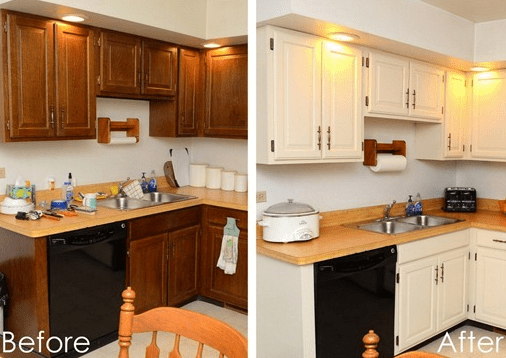
A favorite kitchen installed in conditions of high temperature and humidity gradually loses its attractive appearance, no longer pleases the eye with the brightness and beauty of the facades. A budget option for restoring furniture is to renew the paint. Let's consider the main stages of work on the restoration of kitchen facades - preparation, painting - with an algorithm of actions, possible difficulties and their solution.
Difficulties in painting
Facades are the front parts of the kitchen set, doors, front walls of drawers. The more intricate their design, the more comfortable and chic the furniture will be, but it will make painting difficult. Repainting kitchen cabinets seems simple at first glance. What difficulties you need to take into account when working with headphones:
- the need to allocate sufficient time is not a quick affair;
- preparing a workplace;
- stock up on tools for dismantling furniture and painting;
- purchase a high-quality dye suitable for the material of the facades;
- take into account the protection of decorative parts of the helmet, which do not require painting (glass), prepare masking tape, film.
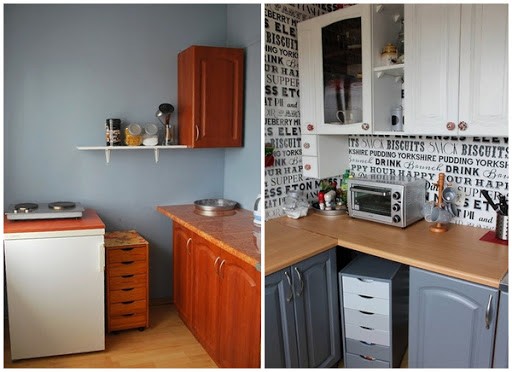
It is necessary to imagine how the kitchen will look in the new color, whether the furniture will fit into the interior of the room. It is not worth saving on painting - large-scale work awaits us, repainting is difficult. Craftsmen should remember that they will not look like new facades.
Which paint is better for wooden facades
Increased demands are placed on kitchen colorants:
- moisture resistance;
- resistance to temperature fluctuations;
- resistance to washing and exposure to household chemicals.
For repainting the facades, 2 types of paints are suitable - enamel and acrylic compositions.
Acrylic paints are used only for areas of the helmet that are not in contact with the sink, oven, stove.
Automotive enamels are produced on different bases, it is better to use acrylic paints for facades.
chipboard
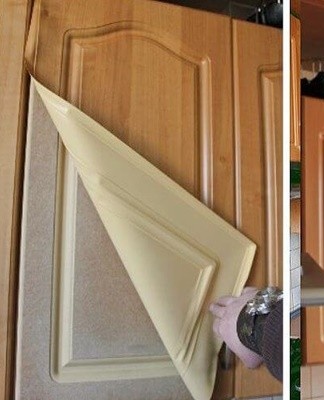
Particleboard is a short-lived material that is destroyed in the kitchen by moisture. Budget furniture is made of chipboard. Usually cheap paints are chosen for painting facades, focusing primarily on the color palette, and not on quality.No decorative element is made on chipboard, the facades are flat, without milling. When painting, it is important to carefully seal the ends of the plates (edges) through which moisture penetrates, leading to delamination of the material.
MDF
Headsets with MDF facades are among the most common types in our kitchens.Various types of milling, decorative glass, asymmetry are often used on the doors. When painting, the decor is covered with masking tape. For MDF, any type of paint is used, but it is better to stick to auto enamel. The composition reliably adheres to the panel, the car enamel is glossy and rich, shines in the sun. When painting the facade can be decorated with glass and other elements.
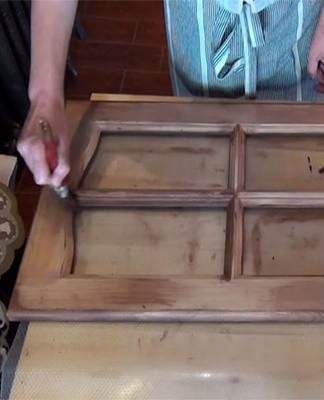
natural wood
Wooden helmets look rich and respectable, but the lattice needs special protection from moisture, burns and hot air. For painting, they use self-enamels, not stingy, choose high-quality and expensive enamels in order to protect the tree from pests and swelling, subsidence and deformation of the facades. If the wood is unpainted, clear varnishes are often used.
What else do you need to do it yourself
By properly preparing the tool set, you can avoid damage to the helmet parts during disassembly and assembly, and paint efficiently and quickly. For work you will need:
- a screwdriver for dismantling the fronts, a set of screwdrivers of different profiles;
- a set of brushes, a roller, a container for dye;
- dye;
- in the presence of large chips and scratches on the facades - putty, spatula;
- a primer composition corresponding to the dye;
- protective film;
- construction hair dryer - for removing the film coating from chipboard products;
- fine and coarse sandpaper (grinder);
- solvent to remove grease stains.
For work you will need glasses, gloves, overalls. They think over decor elements in advance - you may need a stencil for drawing drawings, paint of a different color, glue.
The masking tape is used to cover the parts of the facade that do not require painting, they must be stored in sufficient quantity.
When painting, you can change the fittings - replace poorly functioning handles, door hinges, opening mechanisms. It is better to choose elements for which you do not need to make new holes on the headset. All components of fittings are purchased in advance.
Home coloring algorithm
Before starting work on repainting, it is necessary to prepare tools and materials so that there are no delays during the repair and to clearly understand the sequence of actions.
Workplace and product preparation
The first stage of work is the dismantling of the front parts. They are carefully removed using screwdrivers, screwdrivers, trying not to damage the fasteners and facades. The removed elements are marked to facilitate later assembly of the helmet. If the side walls, cornices need repainting, then they are also dismantled.
Prepare the workplace, taking into account the following points:
- space is freed up in the room to place all the parts to be painted;
- prepare tables, stools, boxes on which the parts will be laid horizontally for drying;
- the room should have good ventilation, as solvents, primers, paint have an odor;
- on the floor, the work table is covered with a protective film to protect it from paint;
- the windows in the room are covered with a mosquito net (in summer), but they are open for ventilation;
- provide recommended temperature conditions for working with the dye.
Decorative details, locks, glass are removed from the facades or carefully covered with masking tape.
Sharpening
Removing the old coating is the longest process before painting the facades. For professional use:
- construction hair dryer to remove the protective film from chipboard or MDF - the surface is heated and the film is gently peeled off;
- the paint is removed with sandpaper or a grinder - the first stage using coarse-grained, then they switch to fine-grained materials;
- to remove varnish, paint, you can use special liquids;
- the last stage is the removal of dust and crumbs (use dry brushes with hard bristles, a vacuum cleaner to blow).
The dust is cleaned dry, then the parts are wiped with a damp cloth. Finally, the wooden parts are treated with a solvent to remove grease stains.
Primer
After removing the old coating, the facades are inspected, the presence of chips and cracks is checked. If necessary, remove all defects with putty, since after staining even minor irregularities will become noticeable.
Primer on MDF and wood is carried out in 2 layers - first with an insulating material, left to dry, polished.
For the second time, use a white polyurethane primer. After drying, the parts are sanded again.The surface of the chipboard is leveled and primed.
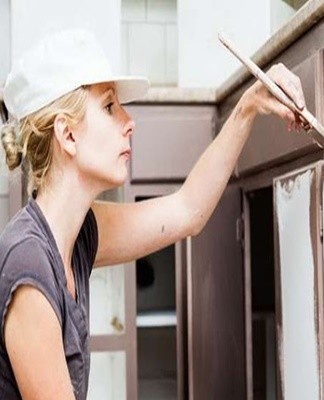
Dyeing
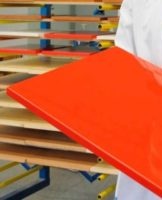
The paint is put in 2-3 layers, laying out the parts on horizontal surfaces to avoid smudging. Basic rules:
- a coat of paint - a thin one, before applying the second, they wait until the first dries completely;
- when using a brush, the rollers only work in one direction;
- when using a spray can, carefully cover all areas that do not require painting with film.
Readiness for applying the next layer is not checked by hand, but according to the paint instructions (the drying time is indicated there).
Important: the paint is regularly mixed during the work (the ball is shaken) so that the layer is even, the color is the same.
The end
The final varnish is applied to increase the resistance of the facades to mechanical stress, to protect the paintwork from chips and scratches. The varnish creates a thin film and evens out the surface. It is applied when the stain has hardened. Choose a varnish that matches the paint on the base.
When applying varnish, great care is taken so that dust particles do not spoil the coating (they are immediately carefully removed with a needle or tweezers).
Decorative treatment
The decor will give the kitchen set a unique and individual character. It is applied after painting, before finishing the surface. Decor options:
- use contrasting colors or different shades of the same tone at the top and bottom of the helmet or in a reflective manner;
- give the paint layer a special texture - with a brush, brush, sponge, sealant;
- glaze - the use of glaze to create a complex color scheme;
- create patterns using stencils - ready-made or handmade;
- carving, patina;
- decorative elements - rhinestones, chains, carved handles, complementing the fittings.
The decoration of the kitchen set is carried out in accordance with the general design of the room, taking into account the style solution.
Features of color choice
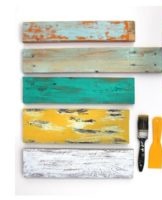
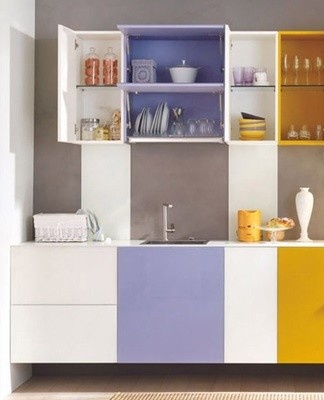
The shade of paint for the facade can be selected from the manufacturer's catalog, or you can tint the composition yourself. The choice of dyes is wide. When painting, the color of the headset is often changed, fitting the furniture in the updated kitchen interior. A popular option is to use different shades of the same color in one design.
The color is complemented by visual effects:
- bright;
- dullness - hides the flaws of the facade;
- mother-of-pearl;
- light effect;
- chameleon coloring.
When using visual additions of color, you need to consider the combination with the details of the decoration of the room.
Common errors and their solutions
To update the facades, you need to allocate enough time; it will not be possible to cope with the paint in 1-2 days. This is one of the most common mistakes you make - wanting to track your weekend work. As a result - poor-quality preparation, carelessness in painting, unpresentable appearance. Points to remember to avoid possible errors:
- The old coating must be removed from the facades - remove the paint layer, film, carefully degrease.
- If, deciding to save time and effort, the painting was done on the spot, without dismantling the furniture, the result will be disastrous - irregularities, stains, scratches. The ribs and narrow gaps are unpainted, the base of the helmet is stained with paint.It is possible to grind well, start the workpiece only in a horizontal position.
- Sanding is a mandatory step before painting. After sanding, the adhesion is strengthened, the paint adheres better to the material.
- After preparation, priming, grinding, the parts are washed from dust. Otherwise the paint will not lay flat, debris particles will shine through the coat. To repaint, you will need to start with sanding and priming.
- Without a primer, the paint layer does not adhere to the base, bubbles and peeling will quickly appear.
- The helmet cannot be assembled correctly. When dismantling, the parts must be marked.
Before assembling, you need to wait the time recommended by the manufacturer of the dye, make sure that not only the facades do not stick together, but the layer is completely hardened.
Additional tips and tricks
Advice from those who coped with the painting of facades on their own:
- You should choose expensive paint from well-known brands, in reputable markets. Cheap stain will quickly lose its appearance, fail to protect furniture from the harsh kitchen environment, and begin to flake off. Works will be wasted. Usually 2 kilograms of paint is enough for painting, you should not save.
- Choose your color carefully. Many people do not have enough imagination to figure out what the desired shade will look like not in a tin can, but under specific conditions and on a large area of facades. Paint a piece of plywood or a door, attach it to a helmet, check the print.
- It is not worth working on the street or on the veranda. Dust, sand, small gnats adhere to the paint.
Before starting work, you need to read the instructions for painting - wait the recommended time before applying the next layer, use varnish, primer recommended by the manufacturer.
Painting the facades of a kitchen set brings old furniture back to life, changes the look of your favorite room in the apartment. The cost of renovation will pay off, painting will extend the service life, return the kitchen to freshness and cleanliness.